Lessons
Class Introduction
03:57 2Document Set Up: Love Note Card
07:34 3Add An Image: Love Note Card
06:14 4Create And Place Type: Love Note Card
14:30 5Add Color And Layering Fonts: Love Note Card
15:32 6Add Additional Graphics: Love Note Card
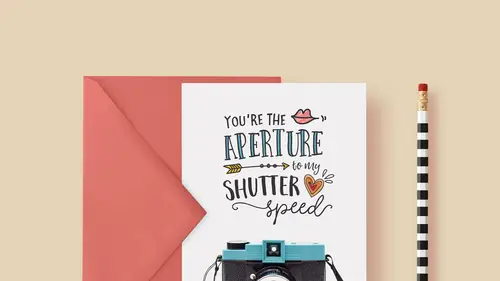
17:12 7Image Inspiration For Greeting Cards
03:36 8Work With Multiple Images: Thank You Card
07:38Lesson Info
Add An Image: Love Note Card
Let's go ahead, we'll add our image in here. So I'm gonna pop back over to Bridge, where I have my images prepared. And this is included with the bonus materials, this is an image from Unsplash. So we'll just go ahead and pop this open. This is an image that I thought would be fun for this project. And we can see that this is a horizontal image and our project is going to end up vertical. So that's something you also wanna consider. When you're working with these designs, and you're looking for a place to start, I look for one thing to sort of give me a good art direction. So maybe I have a specific image in mind that I wanna use, and I'm gonna sort-of build the design around a particular image. Or maybe I have a really great quote or piece of text that I'm planning to use, and maybe the image is going to be secondary. So I'll focus more on the text. In this case, they're both really strong. We're gonna have some neat typography working in conjunction with this really, I think, good gr...
aphic as well, this good image. So they're gonna sort-of share the stage equally. But when I look at this and I think where am I gonna put text on this, if I tried to keep this in this horizontal format, we would either have some space over here to the right, or we'd have some space up here, and either way, I think just sort-of leaves it feeling off-balance. So keep in mind that you can always change the orientation, at least in some cases. So this happens to be an image that works nicely for that. So what we're gonna do is drag this image over into our Templates file. So I'm gonna grab the Move tool and position my cursor in this image here. And you'll notice I've got one image in each of these tabs up here. This is how I switch between them. So I'm gonna go from this image. I'm just gonna click and drag and I won't see much of anything happen, but I'm watching my mouse cursor. And then I'll pause on the tab that I wanna drop it into. I'm still holding my mouse down. Then I'm gonna move my cursor into this area and I'm gonna hold the Shift key and drop it. And that's gonna take this whole huge image and drop it in here. And you'll notice it lands really large, because this image is really high-res, and this template is too, but overall it's smaller in size, it's only a 5 x 7. So hopefully whatever image you're using, if you're trying something of your own, it's better to have it be too big than to be too small. So once we have this in place, it's a good practice to convert it from the pixels that we dragged in to convert it to something called a Smart Object. In this case, it won't do us a whole ton of good, but it's a good habit to get into because it gives you more flexibility. As we drag this image in, we are gonna be resizing it and scaling it down. But to give ourselves some flexibility in the event that maybe later we decide we scaled it too far and we wanna scale it back up, it's nice to have that be a Smart Object so we don't have to worry about losing resolution. So one of the easiest ways to convert that to a Smart Object is just to come up to the Layer menu and choose Smart Objects, Convert to Smart Object. So that just takes all the pixels that this graphic started with, and it basically saves them. So that we will not lose them no matter how we re-size this particular image. All right, so now let's go about re-sizing it. It's really big. In fact, I can't even see the whole thing on my screen. So what we wanna do is scale it down. The keyboard shortcut to do that is Command or Control T on your keyboard, okay? That's the same thing as coming up to the Edit, Free Transform command right here. So you can see Command T, or on a PC, Control T. And that puts this huge box around it so we can scale it down. Now we can't even see all the edges of this box because it's so big. So one of the tricks to scooting out and seeing all these corners is to press Command or Control and the number zero. That will back you up so you can actually see what you're working with here. And then I'm just gonna hold down the Shift key and I'm gonna scale this down. And I don't think I wanna make it too small, like maybe something about like here. And you'll notice that I have some white space up at the top, and that's okay. I'm gonna show you how we can fix that. But when we're happy with the size then we can go ahead and commit this by coming up and clicking the check mark, or you can press Enter on your keyboard. Okay so let's look at our Layers panel. We have our guide layer here. And I'm just gonna go ahead and actually hide that for right now, and I'll drag it on top to keep it above everything so we can check our work later, when we're done, before we go to print. But we're gonna be working underneath that. So because we dragged that image in, it comes in on its own layer. And by default, Photoshop called it Layer One. We can rename it if we wanna double-click and just call it Image, I guess, and I'll press enter to commit that. And then you can see this funny little icon on the layer, and that just represents the fact that we converted all those pixels, we saved them, by converting the layer to a Smart Object. And that, what that does is now if we decide we made this too small and we wanna make it bigger, we can press Command or Control T again and we can scale it up, and it's not actually inventing make-believe pixels, it's drawing on the original pixels that came over with the image. So that's why we do the Smart Object.
Class Materials
Free Bonus Materials
Bonus Materials with Purchase
Ratings and Reviews
a Creativelive Student
I bought this class and love it! I learned so much - Khara is a great teacher. She has packed in heaps of detail and new ideas, and is very easy to listen to. I am now a Creative Market addict and have had lots of fun making my own cards. Thanks Khara!
Pat Taylor Schink
I found this really really useful in many ways, like photoshop shortcuts, how to incorporate glyphs and patterns and more. I bought the Sunshine Daisies and the Fontbox pkgs and also discovered that a year ago I had purchased some other packages with glyphs/patterns/dingbat fonts and brushes and never really knew how to use until this. I have watched portions over and over because I didn't take very good notes. Khara is a great instructor. I recommend her, too.
Christal user-9a70d686
Khara has really inspired me to try making my own cards. She has taken the intimidation factor out of the process for me. I'm purchasing her class, but I sincerely hope she'll do a follow-up class with yet more ideas. I'd particularly like to see her work through a folded card with text inside. I must say that as a teacher I think she is one of the best I've seen yet on Creative Live. She doesn't flit around too fast and really explains when she is doing (and UN-doing) various steps. Thank you, Khara!