Multiple & Double Exposure in Photoshop
Lesson 9 from: FAST CLASS: Creating Painterly PhotographsKathleen Clemons
Multiple & Double Exposure in Photoshop
Lesson 9 from: FAST CLASS: Creating Painterly PhotographsKathleen Clemons
Lessons
Techniques to Create Painterly Photographs
11:09 2Selective Focus & Extension Tubes
14:12 3Shooting Through Natural Materials
07:12 4Shooting Through Non-Natural Materials
13:32 5Painterly Backgrounds
06:35 6In Camera Multiple & Double Exposure
07:08 7Exploring Creative Blur Through Subject Movement
06:30 8Vertical/Horizontal Panning in Photoshop
09:26Lesson Info
Multiple & Double Exposure in Photoshop
So let's talk about doing double exposures in Photoshop. This is a firm that I shot, and I really wasn't crazy about the background. So because I wasn't crazy about this background, the other shot is a fern that I shot through kind of ah, dirty smeared up window at Longwood Gardens. And it was really, really soft, and you could just barely see the fern through. So I thought maybe combining those would be nice and they were both foreign shots, and it would hide that Messi background. So what I did was, if I hold down the shift key and choose the move tool, I get that right on there. And then if I go to my opacity, can start to bring that back and see the fern. Now I want to mask it, but I have tow reduce the opacity enough to really get a good look at it. So I'll open that up. Yeah, I'll make a layer mask, grab my brush, just paint over the part that I want to be able to see in sharp focus. He's going to do that real quickly. Then I go back over to my opacity kind of bring that overlay ...
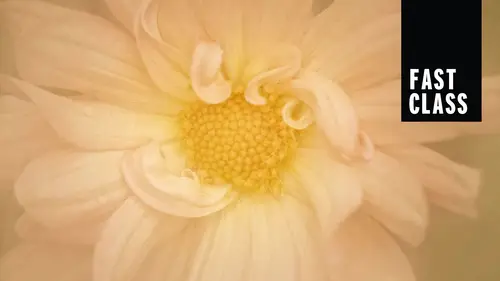
back in, except that it won't be over the fern. So instead of just a background like that, I get ferns in the background just with the double exposure. And I could have done that in camera like we did this morning. Take one in focus, take one out of focus of some nearby ferns and combine them. But if you didn't do that like may, you can do it. Imposed processing if you have another similar shot. This is an orchid that I did the same way that I talked about and showed you how to do it in camera. But I did it in Photoshop. I took one photo of the orchid, another out of focus photo of ah, purple flower. It wasn't an orchid and combine them. And then I got that veil of color that we did right in camera. But I did it in Photoshop very, very easy to do just the same process that I did before. And I didn't even mask this one. Now I want to show you how to do multiple exposure effect in Photoshop. This is a Diane pus. So I'm going to start with opening a new layer. Okay, New layer. Okay, but this one gonna move the layers palette out of the way. I need to be able to see the corners. I'm gonna come up here to the move tool. You see this little box up here that says show transform controls? You want to be sure that is checked. So with this additional layer, I'm going to grab onto the corner, see that little curve on my little pointer there? I'm gonna give it a twist, Going to try and give it a twist. There we go. I'm gonna say, OK, now, if I go back to my layers, I want to set that layer at just 30% right around 30 25 35. So can you start to see this world already? Now I'm gonna make a layer mask and paint out any of the hard edges that show up from doing that technique right around the corner is generally there's a hard edge. Then I'm gonna go back in and I'm going to make another layer. Just see it already start to twist. That's already a 30%. I can go over and twist that a little more. It returned and then go back in and paint out any sharp edges so you can see that you can keep doing this if you do it three times. It's like you took three shots. If you do it five times, it's like you took five shots. So let's turn those layers off. So we started with a straight shot, a little more twisted and a little more twisted right in Photoshop. Here to choose. Ah, photo that has a lot of dense subject. Not a lot of empty area for the technique. All right, back to my slideshow. Okay, I'm going to take these ferns. I'm going to do the same thing. I'm going to open them up, going to start a new layer. Gonna right from the beginning. Make that layer at about 30%. Click on the move tool. Be sure that my show transform controls is clicked. Enlarge this a little bit so I can get to those corners. And I'm going to give this a little a little twist. I'm going to make a layer mask, grab my brush. Be sure that I take out the hard lines from the edges of the frame that will show around the four corners. And when I make a new layer, did it a little more. Go back in and be sure that I can take the lines out around the edges again. Yeah, let's just do one more. So let's turn those off. There's my straight shot on my multiple exposure, All done right in Photoshop. Okay, I did the same thing here, but instead of going in and tilting, I just pulled down. I pulled each new layer down a little bit for the same effect. So it's just like when we were doing it in cameras. I said, You don't always have to twist you could go this way. You can go vertically, you could go horizontally. And to me, this looks like I did a multiple exposure in camera. This is also a kedia. I did the same thing here instead of panning. I did, um, a multiple exposure in Photoshop. Just each new layer that pulled down just a little bit at about a 30% opacity each time. And each time I'm erasing any lines that show up from the edges of my frame. And here's this is ah, shot that I took over Rebecca and I took it in this orientation. But every time I looked at it, I did this. Does that happen to you? Sometimes you know it just in. And if I was a purist, I wouldn't change it. But I'm not, because it drives me crazy looking at it like that. So I thought, Well, what could I dio? So what I did was converted to black and white, and I did multiple exposure, just three to create a feeling of movement in it. And that's the finest, the finished print. I also put a black and white texture on the back, but that's the same image. But thank you. But I used my artistic license to play with it because it was boring and it was crooked. I could deal with one or the other, not both.
Ratings and Reviews
Krystyna
I really liked it, it was inspiring and clear. I need more courses like this...
Phillip Ziegler
Wonderful teacher and a well presented course--both this short version and the long one