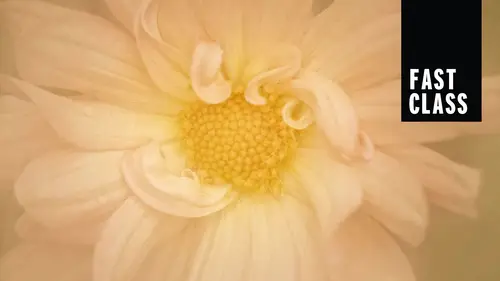
Techniques to Create Painterly Photographs
Lesson 1 from: FAST CLASS: Creating Painterly PhotographsKathleen Clemons
Techniques to Create Painterly Photographs
Lesson 1 from: FAST CLASS: Creating Painterly PhotographsKathleen Clemons
Lesson Info
1. Techniques to Create Painterly Photographs
Lessons
Techniques to Create Painterly Photographs
11:09 2Selective Focus & Extension Tubes
14:12 3Shooting Through Natural Materials
07:12 4Shooting Through Non-Natural Materials
13:32 5Painterly Backgrounds
06:35 6In Camera Multiple & Double Exposure
07:08 7Exploring Creative Blur Through Subject Movement
06:30 8Vertical/Horizontal Panning in Photoshop
09:26Lesson Info
Techniques to Create Painterly Photographs
Let's talk about my favorite technique for painterly type photo, and that's selective focus. So what you're used doing with selective focus, you're using shallow depth of field to draw attention to a particular part of your photograph. This also will simplify the subject beautifully and hide things that are not so attractive in the photograph as well. So the reasons I love it is the simplicity. This is, Ah, shot of a dragon fly that I did it F 3.5, and if I had used a a smaller aperture here with all that grass, it would have been really, really busy. But this simplified it beautifully, and I really didn't do much in post processing it all. Just a 3.5. I can put an emphasis just on the curves or the lines of the shapes of my subject. With selective focus, I can isolate a subject from the background, so actually focus allows you to celebrate what is special about your subject. Cal Italy's Air, one of my very favorite subjects, and they're all about the curves. So with selective focus, I...
could draw your attention just to the curves. The first images a Cal I wanted to draw attention to just the tip. The second is a weed growing around by morning glory. And the third is just, ah, water drop on the edge of belief. But you can see how I simplified those with selective focus and another kala You probably gonna see a lot of calla lilies. Just wanted the attention right on the tip. And I wanted detention here on the foreground. Leaf didn't need the rest in focus. Selective focus allows you to draw attention to just one area, very small area in the frame or ah, larger area in the frame. But it controls just where your eye goes. It also hides flaws, which is fabulous as a flower photographer, because they're not always in pristine condition. Uh, but if I put the selective focus area on the healthy looking part of the flower, I can hide the flies flaws. And then I don't have Thio deal with that. In post processing in a race is a busy background. Ferns grow in the woods, and woods aren't always pretty in the background. A little pine needles and, uh, sticks and I could simplify easily was selective focus. This would have been hugely busy. I was just sitting in some bushes a Katya, and focused my lens through the bushes to one for, and that was sort of isolated and by itself. So let's think about the factors that affect up the field. I know that Apertura is an obvious one for people, but it's not the only thing that you need to think about the shot this at F 4.5. I was actually getting ready Thio to leave my house one day and walked by my Rose bush. And this is what I saw and I knew I was gonna be late. But you know what? I went back in the house and grabbed my camera, and I was very lucky that it that it stayed so larger. Apertures Smaller number create less and focus and more blurred. So I want you to think small number, small amount of focus F two little bit in focus at 3.5 a little bit in focus F 16 lot and focus on um, I probably don't shoot much over f eight and just about everything that I do, but you also can do selective focus within F 5.6. You know, if you're close enough to your subject and the subject is large enough, you're still gonna get plenty of blur. Even at f eight depends on the lens you use and how close you are. This is F 3. with 180 millimeter. I just wanted a little bit and focus. And at four for just a pedal edge on this Poppy when a 6.3 n f four, This is the same subject. But look at the difference in how much is in focus. I prefer the F 3.5, of course, but, uh, but But F eight um, there's still plenty of blur in F A for me as well to make a painterly look. The next thing you need to think about is your focal length. This was shot with a 50 millimeter at f four, but look, what happens if I shoot the same thing with 180 millimeter at F four. I get closer, but I also get much more background blur a much more painterly effect. Here's to more examples of Rebecca the same way both at F four, but look at the difference in the background. So it's not just aperture that you need to be thinking about. So when you're choosing a focal length there a few things that you need to think about well, the background be included. Can you blur it? Is it part of the story that you want to tell? And can you get close enough to your subject with that lens? If you need to get closer, you're going to get a need. Ah, longer focal length or lens baby. You can get pretty close with the lens baby, too, does the scene. Does the scene need the compression that a longer lens provides and think of compression is bringing elements back here and elements here closer together kind of pulls everything together, and that's what I needed for both of these. The next thing that you need to think about is the distance to your subject. Kathleen. I was just wondering if we could go back to that last slide and just kind of talk a little bit more about these different factors that we're going through, like in these particular images so we can really let it sink in. I know sort of that focal length and compression is not not everybody's familiar. How you are. Sure, sure. So these were both with 180 millimeter, and the two daisies in the first picture of the two days is on the right. We're nowhere near that daisy on the left because it was so much further back. But because I used 180 millimeter, I could bring them all into the same grouping where they wouldn't have been if I'd shot that with a wide angle lens. There's no in the way that they would have been together or even Ah, 100 millimeter lens. It wouldn't get that I needed the compression of pull those background elements to the front. Same thing with the other Daisy. I needed to be able to draw that background, which was a good distance away, up close to fill in behind my flower. And if I had used a short lens, it wouldn't happen. The background would have and way further back. That's basically what I mean awesome. It's super helpful. Thio here from you. What would have happened differently if you would use something different? So thank you. Okay, so your distance, the distance from your camera to the subject is the next factor. Both of these images were with 180 millimeter at F 7.1, but you can see that with the Tulip. I was right up close to it. Well, as close as I could get with that lens, which is about 7 16, 17 inches away and with the Irish. But I was quite a bit further back. So the closer you are, you lose depth of field, and I think that's really important for people to understand. I'll have students who are trying Thio shoot an orchid with 100 millimeter lens and, uh, right up close, and they can't understand why they can't get much in focus. But you lost so much step the field because you are so close to your subject. You know, if you're back here, you'll get all that orchid and focus and also everything else around it. So the right lens for the job, uh, comes in handy and also one of the reasons why I like, ah longer focal length, okay. And both of these are also with 180 millimeter at F 3.5 look at the difference about how much is in focus when I get right up close, as close as I can. Depth of field is really, really slim where there's a little more on the fern. But there's still a well blurred background because I used that long length lens and was able to pull that background closer and blur it. This is with the 180 millimeter F 5.6 from a distance away. But watch what happens when I get closer The difference in the amount and focus between this one trying to go back and that. So keep that in mind when the closer you get, you're going to reduce step the field. All four of these pictures are with 180 millimeter lens at F 3.5. So the first one on the left I was a good distance away, and then I got a little closer and take a look. And as as I get closer, you will notice that I lose depth of field in my subject and I get more background blur. So same lands four different photos for different effects. The distance from the subject to the background is also something that you need to think about. If you want a well blurred background, then you don't want it right up against your subject. And, uh, well, blurred background is a painterly background, especially if there is some good colors and shapes in the back. I shot this thank you. I shot this flower. The background in this one is actually a huge patch of Rebecca, and it was probably about 30 ft away. And that's why there's not a shape or anything in the Rebecca, you can see a little bit of foliage that was between the route Becky A and my subject, but I thought it filled in that empty area nicely, without distracting without being in focus. But I loved the fact that I could fill the whole background with yellow, and I do that a lot when I'm looking at a subject. I look around all the different sides of it to choose a background that is either has a painterly look or is very simple, and I went back there last week and they did not plant the Ruymbeke in the same spot this year, so I'm glad I got the shot when I did. Now here these air poppies that I shot in Longwood Gardens this spring. Now you can see that the poppies aren't just a blur of color. They have some shape because they weren't so far away. They were a little bit closer on this. Diane, this photo, Diane, this grows very compact. There's no way you're gonna You're going to have the other flowers far away, so you can see that I have my main flour and focus. And then you can see that the other flowers, they're starting to come into focus. To get a single one and focus, I'd have to choose an angle where there was just one growing if I didn't want any of them in the background.
Ratings and Reviews
Krystyna
I really liked it, it was inspiring and clear. I need more courses like this...
Phillip Ziegler
Wonderful teacher and a well presented course--both this short version and the long one