Applying Textures in Photoshop
Lesson 10 from: FAST CLASS: Creating Painterly PhotographsKathleen Clemons
Applying Textures in Photoshop
Lesson 10 from: FAST CLASS: Creating Painterly PhotographsKathleen Clemons
Lesson Info
10. Applying Textures in Photoshop
Lessons
Techniques to Create Painterly Photographs
11:09 2Selective Focus & Extension Tubes
14:12 3Shooting Through Natural Materials
07:12 4Shooting Through Non-Natural Materials
13:32 5Painterly Backgrounds
06:35 6In Camera Multiple & Double Exposure
07:08 7Exploring Creative Blur Through Subject Movement
06:30 8Vertical/Horizontal Panning in Photoshop
09:26Lesson Info
Applying Textures in Photoshop
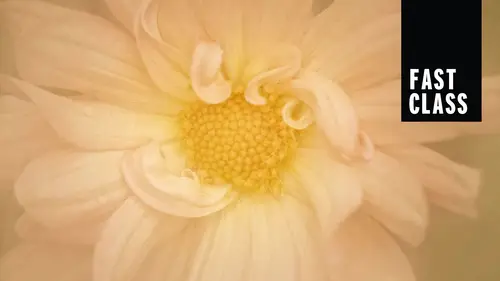
so all about textures. You've seen quite a few textures and a lot of the images that I showed you and I did this. Ah, shot of these poppies with the shooting through technique, just shooting through other poppies. No tool involved, no lace. This was just the other poppies. And here's what it looks like with a texture added. The textures that I choose are very painterly, and they're very soft, and they don't have a lot of strong hard lines because I'm using them mostly for flowers that you don't have to. But that's what I shoot. Most often, flowers are about color, line, shape and texture. And so the last thing I want to do is introduce more lines to the background, trying to reduce any lines in the background. So the the textures that I choose are simple and very painterly. So I took this photo of this lovely morning glory weed, which is destroying one of my gardens. But this was but this was really pretty. The way things on, I can't get rid of it. If you have ideas, I'd be more than h...
appy to hear about it, um, without chemicals, but, um, I'm learning to embrace it and photograph it. And I thought a texture would look really nice on this. So I left this texture pretty heavy. So I went from this to this with a background texture, and it's some. It didn't change the subject, but it changed the background to looking far more painfully. The subject already was painfully, and here's another one. This is, Ah, Dahlia that I shot. The first thing that I did was add that vignette that I showed you to cover up all that green chosen. I picked a color right in the flower, and then I put a texture over that. So from whoops too far from this to that with two stops, one quick vignette and adding a texture. So let's look at some of my favorite textures. This is a one of my favorite texture companies is called flypaper textures because the textures air such strong brush strokes on. That's what I'm looking for in textures. This is another one of my favorites. I think this one is called Peacock. Um, you tend, I find that I tend to use my favorites. You know, you you'll develop some that you just love Um, and you use them quite often, and this is a darker texture. Blue tones again, no strong lines, more of a painterly look. This one is called syringes, and I use it a lot. It's definitely one of my favorites, and these are by French kiss textures, which is also a very, very painterly, um, software. And there's a nice, hefty discount listed in on my gear list for her textures. And sometimes she uses a very strong canvas. Look to her textures, you know, And you could you could do this. You can paint, uh, canvas texture yourself and take a picture of it. Um, my sister in law is in the process of making me some water color textures, which I'm going to mount on those I'm gonna print and mount on those foam boards. Um, take a picture and print them and, um, so that I can use them in while I'm shooting in the garden. And also I could add them in post because they'll have digital files of them. So if your hand it all and can paint, there's another one of hers. Her colors air bold and her brushstrokes are bold to and I think they're beautiful. This is one of mine. I've come out with my own texture line in the first three of my texture. Collections are black and white, um, because I didn't want to alter the color of of my subject when I added a texture and you can use them on color images, too. They just don't add any color to the image. And that's from here is the color version of that. It's just something that I was shooting in a Katya when I was sitting in the bushes that I talked to me about just doing shooting through and I d focused the lens. And then I took it into impression and added brushstrokes to it and made my own texture. So I took one of my photos D focused added brush strokes. So you you know you can Here here's another one that I did the same thing and just played around with Impression Thinks is from my Wonderland collection. This is wheat that was moving in a field that I shot in Ireland, and I just made it black and white, and it makes a great texture. This is rust. This texture actually looks like snow sometimes when you add it to an image, which is very cool. So there there are textured surfaces all around you. When I go to Santa Fe, I shoot the walls. You know, I've shot Frost frost flowers on my mailbox. Uh, anything can be a texture. You just start, have to start your own texture collection. Start collecting these, um, the other thing that you could do. And here's just some out of focus leaves that I shot. And then I took it into impression and added some brush strokes. But let's say that you like this. You can take it into Photoshop and change the color and make a yellow version. Now you've got to You could make a brown version. You could make a black and white version so you can take one and add to your collection by just changing the colors. There's another one of mine. I zoomed my lens on some pink flowers and then took it into impression and and added some brush strokes to it. So impression has been really great for me as faras making my own textures. This is another one of mine. Um, just some weeds. So Let's actually do it at a texture on to, uh to this flower. This is a poppy that I actually shot this in a garden, but it was a garden with a fountain around it, and there was cement, and this poppy lined up beautifully with the cement. Um, but I thought that would be a really nice even base for me to add a texture. So let's open this one up. So the first thing I'm going to do is make that new layer, and that's drag this over here. Now I'm you can add a texture. You have to think of a texture is really like doing the double exposures. You're just dragging one image onto another and playing with the opacity and masking, and you couldn't do that. But there are two software programs that I love for adding textures because they're easier to use, and I could do it quickly, and I can see what a different texture effect will look very quickly because it takes a while sometimes to find the right texture. And if you're doing it manually, it's kind of take you a long time toe. Put it on. That doesn't work. Put this one on, Um, the first one that I use is called Dirty Pictures by get totally rad dot com, and it's a very simple program, and I don't have enough time. Thio show you both. So the other program that I want to show you is also by Topaz, and it's called Topaz texture Effects. And it's a very big program, and it's very powerful, and sometimes that can be overwhelming. And if you find that take, do the 30 day free trial of Get Totally Rads, Dirty pictures and try that out, it opens. Um, you open your photo in it and it shows you're right away. Eight different textures. It comes with some textures you can add your own, but right away I can look at eight different combinations to see what I might like. And then I can add, you know, change the page and look at eight more and eight more so all at once. That's why I like it. But and I was using that exclusively until Topaz came out with topaz texture effects, and it's it's mind blowing. So let zoo open up and I'll show it to you back to Topaz now topaz texture effects comes with some textures that, let's just say, are not really beautiful. But the good thing about it is that you can add your own. You don't have to use theirs. So the first thing I'm gonna do is come up to this little square where says, create an empty effect. I'm gonna click, add an adjustment and look at all the other things that I could do if I didn't just want to add a texture I got out of in yet I could do color overlays, double exposure. I could do a light leak. Um, but I used It's mostly for textures, so right away their default textures have come up and I'm going to choose instead one of my collections. So let's just go to my textures and go down to my wonderland collection. Okay, now the texture that I'm adding is black and white, and you might think, Well, I don't like that in black and white, but this in this program I can change that. I can change the color. It's the color strength first so that you can see in the saturation in the color strength. There we go. So I can make this texture any color I want with the slider. You know, I can go thio yellow to ah, horrible green, blue, purple, pink and I sort of like it a pink. Then I'll pull that color strength down a little bit and a little bit of the saturation, and you can see that the texture is also covering my subject. But this software has a built in mask so I can go down here and I can choose the strength of the brush that I'm going to be taking that texture. Often. I don't do it at 100%. I prefer to build the brush size, go a little smaller and the hardness, and I like a soft brush. So then I will come in and I can start removing the texture. And if I was doing this at home, I would have this at 100% on a big screen so I can just remove that. Let's pull that strength up just a little bit more, take that texture off, and so I'm leaving it just where I want. I'll probably leave it on the stem because I'm really not not seeing much at all. So let's look at my original plain wall to a softly textured image. So and it is just that simple. And this, like I said, is very powerful. There's a community that you can log into and people will upload their textures that they want to share and some of those air beautiful. Some of those are not. You can upload yours if you have textures that you want to share. But that's means that you wouldn't have to be buying. Ah, lot of textures. You know, you can go in. And like I said, you can easily make your own. So I want to show you one more example. Let's cancel that. Okay, this is a poppy that I did shooting through. I think I showed it to you before when I was talking about using the shooting through technique to hide a messy foreground. So let's open this one up and make a new layer. I'm getting better at remembering that. Okay, so for this one, I'm gonna go back thio texture effects. Yeah, Like I said, the default textures are not the best, but we're gonna make a new a new one anyway, So we're gonna add an adjustment. We're gonna go to texture. And let's try some French kiss textures this time. Okay, so you don't even have to click on these. I'm not clicking on them. I'm just mousing over them and see how quickly they change and how quickly you can get annoyed idea about what's going toe work for your photo very simply, and their arm. Or so I think that was kind of nice. It's It's very different, and I can reduce the opacity of it. I can reduce the detail. If you don't like the canvas, look to her textures. You can reduce the detail, and then you just have the colors to see how that disappeared. We can go or you can add more detail. Good Lord, um, or you can pull it back. If you don't like that, play with the opacity. You can make that texture bigger. Her smaller. Like I said, saturation color strength. It's so so powerful you could flip that texture over. Let's say that the texture you chose had certain color or texture over here that you wanted over there. You could flip it. Ah, very, very powerful. So let's leave this one. Let's pull that opacity up a little more so that the texture is a little more obvious that I can show you, and I would click, mask and pull the brush strength down a little bit, goto a soft brush and just go in and start bringing back the natural texture. And I tend to in the center areas go a little heavier on removing it. And then I pull the strength down and go Teoh a smaller brush around the edges because I don't want it to look like it was cut out. You know, if you did that at 100% you'd have hard edges and you don't want that. And with this program, let's say that you got a little carried away and masked over here and went, Oh, no, you can click on white and you can paint that right back in. So that's really nice to do around the edges. If you went a little bit too far or did something a little bit too hard around the edges, let's cancel that. I'm not going to save it. So here is a calla lily that I shot at Longwood Gardens up close and, of course, It was the curves that I was going for. And this was Longwood Gardens. There was nothing I could do about the background unless I had waiters. And I didn't bring them with me and didn't want to be thrown out of Longwood Gardens. So I went into Nick and made a white vignette, and then I went and added a texture to that. So I went from this to this. So I want you to think about combining techniques. You know, not just a texture, maybe a vignette. And then a texture. Because of vignette lays down a beautiful, beautiful surface for the texture to adhere to. They rust texture that I showed you does look like snow. I don't know why I'm just happy that it does. I took this shot of this bonzai tree at Longwood Gardens, and I put it in the snow by adding the rusty texture behind it. Here's ah, shot of, Ah, Poppy that, uh, I shot recently that I thought down a poppy, a penny that I shot recently because I loved the windblown effect of the pedals. But I and I did not like the strong green in the background. So I added a texture to it to calm it down. I could have also done a Vinje, but in this case I didn't mind the green. I just didn't want it to be as strong. So I added a texture and not just for flowers, textures, air Wonderful when you have a great scene but the sky is white and generally you would try and avoid getting that white sky in your composition. If you know that you could add a texture to it, you could go from this to this. And I think in this case the texture made the fog look even stronger. And I just did a black and white conversion as well. This Isa shot where I wanted to show you how to combine topaz impression and texture. So let's open this one and make a new layer, not trusting it now. OK, Z there. All right. So if I would add the text your first and then I will take it into impression. So let's go to filter Topaz Labs. It has texture effects. And like I said, you will use your favorites. And I knew immediately with this one that I wanted Cyrix, which is a ah flypaper texture. So let's click here to get a new window with a texture. I'm gonna go to fly paper. I believe that's in the spring Painterly collection, See? Yep. Here it ISS. It's also the one that I just showed you on that bridge shot with the fog. Eso I do use it a lot. Now it's brown. But because I'm in topaz texture effects, I can pull the saturation right out of that texture and make it black and white. And then I will leave the opacity somewhat high because I like the brush strokes and then I'm going to mask, Yeah, let's see what the size of the rushes, my opacity. Pull that brush down a little bit. It's a good brush size and then brush back a little detail. I don't wanna lose that little red building. I definitely don't want to lose the boat. I'm just doing a quick at it here. I don't like this strong brushstroke on this edge of the bridge. I'm gonna go a little heavier there and let's say that I went across the opening and was like, Oh, but I wanted texture there. Then I'll click on the white and I'll bring that texture back. So let's say that let's do just a little more over here. What's gonna go back to the black? Well, that out So that that building is really going to show and say Okay, and then I'm going to go back into Topaz. But this time I'm going to go to impression. And you know, the default isn't looking too bad right here. I think it's pretty. The opacity is a little strong, though, so let's pull that back. It's a little bit and say Okay, and let me show you that Canceled bridge. Sorry. I want to escape bridge and show you finished version of this in a larger size so that you can get a better look at it. So I've combined the texture to get some interest in the sky and a painterly look at the same time. So don't be afraid to mix things up. Thio to play with the different software together
Ratings and Reviews
Krystyna
I really liked it, it was inspiring and clear. I need more courses like this...
Phillip Ziegler
Wonderful teacher and a well presented course--both this short version and the long one