Lessons
Class Introduction
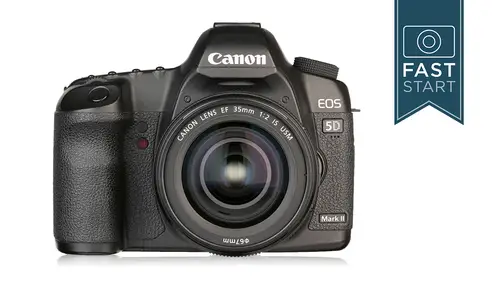
06:50 2Product Overview
13:14 3Photography Basics
09:15 4Button Layout: Top Deck
44:43 5Button Layout: Back Side
20:37 6Button Layout: Other Sides
10:47 7Lenses
07:42 8General Q&A
09:31Lesson Info
Custom Functions
So now we're going to fall into another little rabbit hole of one little setting that opens up and all these other cities and this is the custom functions of the camera and within here we have four different groupings of features and we're just going to kind of go through relatively quickly and I'm gonna give you my hand says to where I have my camera set or what I think is a good general setting for most people and the first grouping are things dealing with exposure the exposure level increments normally work in third stops and I think that is perfectly fine you can adjust it toe half stops if that is to your preference the same thing goes with s o speed settings third stops is fine with me, but some people like half stops okay, so remember some people couldn't get tau eso twenty five thousand or twelve thousand or fifty this is where you would turn eso expansion on and it doesn't mean anything bad it just means that you can go there if you want to go there and I think it's a good opt...
ion to go they're good option to be ableto have at least next up is bracketing auto cancel if you recall the bracketing where we shot a light picture, a dark picture and then a normal picture this turns it off after you've used it one time which is the way most people would use it but if you're in say landscape photography and every shot you do you are shooting a bracketed siri's it gets annoying to return it on every time and so in that case you would come here and turn it off but for most people would just leave this auto cancel turned on normally when you do the bracketing it's going to shoot the normal exposure first the underexposed one second and the over exposed one third some people don't like that order and you can go in and you can customize it safety shift is used in the time value an aperture value mode if you recall I think at the beginning of this class I shot a picture like a really fast shutter speed in the time value mode and I got a very dark picture and that's because I didn't have the right aperture to shoot with if you turn on the safety shift rather than the thousandth of a second that I chose it would back the shutter speed down to something that it thought was appropriate and I kind of don't like the camera going behind my back and making changes on me and so I'm gonna leave my camera at disable final one in this part is thief flash sink speed when you use the aperture value mode in general I'm fine with auto but you could go in and you could force it to stay between two fiftieth and a sixteenth of a second. Or you could force it to be at two fiftieth of a second. For most people were general photography. Auto is going to be fine here. The next major grouping is going to be things dealing with image. So first up in here is long exposure, noise reduction and that is actually very closely related to hye eso speed noise reduction. Sorry, I had to get that all out. So actually want to talk about the first two items in here together? Because noise is going to happen for two reasons. One you've chosen a really high I s o or two. You have your shutter open for a long period of time in a long period of time would be thirty seconds a minute, two minutes. Something like that. So if you recall noise, we have very cropped image. Here we have lo s o ano. Hi isa, which results in noise? Your camera has a built in software to reduce the noise. Now the problem is, is that it's? Very good software. But maybe it's not the best that you can have. And you don't really have too much control over it. And so this is something that I think is better dealt with later and when you shoot in raw you're still just going to get it in raw but this is mainly going to be dealing with jpeg images so I would leave it off and I would leave it on disabled highlight tone priority and so this one if you recall the d plus in your camera actually stands for dynamic range and so a visual example on this one is in the picture on the left you can see that we've lost some detail in the highlight areas and if we were to turn this feature on it would kind of hold back some of the light so that we would be able to get some more detail within those highlight areas and not losing those highlights is a nice thing the downside to it is pretty hefty though we can't shoot at s o one hundred anymore we have to shoot it I s o two hundred or above and so I think by shooting raw and shooting it s o one hundred you're not gonna need this if you were to shoot in j peg this is something that you might want to play around with, but for most people I would leave it at disabled the auto lightning optimizer sounds pretty cool doesn't it all right so here's what it does sometimes when you take pictures contrast e pictures you want to make a little adjustment in the light value so in this picture here the people in the shadows or a little dark and it might be nice to lighten up those shadows so one of the things that the camera has is a software program that it looks at the photos and it tries to figure out what it needs to be done, and one of the things it does is it lightens the shadows and that might seem like a good idea to start with because in this case, the picture I think looks a little bit better now that we can see into the shadows a little bit better. The problem is, is that that isn't the case with all pictures in this case, I think the picture with mohr contrast looks better than the one with less contrast where we've lightened the shadows. This is something that could be done with much better control in software and that's what I would recommend so I would leave that one on disable as well working our way through the custom menu. We're down to the auto focus and drive system got a number of things in here to deal with. The first option is the lens drive when the auto focus can't figure out what's going on and so do you want your camera to continue to look for focus or do you want it to stop for most people just leave this at the zero focus search on the exception to the rule is if you are a wildlife or sports photographer who uses really long telephoto lenses, you may want to turn this off so that your lens doesn't continually search in areas that is nowhere near your subject but for most people focus search on would be fine the lens auto focus stop button function this is on ly for people with lenses that have buttons for focusing on them, which are generally, uh lenses like a three hundred to eight of five hundred f four and some of the really big telephoto lenses uh, where you can customize the way the buttons on those lenses work the point selection method normal is going to be fine here thie other option is that so the normal option on the camera let me just refresh you is you're gonna press the thumb button on the back of the camera and you're going to turn the main dial that's how you select the different focusing points works pretty good now some people like to be able to change it directly with the dial on the back of the camera or with a little joystick you could just simply push around. Some people bumped the's a little too often and like the option of pressing the button and turning the dial so those are your three options normal is the button in the front dial, we have the multi controller here and the quick control dial in the back, so you may want to play around if you are the type of person that switches focusing point's a lot, you could do it a little quicker and you have a little bit of choice and how to do it superimposed on display. And so this is one that I leave on, and basically what's happening here is that when you focus on something the red focus box that your camera chose blinks reddit you very quickly, he had that's my nice visual confirmation I have that turned on, and I have the audio turned off the little beep remember that they're kind of doing the same thing. Auto focus assist beam firing well, this camera doesn't have an auto focus assist beam, but if you put a speed light on it, it does have a beam on it, and in some cases, private detectives, they don't want a beam shooting out from their camera, and so sometimes I don't like, you know, like if you're going to be photographing a public speaker, elector and talking, you may not want a big red light shining in their face on, so you could turn that off right here in your camera and so you can leave it enable their disabled mere lock up now, if you recall back to the very beginning of the class. When we talked about how a single lens reflex camera works, we have a mere that's flopping up and down every time we take a picture, and when that comes up, it causes a little bit of vibration in the camera and it causes a vibration kind of the key shutter speed where it causes a vibration. Is it about one eighth of a second? And so if you're shooting on tripod macro photographer, landscape photographer, product photographer, even you might get a little bit of blurriness due to a very subtle vibration, and so you could turn on the mir lockup, which locks the mirror up. Now you will need to press the shutter at least twice wants to lock the mere up wants to take the picture now, there's a lot of cannon users that had been complaining because there isn't a direct button on the camera for mere lock up, and the fact of the matter is there is a button for mere lockup it's, also known as the live you button. So if you put your camera in live you, your camera is in a mere lock up position, and so I will often use that for times when I'm concerned about mere lockup in vibrations in the camera so there is a nice, very simple button there it does use a tad more battery because we are using the screen on the back of the camera but that's it way to put your camera in mere lock up. Next up is the point area expansion to remind myself oh, uh, this is basically enabling the invisible focusing points if you don't like invisible focusing points, you could turn it off. I personally kind of like invisible focusing points, so I leave it enabled micro f micro adjustment. All right, so this is on ly for advanced users. Uh, what this is is this gives you the ability to go in and fix minor corrections with focusing errors in your lands. Lenses have a certain tolerance cameras have a certain tolerance and sometimes they match up to where they're just not quite right. And what's happening is when you focus on a subject, the camera will focus just a little bit behind it or a little bit in front of it. And we call that front focusing or back focusing whether it's focusing in front of oran back up where it is supposed to focus now, in order to fix this in the past you had to send your camera and all of your lenses back to cannon to have them tested and fix it in the camera personally, I think they got tired of fixing all of the cameras, and they said, you do it yourself now, they will still do it, but this allows you to do it yourself. What you will need to do is you will need to photograph a subject and you'll probably want to have a yard stick or a ruler right next to it usually had a forty five degree angle, and you focus on this subject, and then you see, did your camera actually focus on that subject or a little behind or a little in front of that subject? And then you would come back to the camera, and with that lens on it, you would maybe go to the minus side or you would go to the plus side, so it requires definitely some skillful set up. We're gonna be on tripod, be very careful about things, and then you would go through and you would test each lens you have most people don't need to worry about this, but if your pictures are not coming out, sharpen their consistently front focused or back focused. This is a way for you to get in and fix that problem, and it does require a little bit of testing and very careful procedure, but I've gone through and I adjusted mine my lenses and I found that some lenses I had to go to the plus side some lenses I had to go to the minus side so it varies from lens the lens in your camera I forget this number one of things I don't know is exactly how many lenses I think it can. I think it can remember twenty different lenses on your camera. So where do we go next? We're down to operations in other so this is just kind of the etcetera section uh, on the custom menu. First off we have the shutter button f on button. Okay, remember the whole question about back button focusing so what this one does is it allows you to turn off focusing on the shutter release of the camera so that it's just on the back but and if you wanted to do that, you would select number two in here where the front button controls the meeting and the back button does me tearing and starts the auto focus. And so I do recommend this but kind of only for advanced users. If you're brand new to photography, I would probably leave this on zero, which is the standard city and there is further customizing that you can do in there you can go into the instruction manual if you really want to fully get into that, so the auto focus on and eighty lock button switch so we have an f on button and a meter lock button. If you didn't like the position of the buttons, you could switch their operation from left to right, right to left. So, you know, for some people reaching that f on button is so hard because it's all the way over to the left and the other button is so much closer, so you could switch those if you wanted to the button in the middle of the er quick control dial what's called the set button. You can program this if you want teo and personally, I like this to pop open the quick control screen, which is that screen with that has the shortcut to the menu. Normally that button doesn't do anything unless you program it to, so if you leave it at zero, it doesn't do anything, but if you do go to number five on that, it turns on the quick control screen, but there's some other options in there you can have a change, image, quality or picture styles, but I think that's the most practical one of what it will do dial direction. Okay, I think we all know that I'm a very odd person, but I don't like the way the dial's turned on this camera, all right? So if you have the meter reading and it's over to the left and you want to turn it to the right? What direction should you turn the arrow? Well, canan thinks you should turn the bottom of the dial in that direction and I think it should go in the other direction and so I reversed the dial direction on my camera. It just seems more logical to me of do I want that meter to this side? Or do I want the meter tent outside? And it does cost some problems when I pick up other people's cameras because I'm constantly dialling it in the wrong direction and so I want to get it to the middle. I'm gonna turn the top of the dial in the direction that it needs to go because that's usually where my thumb lies on the top of the dial rather than the bottom of the day, so I like to reverse the direction. If you do choose to put in a different focusing screen, you are supposed to get up, go into the menu system here and tell the camera that you have a different focusing screen because it does effect the meat oring of your cameras. Well, if you work for a law enforcement agency and you need to verify the pictures that you have taken have been unaltered in photo shop for other programs, there is a data verification kit that you can get it's a little on the pricey side, it's around seven hundred dollars, but it can verify that your pictures have not been altered and they're straight true images from the camera. Normally, I would leave that off unless you happen to be in that field finally, is the ability to clear all the custom function, so if you have totally been screwing around for the last fifteen minutes and you've made a whole bunch of mistakes and you could just clear it all and start fresh again and that's just clearing the custom functions, not all the other functions in the camera. So with all these features that we've gone through there's probably only a half dozen that are important to you in any way that you want to come back to myself, I like to check the battery level's I like to format my memory card on a regular basis. Let's see, the other one I often go into is the live view function mode because sometimes I'm changing it between stills and movies, but you can pick out your favorite things, and what you would do is you. I need to register these things in your camera, so you go to register and you would scroll down the long list of everything that you need, and you want to add to it. And then you would go to display from my menu. What happens when you do that is that when you press the menu button, the camera is always going to start on the green. My menu. So that's going to be your list of three, four, five, six things that you use all the time. You can go to the rest of the menu if you want to. If you don't do that, what's gonna happen when you press menu. Is it's either going to go back to it's, going to go back, generally, to the last place that you were in the menu? Or it'll go to just the first half and so highly recommend using my menu there's. Not a lot of stuff that we need in here. But now we have a shortcut to all those things in the menu that we might want to get. Get out.
Class Materials
bonus material with purchase
Ratings and Reviews
Mia Linguia
Amazing class, I walk away feeling like I've made this machine my own. Like getting a new car and adjusting all the seating and mirrors and radio stations to your comfort, then giving it a name because its officially yours. My camera now feels more comfortable to use and I can't wait to use it again with these new found tweaks. Thanks John, always a great class!
Mike Swartz
Having used an XTi I was familiar with the basic Canon layout, but when I bought my 5D MKii used from my wedding photographer who updated to the MKiii, I knew there would be a ton of features I'd never really understood. This video series is fantastic. I've learned so much about my camera, many tips on best practices when planning shots and I've seen an increase in the quality of all my photos as a whole vs. just taking a ton of pics to try and capture one or two that turn out nice. I'm excited to try out so many new things I learned from watching these videos. I'd recommend these videos be the required guide to anyone who owns a 5D MKii.
Nelson
Excellent instruction. The instructor is very knowledgeable and a very effective communicator. Great photo examples and "SLIDES for that". Creative Live and John should both be commended for providing in depth and pertinent information. The Canon 5D MkII is a great camera however without a body of knowledge to fully utilize it you might as well have a low end point and shoot. I would recommend this class to anyone who has a 5D MkII, no matter your skill level. Great job!
Student Work
Related Classes
Camera Guides