Lessons
Class Introduction
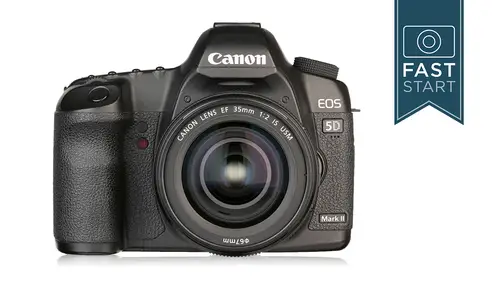
06:50 2Product Overview
13:14 3Photography Basics
09:15 4Button Layout: Top Deck
44:43 5Button Layout: Back Side
20:37 6Button Layout: Other Sides
10:47 7Lenses
07:42 8General Q&A
09:31Lesson Info
Button Layout: Back Side
So on the back of the camera is what we're going to talk about next the menu button is what we're going to get into in the second half of the class. This opens up the full menu of all the options in the camera and we're going to dive into that as I say in the second half of the class now the picture styles button, which is kind of what we were just talking about here with this question when you press that button you can get in and you can change the picture styles first off if you shoot raw, this does not matter. Okay, this on ly matters if you are shooting j peg or raw plus j peg, how the j peg images are processed now if you are shooting j peg well, there's some different things that you can do in here, you can adjust the contrast saturation color, tone level of the way your cameras are processed for most people, I would recommend just leaving it at standard. This is something that is better done on a computer system. If you don't have access to a computer, you can do it in camera. T...
he problem is, is that every picture you shoot is processed and finished with this sort of flavoring, if you will it's like everything you cook, has that exact same flavoring to it and that doesn't work for my type of photography, and it doesn't work for a lot of people's photography out there. First off, most of the time, people who were shooting this camera are going to be shooting wrong. If you want to get the most out of it, you'll probably want to be shooting raw, but there are times when you may want to shoot j pick, and I guess it depends a little bit on how much processing you want to do with a good program like adobe light room. If I could give a little plug, too, that I can shoot in standard, do a tweak or two in light room and fix all my images with that little tweak, and with that little tweak, I get to have more control than I can in the camera. Now you can actually get into the camera and set up your own settings in here. So, for instance, you really like let's, take the what do we got? Landscape? And you think the landscape is just a little too saturated? You could bump it down a notch and record that is your own. And if you want to get into it, that's fine, it's just something that is not really necessary for most of the people, so I would recommend for most people to just leave it at standard and so once you press that button, you would press the info button to get in, and you could start dialling in and changing the contrast in saturation levels and it's better to be done on a computer where you could actually see the results much better, but that's the picture styles, we will see this as well as other features later on as well. The next button down is the information button, and when you press the information button, you're going to get a couple of different screens as you press that button repeatedly. Now the first screen that you see here on the top, if you look down in the lower left hand corner, that gives you your total number of shots, so if you have a large memory card in there, you're going to see, in this case eleven hundred and forty seven shots, so this is where you can see how many shots you have if you have a large memory card and this number will top out at ten thousand, so it won't show you more than ten thousand. But that should be enough to show you what's going to show up with a large memory card, and we have this other screen that's called quick control screen that we're going to talk about a little bit later, a swell. As we work our way down the back side of the camera we have the playback button so if you have taken pictures you will simply hit that button to see the pictures that you have taken you khun then scroll through them with the quick control dial on the back of the camera you'll notice on the back of the camera that that play button is blue and if you look around your camera you're going to see other blue symbols so they're indicating features that deal with playback and we'll talk about these other buttons as we get to him but anything in blue deals with things during playback right below it you see in blue we have a little garbage can and so if you want to delete a picture this would be the quickest and easiest way to simply delete picture moving up towards the top we have our live view so if we want to go into a live view to see what the camera is pointed at all right so now we're in live you and so now I can focus well this is very dark in here, you know there's a lot of things on these cameras that need to be set up so I haven't gone through the full menu to set this camera up and it's not set like my camera so I'm a thrown off a little bit here but in any way in any case we're going to get into live, you let's talk about live you, so when you press that button, you could do two things. One you can take still pictures and two you can shoot movies and so it's called live view and moving mode, and they are interrelated. They're very, very closely work together in the way that they worked. The biggest thing about being in this mode is that focusing auto focusing on your camera is not very good. Ok, normally, the focusing on this camera is quite good with the camera in live you or the movie mode. We're limited to three options. We have the quick mode, which went in that mode. What happens is the near, which is now in the up position because we're shooting live view and the lights coming back to the censor, the mere pops down, the camera focuses and then the mere pops back up. So there's, a lot of noise, there's, a lot of movement going on in the camera, and you can't see what's going on because the mirrors come down and it's going through this whole little funky process. We have a live mode which has a little box on the screen, and if you press halfway down on the shutter release, the camera will focus on what's in that box, but it does so quite slowly and it's kind of irritating on how slow it is, and then we have a live face mode, which is a face detection mode, and that one could be a little sketchy, depending on how prominent the faces or if there's multiple faces in there, he could work in some situations, so none of these three modes are really that great nowthe one, if I had to leave it in one, would be the life now, I haven't told you on how to switch the mod's, yet we're going to do that in a menu setting, but just kind of be aware that there's three different modes in here and there is a secret fourth mode, which is called manual focus, okay? And this is the mode that most professionals and serious people like if you are going to shoot videos a lot of times, I would just simply recommend flipping the switch over to manual manually focusing so it looks good. Shoot your video, stop refocus from the next shot and shoot again. This is how professionals do it this camera's being used on hollywood movies in a lot of larger film productions every one of those that you're going to see is going is going to be done manual focus. Nobody is auto focusing and recording while the camera is focusing at the same time number one, it makes noise gets picked up by the internal microphone and number two it's not very fast and it's not very accurate, and so I don't recommend auto focusing while you're shooting movies, but using live view to manually focus is really, really good. And so, actually, if we can capture a shot over my shoulder here, what I'm gonna do is I'm going to manually focus, and I can't see very well because it's kind of small in screen, over on the right hand side, we have a magnified button and we can magnify in five and ten times, and now I can focus very clearly as it's magnified in and so this is a great way to manually focus because you get teo really have a really close look at what you're focusing on and so for live you for landscape type photography for product photography, where you're really trying to get critical, focus, that's a great system for using live you manual focus now we're not going to totally get into the hole. Hollywood thing that you could do with this camera. But if you want to get this camera set up for video work, there's a lot of things that you might want to look into a support rig like this for the camera with hand grips, you might have an external finder, so a second, uh, director could be watching what you're doing. You might need a special manual follow focus ring on it. You might need an optical finder so that you can see what's going in the back of the viewfinder really well. External microphones, places to put lights and a shoulder rest because the whole unit is going to be so big and heavy. This is what some of the professional riggs look like. If you do want to get into using it with video, probably the simplest best thing that you can get is a zoo kudos e finder, which will allow you to hold the camera right up to your eye and look at the screen on the back of the camera. This is going to give you three times magnification and allow you to see what's going on the back of the screen much easier. It also allows you to hold the camera in a more steady position. And then you can look at some of the different support rigs that are out there, there's a wide variety of depending on how you wanna hold them or rest them on your shoulder. There's a number of great companies out there that are making these for the new dslr and so there's a lot of different ways that you can get into shooting movies. The camera shoots great quality video, but it's a terrible video camera on, so it needs a lot of help with other accessories in order to make it work right. So when it comes to working, when in the live view and with the movie mode just some kind of points to think about, it is using a dot movie file format, which is an h two sixty four, which, if you're into video editing, you know exactly what that is, if not that's, just the format that it's using it does have a four gigabyte limit. We're about twelve minutes at full resolution, so it's not good for really long extended periods of time. It's better for shooting short clips of things while it's in the live you or the video mode, you can hit that information button we just talked about, and that pulls up or takes away information on screen. Sometimes you want to know the shutter speed and aperture is other times you want a nice, clean shot of what you're shooting and as I mentioned in my live, you demo there, you could do five and ten times zoom with that little button up in the upper right that we have yet to talk about. I can't stress enough about shooting videos, focus first and then shoot don't try to auto focus during the shot and as you saw in that little video of me running out of the car to shoot pictures, you khun b shooting video and take a picture at any time you want. And so, while you are shooting video, you can press the shutter release on your camera and take a picture which is kind of a fun thing because, you know, you can capture video and stills essentially at the same time. And so in that particular case, what happened is I started recording, I ran out of the car, I took one, two, three pictures and I continued recording and then turned it off, and I ended up with four files, one video file and three pictures. And so even though you take a picture, it takes those two video clips and it puts them together so you'll still end up with just one video clip, so it's kind of a fun little thing to do to show certain things. So that's, the live you and movie mode, and we will continue to talk about this as we investigate other features in the menu system. All right, so back on the back side of the camera, we have our little I copped this has a removable I cup on the camera that does not easily come off but does come off. And so this is something that might wear out after many years of use that you can replace for about fifteen bucks and kind of hidden up in the upper right hand side of that is the diop ter, and the doctor controls the focusing of the viewfinder, so when you hold the camera up to your eye and you press halfway down on the shutter, release the numbers down at the bottom of the camera should appear very clear if they don't, you need to adjust that doctor so it's clear for your vision. If you wear glasses, you might be able to adjust it so it's clear without your glasses and hopefully you don't have to share the camera with somebody else, because then you'll be fighting over where the doctor should be. The screen on the back of the cameras got about a million dots, it's, very high resolution screen and some people, including myself like but a little protective cover on it and there's a number of good ones out there that you can get they should only sell for fifteen to twenty dollars but scratched up screen is definitely going to lower the resale value and harm your view of the image and so having a protective screen on there is is a nice thing the screen on it is pretty scratch resistant but it still does get scratched if you if you're not too careful with it down at the bottom we have an lcd light sensor and what this is doing is it's looking at how bright or dark it is in back of the camera and it's going to adjust the brightness of the lcd and this is a pain in the butt because when you're looking at the lcd and you're trying to get a judgement on the exposure value if it's too bright or two dark, this little sensor is brightening up the screen and making it darker and it's something that we're going to turn off in the menu system if you want to, which is something I would recommend so we're going to turn that off a little bit later on okay over on the right hand side of camera we have the off on switch and if you are new to cannon this is kind of a bit of a mystery switch because they'll be work they'll be trying tio there'll be somebody here who's been watching this class, and they've been turning the style and they go, it doesn't work, it doesn't work on me and it's, because this switch actually has three positions, the cameras off the camera is on and the camera is on and the dialled is on a swell, and so whatever you turn your camera on most of the times you're going to want to turn it all the way on, it is a way of locking the style so you don't accidentally turn it because one of the problems is, is that there are some people in this world like myself that air, goofy eyed, some people are right, I'd in fact, most people are right, I'd I am left I'd, which means that my nose will sometimes hit right here on the dial. Now, I don't tend to bump the dial, but I guess some people could change the settings on their camera with their nose, and if you do that, you could just leave this little switch in the on position, and so if you're left iding you bump it or you just cleansing you, bump it a lot you would leave your camera on, but normally you would leave it that switch just above on so that's normally, where I'll turn the camera on to all right, what do we got next? A little bottom right hand side right by the dial is a little light that comes on when you take a picture and that basically means that the camera is writing information to the memory card and you don't want to take the memory card out of the camera while that is lit up. If you're shooting sports, you might shoot a syriza pictures and that light might stay on for five or ten seconds. You don't want to take the memory card out of the camera while it is on it's probably not a good idea to turn the camera off. It won't do any damage that I know of, but just let it be known that your camera is working at that time while that light is on. Then of course, the quick control dial is something that we've been working with quite a bit, and in the middle of it is thesent button, so when we get into the menu settings, we're going to be using that to enter information, and we can also program that button to do other things as well. When we get into the custom menu, we have the multi controller, which I generally as well as many other people call the little joystick button on the back of the camera so it's something that you can direct and is very good for directing the focusing points when we get into the focusing points, which point do you want up? Down left, right and you can actually go multiple directions around that, okay, upper right hand corner, we have a cluster of three buttons on the farthest right hand side is a dual purpose button. The first thing that it handles is choosing focusing points. The second thing is, is it zooms in when you're playing back an image or if you're in live view, but the main reason that we're going to go to that button is to change the focusing points and so let's talk about the focusing points on this camera. So when you press that button, probably the easiest way to change focusing points is by turning the main dial of the camera. So the main dial up on the top and what it does is it rotates through the nine focusing points on the camera and then goes to all of them. So it goes from all to any one of the individual points and there's only nine, so it doesn't take too long. I'm gonna circle around and select any one of the points that you want to choose. Now we're gonna talk a little bit more about focusing points when we get into the viewfinder section, I'll give you a little hint, though, that they sent her one is the most accurate and the best, most sensitive one I should say of all of the nine points the button next to that is the auto exposure lock button, and this is going to be handy for people who want to use the program mode the time value mode or the aperture value mode, because when I put my camera in aperture value, the camera's picking out the appropriate shutter speed gets for reasonable center speed here. So I'm at a sixteenth of a second right now, but as I pan the camera over, I'm at a hundredth of a second hundred sixtieth two hundred, one hundred sixty, eight hundred twenty fifth and so there's, some slightly different light readings in here. And so at any time you point the camera to a new position, the camera's taken a new light reading if I wanna lock it in in one position, I would simply press this button it so if I go ahead and press this button and I get a little asterix in the viewfinder on the far left hand side over by the battery and that shutter speed has then been locked in, but now it's been reset because I let the camera away from ii for six seconds, so you have to keep it pressed you don't have to keep your finger on it. But you have to be reasonably quick about pressing it and shooting the picture, so you have about six seconds where it's kind of in a hold position while it has held that this could be a very handy feature if you were shooting a picture of a person let's say right by a window and you want to get the light from beside the window and then move the camera over in front of the window or if you're doing a sunset photograph you don't near do you don't want to measure the light of the sun you want to measure the light of the sky and then recomposed the photograph? This is not going to work in the manual mode. It only works in the automatic moz that's why it's called auto exposure lock and it's also used you'll notice on the playback to zoom out and so if you're playing back images, you'll actually go back two thumbnails where you can see nine pictures at a time. Next to that is a f on auto focus on this is what we had a question about back button focusing and there are two different ways to focus on this camera you compress halfway down on the shutter release and the camera focus or you can press this button in the back and I found that many of the maur immediate in advanced users like separating the shutter release from focusing and there are some good reasons why if you do a lot of re composing you focus on something you moved the camera way when you press down again the camera refocuses and back button focusing can be quite handy and so it's always there for you to use and one of the options that we're going to get to in the menu system you kind of think about this is whether you want to turn the auto focusing on the shutter release off which is an option that you might want to try if you do I think people photography would be very handy to turn that off but there's a lot of other general workers well that you would need to turn that off but when you turn it off you really have to think about shooting pictures because you're going to need to press two buttons one to focus one to shoot and it's handy to separate those but the bad thing about that is when you hand your camera to somebody else to shoot pictures they're not going to know about that customized feature and so if you do that you might want to re program the camera back to a more simple mode for them but when you want to get it set up for yourself if you're over the more intermediate advanced level I would encourage giving it a try I took a long time to warm up to that a particular style. I tried it out and it just didn't seem natural at first. But I kept going at it for a couple of weeks, and now it seems very, very natural, and I really want to have it on my camera. We have a in class question on this winter without back button focusing. If you were to just put your camera on full otto, would that take it off if you had customized it, so to hand it off to somebody. So when you throw your camera into that green zone, anything that you've programmed in goes out the window, okay, yeah, so that's. One quick way to get, get rid of it without reprogramming the camera. Good question, though, all right, and then let's, see right there by the corner of your viewfinder are four little holes and that's the speaker. So when you play back movies, you can hear the sound there, not much toe here but that's, where it's coming from.
Class Materials
bonus material with purchase
Ratings and Reviews
Mia Linguia
Amazing class, I walk away feeling like I've made this machine my own. Like getting a new car and adjusting all the seating and mirrors and radio stations to your comfort, then giving it a name because its officially yours. My camera now feels more comfortable to use and I can't wait to use it again with these new found tweaks. Thanks John, always a great class!
Mike Swartz
Having used an XTi I was familiar with the basic Canon layout, but when I bought my 5D MKii used from my wedding photographer who updated to the MKiii, I knew there would be a ton of features I'd never really understood. This video series is fantastic. I've learned so much about my camera, many tips on best practices when planning shots and I've seen an increase in the quality of all my photos as a whole vs. just taking a ton of pics to try and capture one or two that turn out nice. I'm excited to try out so many new things I learned from watching these videos. I'd recommend these videos be the required guide to anyone who owns a 5D MKii.
Nelson
Excellent instruction. The instructor is very knowledgeable and a very effective communicator. Great photo examples and "SLIDES for that". Creative Live and John should both be commended for providing in depth and pertinent information. The Canon 5D MkII is a great camera however without a body of knowledge to fully utilize it you might as well have a low end point and shoot. I would recommend this class to anyone who has a 5D MkII, no matter your skill level. Great job!
Student Work
Related Classes
Camera Guides