Lessons
Class Introduction
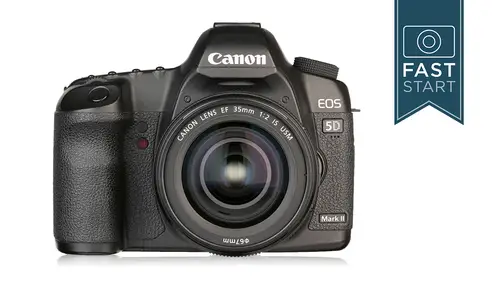
06:50 2Product Overview
13:14 3Photography Basics
09:15 4Button Layout: Top Deck
44:43 5Button Layout: Back Side
20:37 6Button Layout: Other Sides
10:47 7Lenses
07:42 8General Q&A
09:31Lesson Info
Button Layout: Top Deck
All right, so you guys ready to learn the camera? Let's get going then we're gonna be talking about the button layout and we're just gonna go through this in a very simple manner we're gonna go ahead and start on the top and look at what we have to deal with. So on the top of the camera we have the big old mod dial and so that's that big dial on the left hand side and it's amazing how often some people like it started in one mode and then they never change it beyond that and so now you do want to experiment a little bit around to figure out what you're going to use in there? I don't really use more than a a couple of those but it's good to know what they do so let's dive into the mod dial and talk about what it does and we're gonna go ahead and start with that little green auto mode that I recommended you you start off at just for taking that practice practice picture now this is a mode that well, if you have a five b mark to you should be ashamed. If this is the only mode that you use...
on your camera, I'll be honest with you I mean that that's the only mode it's frankly a little pathetic that that's a cz muchas you're doing with the camera as that, but this mode is going to set shutter speeds in apertures, which is nice and it's gonna put child safety locks on bunch of the features in the camera and you're not going to have access to a bunch of the menus and features cool things that this camera can do and so it's not a mode that I recommend unless you're gonna hand it to somebody and say, would you take my picture or you maybe you're gonna hand it to a different family member and say okay, you can take pictures today just put it in this mode and you don't want them to mess up your settings and you don't wanna have to teach them photography in five minutes that's a good hand it to somebody else type of mode. The next mode up on this is called the creative auto mode and it gives you just a little bit more control than that green auto box and there's kind of some goofy controls that they put on the back that allow you to go to slightly faster shutter speeds and slightly slower shutter speeds a little bit more depth of field or a little bit less depth of field and it is for somebody who doesn't know about photography but wants to play around but in a very, very timid way and I think we're all going to grow well beyond this and so I'm going bypassed this mod very quickly and move on to the p mode. The programme mode. Now the programme mode is in some ways exactly the same as the green autozone, minus the child safety locks. So now we have access to the menu and all the other good features in the camera and so personally, when I need to grab a camera and I'm not doing anything specific, and I just want to make sure that fire's a proper exposed picture I'll throw it in the p mode. Uh, the problem with the p mode is that it constantly wants to reset itself back to a certain standard. Now, what is kind of nice is that you are always starting off at a good middle of the road settee whenever you pick the camera and so in the camera right now, let me just make a quick little change here. If I was to just pick this camera and pointed it's giving me a shutter speed of a sixteenth of a second at f four point oh, a moderate amount of depth of field, a reasonable shutter speed, which is a good, safe middle of the road. Maybe potentially an uninteresting photograph as faras. Choosing something interesting going on with the with the settings of the camera so what we can do is we can turn the main dial on the top of the camera so this is the dial right up by the shutter release this is the main dial I haven't officially introduced it but we need to use it right now and so if you have your camera in the programme mode, you can shift the shutter speeds and apertures mohr in one direction or the other just depends on what direction you turn the camera you can go for more depth of field or less step the field faster shutter speeds or slower shutter speeds so if you have the camera, the programme mode and you go oh there's a bicycle going down the street and I want to stop the action you could just simply dial it over until you've got a faster shutter speed and it's a quick, easy way to operate the camera now the back dial on the back of the camera which we haven't officially talked about what is known as thie quick control dial I call it the thumb wheeler the thumb from dial that is going to be used for changing exposure compensation so let me just show you a picture explains a little bit about exposure compensation because sometimes when you take a picture the camera's setting for what it thinks is the proper exposure may not be exactly right you may want to shoot a picture that's a little darker or a picture that's a little lighter and sometimes you want to shoot a serious of pictures like middle and dark we'll talk about bracketing and a little bit but not all the pictures are going to be right in the middle so you need to make a little bit of a lightness adjustment on the camera and the way that you would do that is by using that dial in the back now what you're going be basing this on is when you look in the viewfinder there is what's called an exposure level indicator we also call it the meter all right and it's got a little indicator right in the middle and as you die elit you could dial it to the plus side like plus one for something that's kind of bright if europe skiing perhaps you might be down on the minus side if you have say a lot of dark trees and dirt on earth landscape type shot it might be more towards the minus side now this camera can do plus two and minus two exposure compensation that's the limits some of the newer cameras do plus two or plus three and minus three but frankly I've never had a need to go beyond plus two or minus two and so in general you're going to want to leave that exposure level right in the middle and from time to time you'll be making adjustments either to the plus side or to the minus side, and sometimes when you have time to practice you one in the middle and then shoot one to either side just to see what the difference is in the pictures, the problem that I have with the programme mode is that when I have decided I want to shoot something let's say I'm going to shoot a soccer game and I put my cameron program and I'm thinking I kind of like to stop the action I don't want blurry players I'm going to dial in a faster shutter, sir let's say five hundredth of a second, all right? And I shoot pictures and then my camera shuts down after a few seconds and I go back to turn the camera on again. My camera has reset down to sixty eighth of a second, this camera will reset depending on how you have it set up every six seconds, it will reset back to the middle of the road city. And so if you're just walking around disneyland and you're shooting goofy and your suit magic mountain and you shoot your family and every picture is kind of a different style picture it's gonna work fine for that, but when you are engaging with a subject, whatever that subject is if it's a landscape or a person it's not gonna be the right mode because you're going to constantly have to reset the camera so let's move on to the next, which is the time value mode so t v stands for time value cannon's a little bit odd and calling it time value it's normally called shutter priority with most with most companies, but time value in this particular case allows you to change the shutter speed with the main dial on the top of the camera and a lot of people are drawn to this who are kind of new to photography because they have a good concept of time. The concept of depth of field takes a little learning to get used to that one, but they're like ok, well, I'll just take the time I want the problem is is let's just say I decided I wanted to shoot a picture in here creative live at two thousandth of a second if I shoot a picture, I guarantee you I'm going to get a very dark picture because we don't have enough light in here to shoot two thousandth of a second at the so that I'm at right now and so you can make a lot of mistakes if you don't know what you're doing in the time value moat and so I generally don't recommend it and I don't use it at all myself I much prefer the aperture value mode now time value an aperture value kind of worked the same way the main dial on the top of the camera is what controls the feature that main feature either time value or app winter value and that back dial still controls exposure compensation so I can shoot lighter pictures and I can shoot darker, darker pictures using that same technique that we used in the programme mode with the back dial now aperture priority is my favorite simple automatic mode because I can change my aperture and there's not that many apertures but there's a ton of shutter speeds so I can set any aperture if I want to shoot a picture right now in here at one point four I'm going to get a reasonable looking picture and see how do I have this set right get the set right I got some bright lights here so I'm getting some kind of funny exposures here but if I you want to dial it down to f twenty two I can shoot a picture it's a long shutter speed but I'm going to get proper exposure on my camera at any shutters at any aperture because there's so many choices it's very rare that you will ever choose an aperture where there isn't an acceptable shutter speed I suppose if you chose one point forward pointed your camera the son you might not have inappropriate shutter speed but it's pretty extreme situations like that so aperture value works out quite well because if you're shooting a portrait of somebody you decide you want shallow depth of field, you could set it aperture, say two point eight and your cameras not going to change from two point eight the shutter speeds gonna adjust light, but the two point eight is not going to change. All right, let's, get to the most popular mode on this camera, which is full manual. And so now the dials on the camera have changed a little bit because we were controlling the aperture up on top, and now the aperture is controlled in the back of the camera, so the back is going to control the aperture, the top's gonna control the shutter speed, you can set him anywhere you want, and you're going to have to deal with it. So now you're gonna have to work with that exposure level indicator in the viewfinder, and often times more often than not it's gonna have an indicator like this that's way off to the minus side, and you're going to have to change either shutter speeds apertures, and we'll deal with the vessels later, or one of those three to get the indicator up towards the middle of that reading. Now, it doesn't mean that it's supposed to be in the middle of that reading for every shot, but if you didn't know any better that's a good place to start with the first test shot depends on how light and dark your backgrounds and your subjects are as toe where it should be because it's usually going to be within the minus one to plus one range, and it usually hovers around that middle indicator and so manually working your camera's nice because once you get those shutter speeds, an aperture set, nobody resets things on you unless you bump the nile on the cameras. So it's nice when you set the camera up and it's exactly where you want it. If I was going to go shoot a sporting event, sporting events usually take place in a pretty predefined area with lighting that doesn't change how we get it all set up during warm ups, and I would shoot with the same shutter speed, an aperture for probably the whole game unless I was trying to do something creatively differently, shutter speeds or depth of field probably just keep it the same, and if I was shooting a portrait, I'm gonna be working, maybe in a studio or I might be out in the park, I'm gonna be working under fairly consistent lighting, get it set up for the first shot and shoot a serious of shots all at the same shutter speeds and temperatures once you've dialed that in and figured that out now the camera does have a couple more and not just that we could go up to b stands for bulb and back in the old days of photography, there used to be an heir, a bulb release that when you squeezed it, it pushed a cable and open the shutter on the old time cameras, and it stayed open as long as you squeeze down on that air ball and the bulb on this camera works at essentially the same manner. If you press down on the shutter release it's going to stay open as long as your fingers on that federal lease. Now the problem with that is that your touching the camera and causing vibrations and moving the camera and so it's much better to use an electronic cable release, and we'll talk about some of the different cable releases that you can get for it. So it's a long time exposure, and I I like to do nighttime photography probably more than the average person, and I rarely business, and so it's, just not something most people use. One of the things I found is that with digital cameras, you get a lot of noise when you open up the shutter for a long period of time, and so this camera can go down to thirty seconds and it's pretty rare that I will need to go beyond thirty seconds to do a shot I have tried five minute exposures and then they just get very very noisy and so it's there if you need it but most people aren't going to really need it and then finally we have c one two and three and these air custom bones where you get to customize the camera exactly the way you want to use it and this is really handy if there's something that you routinely do with the camera that requires a lot of changes so for instance maybe you're you're a landscape photographer but you also like doing bird photography and when you do bird photography you prefer using a spot meter a certain type of focusing system uh you like to use the motor drive and some other changes perhaps on the cameras well and making all those changes means that you're going to miss the shot of the bird because it's gone and you might have another serious of our types of pictures where you set your camera for landscape shots you have a particular aperture and shutter speed you like to use you have the camera at a particular esso and focusing system and it takes a lot of time to go switch these four five ten different features you can program them all into one two and three and have three favorite modes and simply use those rather than aperture value manual or anything else and so these modes you will be able to change things like the mod sistemas faras aperture priority shutter priority program manual you'll be able to go in and change the focusing systems and pretty much all the menu systems in the cameras well, and so if you do anything on a regular basis that's kind of a nice place to be able to go to, to know that you have everything reset on my camera, I know I've saved myself a lot of hassle by having one mode that I used for my landscape photography. One of the key things is I have my eyes so set at one hundred and every once in a while and bumping my eyes so up and down, and I forget to reset it back at one hundred, and that makes sure that I always got the camera in the right position. And so if you have a couple different types of photography, great system highly recommend doing that now the way you actually do it is you would set your camera up exactly as you wanted, teo. Then you're going to go into the menu system, which we will see later in this class where we would program it in so you just set the camera, and then you would register that setting so something you could do later tonight after you've watched the whole class all right, so moving back on to the rest of the camera right next to the model is a funny little ufo looking diagram and that's the focal plane of the camera in case you wanted to know exactly where the sensor is within the camera, the distance from the lens there's some scientific reasons why purposes way you would need to measure the distance from the subject to the focal plane, but it's, just in an indicator to let you know where the sensor is, then on top of the camera we have, of course, the hot shoe. One of things to know is that there is kind of a ring seal around the top of the the hot you, and this matches up with the current cannon flashes so that there is a very tight weather seal when you mount a flash on the camera. So let's, look at some of the different flashes that you can get, and this is one of the areas where you can put aftermarket flash unit's on the camera, but I would record really, really recommend candid flashes, flashes one of the most complicated areas of photography, and for on camera automatic flash. I would bite the bullet, spend the extra money and get the cannon flashes it's just going to make life a lot easier than some of the cheap alternate flashes that are out there. Now. The this camera does not have a built in flash and I love that because now we have a smaller, lighter weight camera that's more weather resistant that has a really high quality prism in it the flash eats up a lot of space and they have to compromise on the prism when they put in a flash unit and it just makes the camera a little bit more so it doesn't bother me at all because the built in flashing its just don't give you the best light so if you did need an emergency small light just to take something with you say you're into travel photography uh this is one of the few times I would recommend cannons smallest, lightest flash it's not going to give you a lot of options, but if you needed a little bump of light it could do it and it sells for about a little under two hundred dollars the next one up is going to give you a little bit more versatility because you can bounce it off of the low white ceiling so it gives you the flip capability and what's most unusual about it is that it has a secondary video light so if you want to shoot video with the camera and add a little bit of light now this light's not good for very much distance if you're shooting video of people that are within, say, ten feet it's going to add a little bit of fill light to the eyes an intermediate level flash is good for a lot of general photographers who don't have a lot of heavy needs with the flash, we are going to have the ability to bounce and swivel here and it's gonna offer a reasonable amount of power for most people. If you are an event photographer, you shoot weddings, you're shooting lots of people, corporate events, and you're shooting lots and lots of flash. You might want to look at the five eighty e x to this flash is going to sell for about five hundred dollars, and it's gonna offer very fast recycle times between full power flashes. It's going to give you lots of capabilities for his bounce swivel, as well as giving you some special effects modes where you could do multiple stroke with the camera and some other kind of neat stuff, high speed sync and so for it. And kanan recently introduced the six hundred ex rt, which has everything the five eighty e x two had but ads radio triggering, and with many of the other cameras that have built in flashes, you can take one of these any of these flashes and you khun, trigger them wirelessly with the built in flash with this camera, you would need a special transmitter, so canada has two different systems they haven't infrared system, which is good for relatively short and now they have a radio system which is good for much greater range and can go through walls and is not defeated by other things getting in the way. And so if you really want to do wireless off camera flash, this is one option. There are other non cannon options that are also available if you want to do things in a more manual way and if you're going to use any of these, what could be really helpful is one of the off camera flash shoes and this is gonna be really helpful if you like to use your camera on a bracket. And so when I'm shooting event, corporate style style weddings where you're shooting lots of people pictures I want to keep the flash above the lands, whether I'm shooting vertically or horizontally it's important to keep the flash above the lands in a flash. Brackett will do that in order to keep that automatic flash that's when the court is handy. So when you are using your camera in the flash mode with a flash on the camera with a cannon flash, whether it's directly attached or with the court the maximum shutter speed is one two hundredth of a second you can't go above that there is a little asterix where if you have a special cannon flash and you put it in a special mode, you could do something called high speed flash we're not getting into that because it's more of a flash flash thing of that particular flash. But in general, your camera can only go up to one two hundredth of a second what's happening is that as the shutters on your camera open, the first one opens as soon as it's all the way open, it triggers the flash to fire and under fast shutter speeds. Here you can see under five hundredth of a second very clearly the second curtain has started to close and is mostly clothes, and even at two fiftieth of a second it has started to close and it has clipped off the light from the bottom of the picture. Now, if you happen to work in a studio or you happen to work with larger strobe systems that you're plugging into the pc connection on the side of the camera, then we're dealing with more powerful strobes, and what you're going to want to do is to go down to one hundred twenty fifth of a second. Technically, the camera can handle a little bit more, and so I did a little test I shot shot the camera at two fifty thumb a second definitely got some clipping at two hundredth of a second. I was still getting a little bit of darkness on the bottom of the picture and even at one hundred and sixteenth of a second I was noticing that there was still a little bit of darkness going on and so to be safe on this camera, cannon actually recommends one sixtieth of a second but one hundred twenty fifth should do should do a good job I haven't seen any problems with that and that's where most of the studio photographers are shooting this camera you can of course go much lower than that, but that would be the top shutter speed that you could use okay working our way over to the right hand side we're going to have kind of a grouping of four very important buttons, at least three of them three of the four are very important. The first one deals with mita ring and white balance it's a dual purpose button you'll press the button and you will have about six seconds in order to make a change now if you want to change the meat ary you're going to use the mode the main dial on the camera, which is the one up by the shutter release so you press that button and then you turn that dial and there's gonna be a little symbol in there that changes through the four different mita ring systems and they are evaluative partial spot and center waiting senator, wait it is the system that we used to have in cameras many years ago and it's kind of still kept there for legacy reasons. Some people prefer a spot reading so they could be a very, very precise reading in a small area, the partial reading is basically a fat spot it's just another big circle. The evaluative metering is a meeting system that uses a multitude of boxes to compare and contrast lightness values uses thirty five zones and it comes up with a pretty good average of what the picture sees. And so for most people, I would recommend using evaluative meters now there's some people who have favorite meter in systems and by all means use whatever you like. But evaluative is a good general system that is accurate most of the time. It's very, very accurate now pushing that same button but changing the dial on the back of the camera, which is the quick control dial is going to change the white balance of the camera and you'll see a bunch of different symbols changing around in the upper left that control screen so let's, just talk for a moment about white balance as we look at the world r I c one thing and our brains interpret what we see and when we look at something like snow, we immediately no hey that's supposed to be white but with different colored lights, subjects will have a different color, and our camera will record not what we think is there, but what is actually there. And so we have to deal with this kelvin scale, which is a scale of color temperature of light, and we should adjust our white balance to the type of light that we're working under, so daylight cloudy and shade are all slightly different colors, and then for artificial light, tungsten, fluorescent and flash, they're slightly different as well. And so if you're getting funny colors it's likely to do with the white balance on the camera now, I will have to admit that I don't worry about white balance too much, and we'll talk more about rob versus j peg as we go on. But if you shoot raw images, you collect all the raw information off of this sensor, you don't have to worry about this too much because you can fix it later without damaging your photograph in any way. And so you could breathe easy if you're going to shoot raw, uh, in order to do this, but if you do shoot j p, you do need to kind of stay on top of this and make sure it's set properly. Now there are three other options that you do have on this camera. One of the options is, kelvin said, if you were geeky enough and strange enough to actually know the kelvin temperature you were working in, you can set it very specifically. And there are people who do work in certain environments on a regular basis, and they know the color temperature of the light that they're working in sometimes just to try it there they shoot their camera at five thousand doesn't look quite right. They should have fifty, five hundred. Not quite right. You did it six thousand and it's just right they could set it on their camera, and it would be just fine now, one of things that you could do if you really wanted to have it set right is you could set a custom white mountains, and the way you do this is that you would basically take a white piece of paper and you would photograph the white piece of paper, and then you would calibrate it using the menu system, basically in the menu system, it ask you, is this a white object? You say yes, and it looks at the light reflecting off of the white sheet of paper and will balance the light, according to what's reflected off that piece of paper. And so that's a way for you to get super accurate lighting if you were to go into, say, a theater which has really unusual lighting just if you could go up to the stage and photograph a white sheet of paper, you could calibrate it perfectly for that light set up and then finally on this and I know that if you know that I don't like otto most of the things on the camera there is an auto white balance and this is one of my guys about my only exception on auto I leave my camera in auto white balance almost all the time first off, it doesn't pretty goodjob. Secondly, I shoot raw and I can fix it later if necessary. And so auto white balance it's not a bad place to start if you're getting funny funky colors, then go into the white balance and see if you can find a more appropriate setting for it. So that's that's the white balance? Just be aware of where your cameras said you don't want to accidentally leave it in the wrong place for a long period of time okay, the next button over is our auto focus and derive button and so the first part about this is the auto focus, so you press that button you got a few seconds to change the main dial on the top of your camera and as I can see on my camera you do have to have your camera in auto focus on the lens there's going to be a manual focus autofocus switch and so you do have to have that in auto and that's gonna allow us to change between one shot eh I focus and a servant one shot is what I would recommend for most people most of the time what happens in this case is the camera will seek out the sorrow sharpest focus and then it will stop because hopefully you're not moving closer to your subject in your subjects not moving around and so for still subjects that's the system that works best one shot now jump into the third one ay ay servo what happens there is the camera will focus try to find the right subject and then it will continue to track that movement whether it comes towards you or away from you or moving in any direction and so for shooting sports you do need to change over to a servo very important then they decided to include one that was kind of in between the two and so a I focus stands for artificial intelligent focus where the camera is going to figure out whether the subject is moving or not and I and many other photographers have found that it is very inconsistent the results that you get here I'll for instance accidentally set my camera to this mode and was shooting the end of a cross country race, and as the runners were coming in, the camera was occasionally focusing on the grass and locking in on the grass. Uh, it didn't understand that there was something moving bright, very near the grass, and so I would highly recommend either one shot or a servo and I think it's pretty easy generally you're either shooting sports or you're not it's very seldom that you're shooting sports and then landscapes and then sports and then landscapes uh and so that's one of the things that you will want to change in those situations. The other thing that that button does is it controls the drive mode on the camera, and so when you press down on the shutter release, what exactly is going to happen? Do you take one shot? Does the continuous motor drive, which works at three point nine frames a second work or do you put it into the self time remote and we have to defer itself time remotes? We have ten seconds, which is probably enough time for you to get around and get in the picture yourself. We also have a two second mode, which I think is a great little tripod mode that way, so I got my camera in two seconds so I get the set get my hands off the camera and nothing was touching the camera, and all the vibrations had time to settle out. And so, rather than using the cable release, the two second self timer works really well in that mode as well. Now you notice the little remote symbol beside that you can also get the little rc six remote for about twenty five bucks, and this allows you to get in the picture yourself. So it's a remote it's about the size of this, and it allows you more than ten seconds to get around and get in the picture. The problem is, is that it uses infrared and it's on ly good for about fifteen or twenty feet, so it can't go through walls. You have to have line of sight, got to see it on the camera, and so it is a little bit limiting, and so sometimes it will be better to get the cable release for a lot of people's purpose is next up. The third button over here is controlling the s, so this is a button that you'll go to quite regularly on the cameras. So by pressing that button and turning the front dial, you will be able to go between auto one hundred and up to sixty, four hundred, and this is corn controlling the sensitivity of the censor the best quality images. On the sensor are going to be captured at s o one hundred. When you go to s o two hundred, you are allowing less light to the sensor and you're forcing the sensor too. Take the amount of light that comes to it an amplified and the camera does a phenomenal job at working with half the amount of light it s o two hundred it does really good at four hundred and different people have different opinions, but I don't have a problem shooting this camera upto so eight hundred it's it's really, really very, very good. The thing is, is that one hundred is always better than two hundred. Two hundred is better than four hundred lower the number of the better. Yes. And the highest I've shot on this camera for real photography is s o sixty four hundred and it's a little grainy. But it was nice because it was basically pitch black out and there's just a couple of street lamps out. Now we do have an option in the menu system that we will get to, and you can make a decision as to whether you want to expand this range or not. It will allow you go upto each one in hte too. Each one is one stop higher. Than the previous number. So sixty four hundred times two is twelve thousand eight hundred that's the high one setting the camera can also go up to twenty five thousand six hundred at h two, which is very rare that you would ever need that to go there and on the other end of the spectrum seeking go the other direction to a low setting a fifty and it's very rare that I'll ever used these extremes, but I like them to be available to me if I want to use them so I would recommend turning on what's called s o expansion and we'll get to that in the menu and I'll tell you when we can set that and so those those are some of the options now we do also have auto s o here and I'm not a big fan of this because the lower the number the better when it comes to s o and I want to be in control of theis so generally like I want to be in control of the shutter speeds and the apertures. And so for most people, I would highly recommend getting to know your esos knowing where you want to have them set and doing that yourself if you're gonna hand the camera to somebody else and you throw the camera into the green autozone mode, it goes into automatic so and so for the for the simple is set up so it's going to take care of it for you in that green zone but I think it's better with this camera to really take control of that yourself and then we have flash exposure compensation and this one it is really only going to affect you if you were adding on a flash to the camera cause once you add on one of the cannon flashes now you can start to control the features of the flash directly through the camera and in this case because it doesn't have a flash on it it really doesn't matter if you set this but the reason that you would want to set this is that when you take pictures with the flash unit of people which is one of the most common things people are using lighting for the automatic flash will often kick out technically the correct amount of light but aesthetically too much light and you often want to power down the flash a little bit and so tt l stands for through the lens it's the automatic flash system that these cameras use and as I say it kicks out a little too much light. Personally I like to power the flash down about one stop so minus one lot of photographers I know would just leave their camera at minus two thirds or minus one or minus one and a third it depends on their personal taste and how they shoot pictures in the equipment that they use and so in this serious of pictures here I prefer the minus one setting I think you don't want to hit people too hard with the flash the blown out face look is not a good look and in this particular situation it looks really bad and it's because she has a dark sweater on in the camera and flash or trying to compensate for the darkness there and so in this case I actually prefer tt l minus two and so if it was my camera and I do have a camera I would set it at minus one and just leave it there knowing that I could bounce it up to zero if need be and I can bounce it down further if necessary as well and so if you wanted to keep it at minus one it's on ly gonna happen when you actually attach a flash on the camera all right next up good old shutter release on the camera now this camera has a shuttered durability of one hundred and fifty thousand firings and that's how they rate how durable a camera is beyond the weather ceiling and the type of construction is how many times I got the self timer set on I got you it's turned off change that real quick so how many times can you press the shutter release on the camera and so one hundred fifty thousand firings what happens at that point the camera blows up no uh it's like a car you know if you treat it well you can get many more than one hundred fifty thousand firings on it and so with the shutter release you know it's obvious stuff but it is a two stage button so you should be very comfortable pressing halfway down it wakes the camera it activates the focusing system it activates the light meter so it's doing a number of things by just pressing halfway down and so as I'm getting ready to shoot, I'm often pressing halfway down and pressing all the way down. Of course we'll take the picture right behind that is the main dial, which is the kind of the main dial on the camera you're going to use to change anything in the menu systems and we've been introduced to it now with a lot of the other features have been using we have a little light button right there so if you're working at night time and you want to see what's going on in the lcd panel, the little light button will stay on for about what six or ten seconds and it's a handy little device for working under low light conditions right there in the top right hand corner of the lcd screen is the total remaining shops and one of the things that has been very frustrating for cannon users because some other company has another way of around this is that when you have a really large memory card in there like I have right now it says I have nine hundred ninety nine shots, which means that I actually have probably been more than nine hundred ninety nine but I don't know how many more and kanan users have been frustrated because they want to know how many shots am I really going to get? And there is a secret way to tell and I'm gonna tell you in just a moment but you can't tell here there's another way that you can tell how many shots you have on your camera with really large memory cards stay tuned in for a little bit away from that and then over in the bottom left hand corner there's a little battery indicator to indicate how good the batteries in the camera so we're going to switch to the back side of the camera but let's do some questions and answers mostly because I need to get a drink of water and I'll just throw the camera over onto you guys perfect looks like we have a question in the audience. Did you have a question for john? I did um the servo can that be set is that one of the settings that will stay if you use a custom function on the daio because I could see for weddings you're shooting us up at the altar and then they wantto you know they kiss and they come back down that's a whole different set of setup for lighting for me so if I could just quickly put that in one of my custom functions and have it go a servo and a few others minor details, you are like all kinds of smart that's a really good idea that's a great example of how to do so yes and that's exactly the way that you would use that when you need to quickly make that change and you don't want to be fumbling around with your camera but yes definitely could change that. Another question in class john I noticed when I moved from my fifty d to the mark too the mirror shutter makes a lot more noise or vibrate it has a lot more vibration I want to know is that normal and it just felt funnier in my hand. Well, it isn't it is a different camera and every camera has a unique shutter sound and if you're really geeky, you'll watch movies and you'll listen to hear what camera they're using and it's really funny when they have a digital camera and they're using like an old nikon f three shutter sound I don't why I got out of that but what's what is happening? What is majorly different between this camera and your old camera is it's a larger sensor and you have a larger mere system in there, so there is mme or mere and mass going up as well as the shutter units are larger as well and so it's going to make a different noise and it's probably going to have a little bit more vibration simply because of the size difference on it it's kind of kind of surprising to me that you made that much of a notice of, but it makes logical sense right away but and I also appreciated your tip about the two second on the tripod two second delay because I used to try pot all the time for portrait okay, so that's a good tip local first photos by johnny is wondering the color coloring seems a little off when compared to my nikon why? Well, I guess one of my questions that I would have is does the color seem off on the back of the camera or the color from the censor? Because there's a lot of things that affect the color you know right now on the internet, they're comparing the differences between the way it looks on the back of the newest cannons and icons icons had a little greenish tint on it, but nikon cannon lenses have a very, very slightly different look in the color accuracy of um and I don't have a specific answer for it I don't I don't know I mean, the color temperature that the nikon and cannon are shooting, if you're shooting them side by side, you know, even their sensors are going to pick up light a little differently the processing engine, whether you even if you're shooting raw, is slightly different from canon tonight, khan and it should be something that could be fixed later on. I frankly, I get a little kick out of people who say, well, I like brand acts because their color is so much better, and I can take raw files from either one of these and make it look in a way that I'm happy with, and so maybe they're just pickier than I am. Maybe I'm just not picking enough, but I think you could get good color from either camera, so the questions are coming in about the auto focus. Um, mrs tademy from louisiana, asked, I have problems focusing with my five d mark, too. Do you have any tips for focusing? And other people had asked about slow autofocus. We're going to be talking more about auto focusing because we still have auto focusing points, the selection of the points and some things like invisible focusing points on the camera, and so we're going to touch more on that, but I would encourage people asking questions in the room to be more specific. About their questions. Like I have problems focusing with my cat running for food or whatever the case may be rather than to general of questions. Okay, sounds good. Yeah. So? So get specific on me. All right, clear of rock is wondering, is I s o fifty better than s o one hundred in this case, I've heard about native isos for cameras dot dot oh, okay that's a good question generally the lower the iso setting, the better the quality and in this case one hundred is the best quality they're able teo use fifty and I've compared fifty and s a one hundred and they're very, very similar in quality. But I s a one hundred is what is considered the native sensitivity it's where the sensor has been built toe best absorb light and they found a way where it can absorbed twice a cz much light and still come up with a good result. And I mean, I kind of wish they could do is so twenty five from time to time, but I also fifty looks quite good. It's it's very close to one hundred, but there's really no advantage at shooting at fifty for quality reasons. Okay, you just touched on this, but aurora photos would like to know if back, but focusing works with a servo back button focusing does work and we will talk more about back button focusing for those who don't know what we're talking about but it does work with that yes samantha underscore l says when I go into s o I don't seem to have fifty or high one or high too yes we need to go into the menu system go to s o expansion which stay tuned we will do so you have to turn a special little switch on the camera on in order to do that great all right let's see uh bianca and photo ask with the custom modes be beneficial for switching between shots with an external flash and natural light. Mmm I think on that when it's going to depend on how many features you're changing on your camera it might be beneficial it depends on how you set your camera uh if you found that there's a lot of different changes that you make in the meeting system or the focusing system or something like that it could be beneficial I know with what the camera is set up as it is it doesn't have a built in flash so you could have exposure compensation set to minus one and it doesn't change anything about natural daylight shooting put on a flash and suddenly it's adjusting that flash so I guess yes, it just depends on how you shoot with the camera how you set it up rebecca's lens is wondering if you could explain or show us how to preset eso aperture and shutter speed, for example, shooting indoor for a wedding and outdoor for post wedding shot. This is their way to preset this well, you can preset it with the custom settings, and so what you would simply do is you would set the camera up exactly the way you want it set up. So for instance, I'll just do a couple of them I will set let's see manual, I'm going to set s o at eight hundred because I always work in dark churches. I typically like to shoot at two point eight. Now I'm gonna have to manually adjust the shutter speed when I get in that light situation, but I'm just going to set it to one hundred twenty fifth to start with, I will leave it in single c one shot focusing, and I'm going to adjust it to continuous drive so I can shoot a series of pictures. I'm not going to do the next step, which is going into the menu system to where we go to custom and I would register that as custom number one and then I would come back and I would re set my camera up maybe now I'm going to go down to the esso one hundred and I'm going to change it to continuous focusing and whatever other changes. And then I would go register that as custom number two. And then you do that again for custom number three. And you're just gonna have to remember what? See, one, two and three years with the way you work.
Class Materials
bonus material with purchase
Ratings and Reviews
Mia Linguia
Amazing class, I walk away feeling like I've made this machine my own. Like getting a new car and adjusting all the seating and mirrors and radio stations to your comfort, then giving it a name because its officially yours. My camera now feels more comfortable to use and I can't wait to use it again with these new found tweaks. Thanks John, always a great class!
Mike Swartz
Having used an XTi I was familiar with the basic Canon layout, but when I bought my 5D MKii used from my wedding photographer who updated to the MKiii, I knew there would be a ton of features I'd never really understood. This video series is fantastic. I've learned so much about my camera, many tips on best practices when planning shots and I've seen an increase in the quality of all my photos as a whole vs. just taking a ton of pics to try and capture one or two that turn out nice. I'm excited to try out so many new things I learned from watching these videos. I'd recommend these videos be the required guide to anyone who owns a 5D MKii.
Nelson
Excellent instruction. The instructor is very knowledgeable and a very effective communicator. Great photo examples and "SLIDES for that". Creative Live and John should both be commended for providing in depth and pertinent information. The Canon 5D MkII is a great camera however without a body of knowledge to fully utilize it you might as well have a low end point and shoot. I would recommend this class to anyone who has a 5D MkII, no matter your skill level. Great job!
Student Work
Related Classes
Camera Guides