Adding Elastic Waste Band to the Skirt
Lesson 9 from: Simple Sewing Projects for BeginnersSusan Beal
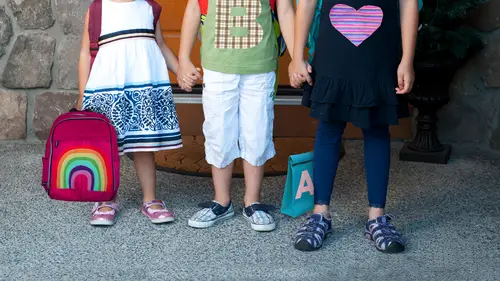
Adding Elastic Waste Band to the Skirt
Lesson 9 from: Simple Sewing Projects for BeginnersSusan Beal
Lessons
Day 1
1T-Shirt Appliqué Prep
27:26 2Basic Stitching: Satin & Zig Zag
21:16 3Adding an Appliqué to Your Shirt
42:01 4Backpack: Rainbow Appliqué Prep
26:58 5Building the Fabric Rainbow
16:12 6Zig Zag Stitch: Layered Rainbow
19:46 7Creative Kids Clothing: Simple Skirts
36:32Adding Binding Tape to a Skirt
25:39 9Adding Elastic Waste Band to the Skirt
27:58 10Easy Superhero Cape
22:56 11Embellishing Your Cape
35:15 12Basting the Cape
20:26Day 2
13Oil Cloth Lunch Tote Prep
29:13 14Sewing Oil Cloth Lunch Tote
30:01 15Building the Lunch Tote Body
21:14 16Adding Pearl Snaps & Eyelets
29:00 17Creating Unique Cloth Napkins
42:27 18Prepping Images for Art Tote
32:25 19Creating Denim Frame Around Images
23:49 20Patching Together the Art Tote Bag
29:04 21Creating Box Corners on the Tote
26:14 22Adding Lining & Handles
24:05 23Oil Cloth Art Folder
30:49Lesson Info
Adding Elastic Waste Band to the Skirt
So no, we're going to make our waistband and I have some one inch wide elastic an oversized safety pen to use for the elastic threat er ah this is great elastic it's nice and wide I will show you one thing quickly that uh this easter skirt I made my daughter year and a half ago I didn't have any one inch wide elastic in the house, so I just used this which is a half inch and it works fine, but it doesn't have quite the same just durability and just just, uh, what sort of looking for it doesn't end up holding the waistband quite a structurally together as a thicker, wider kind of heavier duty elastic so I would highly recommend the one inch if you have it handy the skirt can be made with a half inch or another measurement, but I just having made about ten of these now I have my preferences, so I thought I'd mention that so now the waistband cannot be quicker we're going tio take our back seem, which is our salvage right here and we're going to start pressing down the raw edge to the wro...
ng side the inside of the skirt using the iron and press it down about a quarter inch doesn't not need to be very far you can either this or you can carefully measured each time I've gotten to the point where it's pretty quick for me to just glance and see that it's about the same so this is your first fold it's going to be a double fold waistband and you want to just move your way around the skirt, folding it down, pressing and repeat so when you get back to where you started, great now will pick up our elastic and we're going to use it as a visual guide to how wide our second fold needs to be. This is a really sirti have your version of the elastic, so you're going to want to give this one a little breathing room essentially you can see here I want a little bit of room for this elastic inside the waistband casing. I don't want it to be crazy tightly crammed in there because it's a very nice heavy duties thicker, elastic so essentially what I'm going to d'oh is full of this town without pressing at and just kind of hold my elastic over it. So this looks good. I think I want a little space for the elastic fields move around so that it doesn't get tight it's not hard to feed through in a minute one we're constructing our waistband, so I'm going to use that as my guideline and I'll show you again because as I go around, I want to keep holding my elastic so that it's a good reference point making sure I never so it too narrowly because otherwise the last six harder to feed in as I just said so this is good it gives just a little bit of fabric space above and below so when you do your straight stitch it will stay there and one thing I can tell you that's nice about this is if you so your waistband a little too generously in the elastic kind of has more room to move than you want it's a lot easier to add a quick extra row of sewing or to take it out and fix it than it is when you saw it a little too narrowly and you can't even cram your elastic and side it's just a little bit more of a process and you don't even have the glory of the waistband so I like to give it a little bit of breathing room if that makes sense um for my adult skirts I'll just show a very simple quick thing I do a somewhat similar waistband but I use a narrower elastic texas has a zipper and it's pitted so this waste ban is the only things giving the skirt shape with my adult skirt I took a nearer elastic inside and his executive just as I did to him if you can see this on the screen and what's nice about this is that it makes it really simple and flat but you don't have to go to the trouble of feeding the elastic through for this girl's skirt it's just really nice having something that's very sturdy at the top because of your daughter's is activist mine as she's going to need a good a good skirt that stays with her through three recess is a day and whatever else she gets into so when a double check my that's getting a little tighter, I'll give it a little more and another thing I'll mention with ease as you can always add another tear so that if you really love a fabric but you don't have eighteen inches you can stitched together and make, uh skirt with several fabrics like a slightly a patchwork effect I would join those two with french seems if I were doing that but this is such an efficient pattern is just a half yard is absolutely all you need unless you want to make an applicator to match, in which case I'd buy a little more like two thirds of the yard and have a little more fabric left over to play with how are we doing with all students were doing okay, holly you if you're okay it's secret club handshake for the, uh full the seam of your finding oh yeah let's go over that again let me just show you my finished one let's see mystified that real quick because I'm a cold so I know you did a diagonal but on those but I always have to look it up every time I do it because I forget e know exactly I like this street joined for this because it's just quicker and it doesn't have quite as much of a visual especially if it's something with a pattern that's very graphic like sometimes the diagonal can kind of break it so all I do is where you with yours I'll just come right over oh oh yes totally so you'll want to overlap that andi I would turn this one since it's got a little edge you want to turn that they overlap half inch and you can use that as a great measurement and as soon as you have it trimmed so it's the half inch that is great so each one has happened entry yesterday overlap like say where me thiss parts between many fingertips is happen inch and then that second circle and then you'll just once you get the half inch you will join them right sides together and flat and citizen with a quarter inch which essentially gobbles up all that little extras balance got great and then you open it all the way out so the little raw edges of the sides and the end are both aligned don't so it's while it's so folded because it'll just end up being bulky and it won't be a zoo need a joint and switch this one yeah so for this you want to do the streets touch great that's so all you'll need to do is change the dial the streets such I think uh stitch sizes pretty versatile and then I'm so that so those together there and you'll be totally good to go I don't see I'm going to double check my last week on yeah, a lot of different kinds of types of elastic on the market I would imagine I might have missed this because we were also re threading the machine um that it's a non role that you recommend yes, exactly exactly and because some are and some aren't yes, yes it's good to look into that because the stretch really varies wears if it's and is comfortable really varies but yes, good great point I this one's so I haven't seen the packaging, but I I always look for that thank you for mentioning that becky so let's finish up our waistband really quickly and that easiest way to do that is take your backs now that I've penned it and pressed it all the way around, I'm going to open out my back section, which is here with the seam and I'm going to leave about a four or five inch opening there and you you won't so that that's where you're going to feed your elastic through and I want to set it for my straight stitch again and you'll want to change your threat here if you're using something that is completely different for, say, the binding tape so I will just very quickly switch out to my light lutheran that matches my main fabric and you want to change your bob and and mean thread if this is ah, an issue in you're doing a separate fabric okay? So home stretch time all right, so I'm just going to so mice straight stretch for constructing this week's pant I want to start at the back, leaving my large donors opening for the elastic and in schuss skin a stitch very close to the fold it doesn't have to be exactly there, but just keep it consistent need straight such forward and you don't need to baxter cherokee she'll catch it in a few minutes let's see how this looks since I chose to just the thread perfect I have got it on a standard such length of about two and a half just closer to three keep moving my waistband forward so it's not being pulled no, you'll see I'm coming back to me back seems they want to stop around right here, so I've got plenty of room to feed my elastic all right, so now I have ah stitched waistband with a channel for the elastic two feet into the bottom of sorts completely done says is the very last part so with this elastic I'm going to feed a large safety pin I'm gonna clip it onto a large safety pen and this is a bit of a child near they also sell really nice elastic guides that you can buy, which are wonderful and work very well, teo but just for at home grab something handy you can feed it through thiss so it's kind of whatever works for you what I like to do is kind of press this forward and then holding thie safety pen with my left hand, I just kind of gently tugged the waistband with my right hand, so again I gathered up so that the safety pin had is as far forward as I can get it and then I just kind of gently took the waistband back they're in any number of ways to do it, but as you can see how I was looking at my waistband before, I'm glad I left it a little bit of wiggle room because now it's much easier to get everything fed through without getting caught so most the way around and of course when a safety pin just opened but luckily my sewing ninja skills are improving after fifteen years, so I got it closed back up without having to take it all the way out that is a hazard though don't poke yourself and here it looks like I vis but we're yep the waistbands a little narrower so it's feeling grumpy about getting through this one place you just try it again and really it's not like uh can sometimes work around it honestly getting your seam ripper out is not the end of the world it happens more often than most of us would care to admit so if you do end up with a place where it's a little narrower and it's being irritating and not really wanting to go just get the seam ripper out and redo the scene it's much easier so holding up some hope that I'll get this one is over but um almost the end which is great so in a smooth the stone as you can see your elastic definitely make sure it's longer than your eventual waistband will need to be with a girl skirt honestly the most reliable to me is measuring a girl's skirt that fits your child or friend well it's just kind of a nice way to do it because then they end up with something that's you can always open this back out and adjust it it's really easy to d'oh but it's a little easier than measuring a live child to you know just of a finished garment is a little better of a gauge sometimes then I'm measuring but either will work fine so almost there so here's my here is the other side of the waistband degree so this safety pin is a great size having now hung out with it for five minutes I would say it's a little bit of a lightweight wait why? So if I were starting this again, I'd use two of these just I had a little something more substantial to grab onto you um I just use quotes her safety pins from the fabric, sir, but this one I think, is a little later wait for general use so you might want to double up on that. So I've got a skirt of my daughters that fits her well for comparison, I'm just going to gather my elastic so it's got a little bit more of a waste definition and I'm going to take this skirt that I know fits her really well, measure the waistband and duplicate that and then as soon as we join the sway spanned we are good to go, so holding the skirt like thiss a measure across front yeah, I remember this is a twenty one inch elastic I remember from sewing it in july, so I'll start this here pennant for a quick overlap and that's already serena looks so cute I love these skirts what's he so that one is still a little white that looks like more like twenty two and a half, twenty three inches my daughter console her clothes from that air technically to t she's almost six and a half so air on the narrower when it comes to things like wastes was almost his biggest her and she won't do that though yeah one more little spinach and then we'll be sewing this together yeah that backpack should should last her a while it's so yeah it's so big it's like um I actually carried it when we went I gain suijk it's kind of fun carrying a rainbow backpacker on in the world all right there we go this is a good ballpark for her and honestly another thing you khun dio is once you've so in this before you seal up the waistband I'll tell you where to stop in just a second you can easily adjust this elastic again it's much easier to make it smaller and smaller than make it bigger so I'm turning away the excess elastic I've made really sure that it's not twisted so it's all need and held together so now the skirt as served its purpose I've got an elastic that's overlapping by about an inch this is going to give me a little space to let it out if she's gross and I want to just add a little more waste give and I want to put it on the streets touch you can also do this exact here but I'm just going to do straight such and do a box stitch around the elastic so it's ready to go so I'm gonna adjust my such length tio longer because this is really thick so through chop my needle and without catching any of the colorful fabric waistbands just see elastic right now that's all are so I'm gonna back a so ford back stitch and then go to the end of the raj sown I've sewn and back such this whole thing I'm going to go over it one more time and then drop my needle habit to turn a ninety degree corner again making one hundred percent sure I'm not catching my skirt and here and then stitch forward again. This isn't as crucial since the last it's going to get the majority of the wear is going to be the horizontal elastic and not the vertical it's not quite as important to stitch that over and over again, so I'm going to do this second perimeter the same way to the first one was some back searching and then last side of the box and I'll clear all this other threat out of the way so it's not as messy okay, so I've got an elastic that has, um a reinforced box stitch clear these extra threats out of the way and trim my access elastic really quickly so it's not pointy and then he'll adjust your elastic so that it neatly fits around there's this skirt this is a great place to put in a personal tag or name tag if you have one it's really nice to be able to just kind of make one that says your child's name or made especially for you or something that's kind of a nice extra touch I'm gonna press my waistband down a second time and this is going to be a heavily gathered elastic so it's not going to lie flat like arnhem stone but that's fine, we're just going to do our last little street stitched to seal the deal and as you can see, I've got just this pen together I'm using my streets such I'm going to adjust my length back to a standard one again of about two and a half from that longer stitch I used to join the elastic since it's so thick and when it gently opened the south, drop my needle and just hold this waste section about us flat as I can get it it's nothing that's an if you stitch into the elastic that is totally fine it's not the biggest deal but it's nice if you don't because then the elastic and move more freely so I am going to back such here when I get started sewing and then keep going forward and then just a little bit further and we're done with the skirt let's see just one second perfect. Sometimes it's easier if you just shake it out a little bit. So it's? Not quite as tight. I there we go. I'm just going to repeat my back. Such just a catch this again. Great. So you'll have a few threads to trim on the back side and on the middle on the inside of the waistband. But go rainbow skirt. Yeah, waste had you know how much have tied to pull that? I would say compared to skirt that that your child well, or measure her waist and then out a little bit, I think honestly, trying it on based on a skirt measurement is the easiest I have for certain elastic brands. And as becky mentioned earlier, there are different elastics. So I know this this one and so you could eyeball I have. Yeah, and that's the one thing that is actually what's great is when you stitch the box such of the elastic you don't have tio, you know, just seal the waste immediately. You can try it on the child and then if it isn't right, adjust the box so I I always give mine a little wiggle room and then I always knowing my daughter end up adjusting it down, ok, so yes, so here is this finish skirt and and just though quick thing I'll mention is if you want to do a double fold him instead that is totally easy you'll just fold it the same way you did it. The waistband not as wide since you won't be feeding elastic through, but just a quick double narrow him and you can zigzag or streets to decide a swell. So there's lots of options for personalizing it half of students don't caroline, how did you do? I think I'm all right I have to do did you do so with a straight ditch? Yeah, he lasted together. Yes, I did a box with a I made a little box of st stitches. Okay, yeah, I can't believe that again. We've got something just a narrow go we had just a few bits of fabric here in front of us and now we've got such a beautiful finished garment already. So and susan unfortunately make it look so easy. A cz well, it's, so much fun, but I think judging by the online audience there following along very easily. So this is great in a great segment on going look atmore kids clothing in our next segment tell us about that! Yes, I'm excited we're going to dio garment just a simple assists, but a little more light hearted it's ah a bit of an after school thing, but we're going to make a really simple cape. And your you have opportunity used two different fabrics that you can mix and match colors with, and then an optional decoration or applicator. That, too. Superheroes that kind of have salute till then, I'll be there. I'll make one for myself.
Class Materials
bonus material with purchase
Ratings and Reviews
Amanda Siska
Susan's projects were the best introduction to sewing I could have hoped for! I wasn't able to watch every project, but the ones I saw were simple, VERY clearly explained, and perfect for a beginning seamstress like myself. I'd never used binding tape before, or elastic, but now I'm confident about making my own binding tape and adding elastic waistbands to pretty much anything. I was immediately inspired to make a few skirts for myself after watching the simple children's skirt in this course, and I'm planning to make cloth napkins and an oilcloth lunch sack as well. I wish I'd gotten to see the applique portion, so I think I'll have to purchase the course in order to see that part. I'm positive that it will be just what I need to learn the process! I see that the previous reviewer was disappointed by the lack of diversity of crafts for this course, but I find that the name "Simple Sewing Projects for Beginners" was completely accurate for what it was. Perhaps it was categorized in a craft category, which would still seem applicable. I think it was advertised as having back to school projects to make for your kids, which is an even more detailed description of the course, since it includes clothing for boys and girls, as well as a lunch tote, cloth napkin, cape, and maybe more things I missed. Overall, this was my first Creative Live experience, and I was blown away by how informative and fun it was to watch!
user-c76ced
What a great class! Susan does a fabulous job explaining each project and is great at giving you a heads up on what issues you might face with each project. I've now made two applique projects with another in the works. I've also made two of the girls skirts. Susan gave me the confidence to try and I am really happy with the results. Hope to try the binding tape soon. Thanks for offering this video.
user-c468fb
Fun projects to make for your little one. Susan explains things so clearly. Very nice that she also offers patterns and written instructions for free