Lessons
Day 1
1T-Shirt Appliqué Prep
27:26 2Basic Stitching: Satin & Zig Zag
21:16 3Adding an Appliqué to Your Shirt
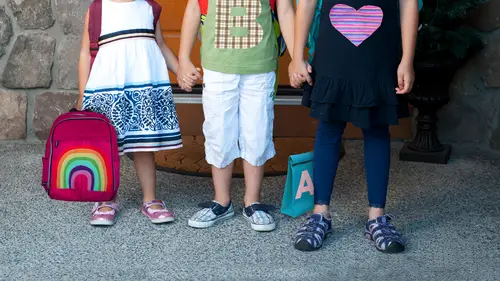
42:01 4Backpack: Rainbow Appliqué Prep
26:58 5Building the Fabric Rainbow
16:12 6Zig Zag Stitch: Layered Rainbow
19:46 7Creative Kids Clothing: Simple Skirts
36:32Adding Binding Tape to a Skirt
25:39 9Adding Elastic Waste Band to the Skirt
27:58 10Easy Superhero Cape
22:56 11Embellishing Your Cape
35:15 12Basting the Cape
20:26Day 2
13Oil Cloth Lunch Tote Prep
29:13 14Sewing Oil Cloth Lunch Tote
30:01 15Building the Lunch Tote Body
21:14 16Adding Pearl Snaps & Eyelets
29:00 17Creating Unique Cloth Napkins
42:27 18Prepping Images for Art Tote
32:25 19Creating Denim Frame Around Images
23:49 20Patching Together the Art Tote Bag
29:04 21Creating Box Corners on the Tote
26:14 22Adding Lining & Handles
24:05 23Oil Cloth Art Folder
30:49Lesson Info
Adding an Appliqué to Your Shirt
So once we're at a great place with our test stitches and like how our final one came out can go ahead and start search your application. So remember when you're sitting a zigzag course satin stitch, you'll want almost all of your stitching I'll just show this again is a quick visual you'll want ninety plus percent of your stitching to be on the fabric and the t shirt you're goal is not to catch fifty percent fabric and fifty percent t shirt you really want to stay with your design, which is why we chose a matching thread that coordinates their design and and also just how it just creates kind of a more of a stability you can even see here it's very discreet, but we can turn this way later I left the sun so I could show you here I just very slightly went into the fabric, leaving a tiny edge, which is totally fine and can easily be trimmed or honestly, one machine wash later won't show, but the goal is not to z veer onto the t shirt fabric because the notice flimsier and not really desi...
gned to take like a heavy stitch of that kind without, you know it's it's kind of partner in the applicator, so what we'll do is, as I mentioned, will start at the very bottom diagonal part of our heart and move forward so with the zigzag, you'll always have one side of this eggs I've one side and here's a great place to mention that having to move this part of my machine right off so I have a little bit more, yeah. Oh, yeah, let me show you again, it's, just a really quick slide out. So when it's locked and he'll just hold both sides of this and just kind of slide it away from the machine. Yeah, perfect! My machine at home has a similar feature. This is really nice for things like smaller projects, t shirts, anything of this nature because then you won't accidentally. So the back of your t shirt folded in it's totally optional, but for me, I like just having the chance to tuck the bottom layer of my government underneath so that it's just easier toe maneuver. So here, what you're going to do is use your fly wheel on the side. Two drop your needle slowly to the left side of his exact as you can see on this, the left side of his executive this in this sense we're moving up, you'll want to drop the needle slightly over onto the fabric. It's not a huge with and you can always move it once you've dropped it, but you'll want it to be you don't want it right on the edge of the fabric you wanted just the width of this exact over so that your stitches will hit right in here and the other side of the stitches will hit along the edge of the fabric. This is one of those pictures worth a thousand words things so once you've got your own fabric ready, it will be a lot more obvious when you're looking at it, so when you're dropping your needle, just make sure it's just, you know, just like an eighth of an inch from the edge of the fabric so that your or even a little more so that yours exacts will be on the fabric and that your opposite side you're right side of this exact will be paralleling and tracing the outside of the application so our stitch settings are all where we want them. We'll just start sewing forward and just mention here you don't need to go really fast. This is kind of nice to just get a feel for so it's just like driving a car or anything where you'd like to kind of get started a little more slowly so you'll stitch forward and then once you get off a little ways up, you can check your searching I really like how mine looks when I left the needle down when I lift the foot and leave the needle in the stitches I can just see here exactly where my stitches are anything they just have a nice even look I'm happy with where they're joining the applicator to the fabric so I'll just keep going that way and when you get to the curve we'll just chat again in a minute so now that I'm at approaching my curve I stopped with my needle down in the heart fabric not just in the t shirt it's just ideal whenever you stop and have your needle down it's it's ideal if you can have it in the in the applicator just like that great and then we'll rotate it just a little bit this isn't a dramatic shift it's not a right angle it's not like a u turn but we'll just want to adjust it a bit so that as we continue to sow ford following our curve well kind of have that as an easier approach rather than our original you know very diagonal angle so now it just keeps switching the same way don't change anything on your stitches except their direction and follow the curve just intuitively with your eye if your fabric excusing if your needle lands and just the knit fabric you can use your flywheel to pick up one stitch and just move it right over to the opposite side of this exact when you want to shift it again I like to maneuver my shirt or t shirt or whatever I'm working with with my hands a bit as well as just the needle working its magic and you can make a cz many ours few of these little course corrections as she want one other thing that is really, really ideal to mention now is that your always going to want to keep the back of your garment away from your stitching it's so easy to accidentally catch it underneath. So with this method, I'm also each time I'm stopping and changing my needle position, I'm also just quickly making sure that my other fabric isn't bunched up or going to be caught by these execs that's what seem rivers are great, but the less you have to use some of the better sinking my needle in there again, I'm at the top of this heart curve and I'm making this slight adjustment again so I can kind of go on the home stretch to the center top, okay, I am almost to the center of my heart, this is almost like a diagonal, so I'm treating it like that. I've adjusted my foot so that I'm kind of pointing in the way I want to go and I'm going to make a hard stop at this at the top center of the heart e all right, I think I've got a little bit sorry that's the way I always say I am in portland modern quote golden what we say about our quilting is ah there's any little tiny bit here there you say it's one wash away from perfection so now that I'm at the top center of the heart I'm just going to go a few stitches further I'll show you in just a second and I'm going to stop on the inside of my heart fabric not the t shirt as I've mentioned probably eight or ten or fifty times you know so when I pivot and I start my zigzag again I'm ready to keep moving forward with this new side with the curve and diagonal and I'll be doing this same exact stitching but because I stopped in the center on the fabric it'll slightly overlap itself and just cause a very smooth need transition if you land in the t shirt that can end up leaving a gap that isn't stitched of the fabric the t shirt can distort and move a little bit the woven is just a much better foundation for your kind of big angle turns yeah where's your line of sight when you're watching because I know if you watched the needle that's not normally the best things so I kind of just watch I pick a spot in the foot that's a great way to do it I'm cheating foot at home called it creative foot satin foot and it just it's designed for a blind woman so it just follows the curve so I don't have to dok this's we're concentrating yeah, I like here how on this but there's just that small kind of concentrated like a long oval so for me, you know, it's just it is kind of, you know, you do have to keep your eye on it and be focused, but yeah, that's a great way to think about it because the needle sometimes can feel like you know, it's it is going to move and have some flexibility so you want to really be looking at that you're kind of eyes on the prize of the fabric area you wantto cover? Yeah, great so I'm ready to do my second curve I'm going to be able to do this one a little faster since I got some experience on the first one I will show you what to do if you make a mistake, so no worries there it happens this is definitely sewing live is a very challenging process, although when it goes well it's very euphoric and I will mention one thing that is kind of easier if you're a beginner is if you're doing a high contrast applicants shirt like if it's not his settle of a match it's just easier to see the edgier fabric all the compu gorgeous if you're doing something that's a little more color coordinated yeah he was self taught sewer or did someone teach you my best friend from high school you know cannot tio visit me when I was twenty five and I'd always wanted to sew and not my grandmothers both sewed but I didn't get a chance to learn from them as a younger girl but she came up to visit for a week and I bought in nineteen sixties aqua singer at a thrift store I fell in love with it and the week that she came to visit she showed me everything by the time she left I could she she left me hand drawn diagram of how to thread it because I was there is owed forget that in your journal yeah exactly and she taught me how to even put a zipper in and so by the end of the week I had made an apron a vintage dress with a just a calico just an expensive fabric and then a pillow apron and had started on a cord or a western jacket for my boyfriend yeah so this is very nostalgic it reminds you my very first machine because the machine heard about a mistake so we have a little oh yeah you know, let me finish just make sure my needle sound and yeah I'd be happy to show I yeah take a quick look over here started tio just wanted to stay in the one spot oh, yes totally that will happen let me grab my seam ripper seem reverse commute worth their weight in gold so yes, those kind of thread knots what I do is very gently because you don't want to tear your t shirt I try to get the majority of that threat as you can see, you know it's just kind of pierce through it and then I kind of gently move it forward now you're back well hopefully a lot of it will pull out now because yeah, we've loosened the front so it doesn't have anything to hang on tio um and then I'll trim that away and then we'll kind of repeat that process yeah, this is one thing and in some of our later project it's like stitching, finding tape and doing other layered projects I'm going to show you a few tricks her going around the heavier seems and the corners that I like that you know might save us a couple of these experiences because they happen. So what do you think I did to make that happen? You know, one thing you could do is wear it. Let me just look at the front again you oh, so you were right here. Yeah, at the top of the heart we'll just take all this out and then what I would do who is the nice thing was six ag is since it is kind of a tighter overlapping type of stitch you it's not like a straight stretch where if you didn't back such it might start to pull out you know and be the sea might start disappearing so once we get rid of the majority of that and you've kind of got a level playing field again I would start nazi training terrier t shirt there we go. Okay, I need to really good light oh, I know that makes a huge difference. Okay, so what I would do here is start again sinking your needle right there where it's in there and then adjust your stitch length just slightly upward so it's a lie a little bit longer we've had a nice you have had a really nice kind of taters exact but I would maybe move it a little bit less dense, ok? And then when you stitch forward, move the fabric a little bit you don't have to worry about just shoving it forward but I would just kind of give those feed dogs a little help so that you don't get caught and that sort of like traffic jam. Okay? Yeah, but I did definitely happened after that together through hard fabric just certainly the needle in the heart fabric at this about one part of the heart yeah let's get this oh organize it is just a little ahead of the team you know so what I do it across like I would turn yeah so you're going to be moving forward just as you would if you hadn't had that little glitchy part oh I love your notebook that one's really good okay okay then so you'll drop your needle into the fabric into the yeah using the flywheel that should I put the foot down yeah you can put the foot down so it's just kind of gently holds it in place and then sink your neil and making sure it's to the left side into the fabric I am great so now you will just let me just take a really quick peek if I can just lift your foot for a second great so now just gently moving the fabric a bit with your hands just starts exacting forward trying to just let the fabric have a little help everything forward rather than kind of getting caught and then having that you know triple quadruples point yeah that's better great her friends yeah I um I know that feeling very well the fabric a bit a top is that something that I could just go back yes over or we don't see what locus there's a coat oh yeah for that one it's so close I might just shot a second time you can also gently remove your stitches I think it will merge nicely and it won't be a very overwhelming look because it's such a it's such a big contrast there there I will read this is all one continuous threat and applicator with the black being such a vivid ok, yeah, ok, so I just yeah, about yes, one ship that is just finish us normal. And when you finish, you don't need to back stitch more than a couple of stitches because it will join and kind of have its own kind of natural ending where you such over your beginning, when you're completely done, take this off from the threats and then I'd go back and just kind of sits just to catch the stitches and the fabric together, just as you said. Okay, questions coming in from online one from michelle and one from elizabeth and their post asking about fraying on how do you stop the fabric from fraying? And michelle is saying that after a few times she's washed her stuff. The frame, the application's frayed. Does them backing? Make any difference? Oh, yes. For that one, I would say the number one thing that makes the difference is a really nice, tight, secure stitching line. The backing, good quality, backing fuse herbal is very important, and one thing I really like is I'll make notes in my notebook when I use different brands, but I like a lightweight but very durable if usable and then I'll make a note, if a t shirt after a few washings, like one of my sons or daughters, he knew didn't stand up a swell I might re stitch or kind of do of humans, but the having a neat, clean stitch mark is a really just stitch line is a really, really good insurance against spring, and some of the brands of fuse apples will say that you don't have to sew around the edge, but I usually find that it makes a nice difference, so this would be my quick tips. Michelle was also asking what heat setting you need for the iron when you're actually using the putting the path? Oh, I'm using a cotton setting because that's, what mine calls for but if something else is ah is mentioned, please just go with that, but a hot iron in this case light spray starch or water for my brand and then also keeping the iron moving so that you don't scorch or have anything get kind of over pressed and iron shine is ideal. Thank you very much. Yeah, how's it going? No going good, I finished great, but I have some extra strings, like from where I messed up, yeah, like loose one sticking out. Yes, you can use either gently tugged them if they're the ones that we took out that they may not be connected they could easily tuck away or you can slip them with scissors if there is the one that is finishing the other stitch so that's like the stitch that I first did always the tail yeah oh yes just trim that was scissors and close to the edge perfect here I'll just finish up mine I'm so excited you guys there finishing up this project awesome and then just show everyone at home tio how I do that end of the heart so for my final I'm just continuing my same process I call this a victory laugh when you're on the last part it's so fun to be approaching the finish of a project so I've very tights exact like a satin stitch that's very, very durable you don't necessarily have to backstage very much are more than one or two, so for this one I'm almost to the end I'm just going to stitch the very end to do a very brief reverse to back such one or two six eggs and then pull it right off the machines so I'll just show you that the goal is not to stitch past that okay onto the t shirt it's really not a big deal it's not structurally a problem or anything wrong but it just can show and kind of pull that dinner woven t shirt and one thing I really like is when the applications just such a neat clean kind of part of the whole thing so for mine you can see the bottom of my heart I've got just just tiny little threads toe trim out and you can get jaco as you mentioned the fraying you can get just these few little fraying threads around the edges but really you can either trim or just kind of gently pull them way depending on how connected there yes, sir here's my little heart up like a yeah, this thing down yes, absolutely. Becky can show you any more detail but that you just you push it down while you're sewing and it just for the duration of the pressing it reverses so you have got my daughter will be very happy to see me in a few days with a couple of new she saw me so this one last weekend was wondering why it wasn't going into her drawer. So so yeah, this is such a sweet one. So yeah, this heart was ah to me a great beginner one it's just it's got a few places where this action in a check because there's a hot pink component it almost looks like my fabric up pulled away there but that's actually printed fabric that's the same colors of sweatshirt so any other questions before I move on to things like the symmetry and a few other things to look out for a few more detailed application look at each of our ladies I know I can see that looking really good how cute I like all the different color backgrounds to I love those kind of multi color beautiful fund prints that really jump in a bunch of different directions yeah so I made the mistake it up at the top it doesn't mean it looks little country really looks it looks like there's a little mistake there is it president before okay it would be fine it won't like turn into a hole or anything you know let me look at it up close but yes a sze she said pressing it is great giving it a little spray starch it'll kind of stabilize and smooth the fabrics yeah you know that is totally structurally looks fine you know what else you could do is just stitch over it one more time even with the streets it's just to kind of give it a little line and body and then you could also so a button or something fun right there okay to cover yeah it's definitely yeah the most you know, if it's if it's bothering your eye I would just gently take the stitches out and redo it it's totally optional but I think it's going to stay together just fine um so I'd love to just go over getting a next project started that uses for example in alphabet letter or number this is when I made my son with his initials which he is very excited I tried getting a picture of him in it I got several blurs and then he ran out the door to preschool not changing back out of it anyway but this one was a very quick easy one to so and I just want to mention here too that although this one is another example of a color match on the applicator if you don't have the exact thread color of your fabric I would just use a neutral or something that's kind of compatible with it and really it won't be a glaringly huge difference as you can see you know there's thiss fabric for example I used a kind of a warm kind of ah kind of a simple yellow but you know they're places where the yellows stitching against gray or against white and really as long as it has kind of a color match that that that goes well with your eye it doesn't matter if it's an identical color match the fabric so for our next when I thought everybody could just get started with a project that you could maybe take home or finish later but I just wanted to show how I do one there was a slightly more a non symmetrical application so let's see what I have here? Well, since I made a rainbow for uh my daughter I'll work on another initial t shirt for my son and see this one is the I really like how it just feels like it's got a lot of in simplicity it's got straight lines here and curves here and did you guys choose letters or numbers? There's also stars in the download pack if anybody wants to do stars I brought this to show this is just an example since I knew we wouldn't have time to so every single thing this one isn't even fused yet I was gonna stitch it if that was a good, hopeful teaching tool but the's stars is this one I made for my son last week with the star patterns that are part of let's see him so I want to make sure that it's shows up on the screen so these stars are really nice simple one to dio there are a lot of very straight lines obviously you'll do hard pivots and just keep going in these directions at both the points and the's corners but it's a lot of fun to do straight line application it just has such a clean classic beautiful look so with the ones that we're doing these will be separate they will not be if you're doing for example, if you'd like to do two letters together what will dio is keeping in mind that our fabric will be showing the correctly oriented letter it's come times helpful to me to think about it as like a sandwich where this is the front that everyone will see. This is the fuse herbal and will want to have it in this case, I'm b a with me, if usable behind will want to have the fuse herbal read correctly, so just to explain it a little more clearly, you'll want a trace on your backing paper, which will be peeled away and is on ly for the purposes of transferring the pattern, you will trace your letter backwards that way it will create the fuse herbal that the fabric that will be on the front of the t shirt will be front. So in my case, I'm going to move towards the edge of my few zobel again, I love just save my scraps because you you never know until you're making, like, say, for example, these tiny heart, she could make a little row of seven and rainbow colors that would be a great way to use these tiny pieces, so holding it up against light or whatever works best, I'll start tracing my I'll do it on a darker surface that has a little more contrast, so, um I was just I have one more little tip to share that I made in my application notes oh yes is is it when you're doing something straight like an e you can always use thie edge of your street if usable as one edge you don't have to go in and let's knock a fabric with salvage you can easily use the edge of the and again it doesn't have to be and neat straight line something like a light box would be ideal for this because you can actually see it more easily I love how these letters are very dark black so they have a lot of the um a lot of it it just shows right through but it is in this brand does have some transparency so it's not a flat surface but I'm just gonna hold this up so I get some light shining through it and you can use for for like my e for example which I've mentioned it's a very straight up and down letters you can use for example this quoting ruler is just ideal once you know where your straight lines should be you can line that up and child down you can also measure how big your letter is just for example mine is five and a half inches tall and almost three inches wide so that's an easy way to do it just to use that gauge as a straight edge I'll cut it up I'll do it on three just for that purpose so there's the spine of my and it is nice to have just a little bit of access is I mentioned in the first one around that so I'll just get a little longer than it wass and using my scissors all trim away around this leaving some extra that I'll be turning my fabric away when it's ready so here you can see this holding it up to the light I have caught the bottom and the spine of my and now I can see where I made my lines earlier right here and I can again use a straight edge to follow that I'm holding this up to a window would be ideal you could just scotch tape the pattern to a window and use that as a very easy way to transfer kes I'm just continuing to hold mine up to the light use my cage and I know I'm certain letters like e or oh don't have you know is much of ah symmetrical issue is like a q or b or d but I'm just doing it this way so that for a little solidarity with those of you in with off about letters that don't have quite as much of a easy straightforward so making these little reference marks and then using a straight edge or using a light boxer window is a great way to get the detail here I'm catching the inner spine of e it's. Just a couple little reference marks and there's that almost son how's it how's, everybody's coming good that's, why did you choose some shapes as well? I would start us tall, so I love the stars and stars or greats like hearts. They're not symmetrical, so it doesn't involve too much worry about about backwards reading or anything like that. All right, so now that I've done the extremely low fi version of a neat pattern, you can see with the way that it's reading it's going to be correct on my fabric, so I'll just quickly show thiss I'm preparing it the same way I did the first time, using a fabric that I absolutely love that reminds me of the first grade learning to write your upper case and lower case letters, and my son's favorite color is yellow, so it seemed like a good choice for him, and I just wanted to show here how you'll want with something like this. I chose this one because it's a course on a line, so you'll want to have them be you can always do a bias application. If you do that, you'll have, like a diagonal, for example, if there's ah, you know, this would actually be kind of fun as you know I just ah falling or arising diagonal instead of straight but for this one will do it the same way we'll press it right into the back and you'll try not to use the fabric salvage in your application because you'll end up with just a little bit of that you know perforated area and sometimes the woven fabric isn't as quite the same consistency and texture so when a warm this here just since the fabric was colder so it has a little I really like how this one it just kind of catches some of those lines and looks very very classic back to school one of my favorite ones I've made um forever it was um his first e which was a diagonal plaid the one I showed in that photo earlier and I just really like how those designs look when you isolate them within like a letter or a shape there's just something so beautiful about a really well designed fabric how it looks when it's just condensed down to a smaller piece like a letter number star you can also fussy cut which means that when you're working with your fabrics you highlight special parts that you really enjoy I'd seen and then when you do that you'll be you'll be able to catch like for example in one of those fabrics because they're working with that have a few more intentional directional prints you can get some really, really pretty elements that really pop as part of a simple overall design. So I'm just trimming away my backing, and if you're using a two sided fabric apple k, of course you will already have peeled away that first side that was easier to remove and press it raided your fabric. Justus we did the first time, so I'm almost ready to turmoil this and then prep it for the second one really excited because our next segment is gonna have my favorite application and you'll use all the techniques that we've been working with today and then take them in another direction with a little more going on. So I wanna, um, catch this your master here's my e I really like again, as I said, how it just has such a cute, simple look with this kind of classic rating paper. Is anybody having any issues with the backwards or orientation kind of placement after they've gotten started? So for this, when I want to leave some space for a little again, especially since this pattern does remind me of sort of this early days is of practicing your capitals and lower case saw cut that one in a minute, what's my same pattern, so what I loved about creating the packet that goes with it. Of course purchases that the whole alphabets represented with upper and lower case all the numbers will need and then the hearts and stars that a good friend of mine michelle friedman helps me design as really simple really pretty ones you khun do either as you said before the small grouping ah large heart or what I thought would be especially cute is for the heart that we made you could do a second heart and to say a solid or contrast and put it right over ah layering technique that will be working on more in our next segment but there's just so many options with these simple graphic shapes and of course you're free to go in any direction of things your kids really love or other shapes or designs that really jump out at you. So one thing I would also really encourage you to do if you're enjoying these applications is just think about your own clothes or you know just I think about things that you could remake our or work on that aren't for kids adding a fun applicator to a tote bag, your child's initials or yours any kind of shape that makes a beautiful there's just so many directions to go and these air all machine washable you'll want to make sure you choose materials and base items that are machine washable but the way that we've made these applications they'll hopefully be very durable and be favorite pieces for years to come. I'm sure they will and I think it's wonderful that here we are we were only into our first segment we've already got a finished item it shows really how very simple this is great, the caroline who's beginning with some of our more experienced there, so it's a swell have been able to create this so, so wonderfully so thank you, susan. Great! Thank you went on, except what? We're going to get more adventurous than we've got some advanced applications coming up to tell us about, oh, I'm so excited for these. My favorite applicant project I've made was last year and my daughter started school, she was in kindergarten and I bought her a plane backpack just a hot pink win that I absolutely loved, and one of my favorite things about it was that she loves rainbow xyz I've mentioned, so I came up with a very simple, free, hand drawn, layered rainbow applicator that was just one of those things that I felt like I just was so her, but so many of her friends at school loved it tio boys and girls, everybody who sees it knows it's her backpack, so I'm very excited to have turned that into an neat, easy to use pattern and in the course packet that arun gets when they are enroll and purchase the class, you'll have the eight piece pattern to create it, layer by layer to make our very colorful rainbow. You can put on a tote bag backpack the back of a jean jacket it's just a fun one to make and it uses seven fabrics of your choice, whether it's solids or prints. Fantastic. What we're looking forward to that more to come thank you for your comments. Thank you, everybody who's joining us online, michelle, be too is with us on michelle is saying I've been sewing or trying to so for a very long time I still can't do a straight light, so I'm going around my heart has made it much, much easier. I said, I'm going to keep at it, I'm going to hopefully make a quilt on, then I'm going to call creative life. Wait, she's definitely says she's going to buy this class. Agassi is watching us on twitter and she's, saying, susan is such a great teacher so she's really enjoying that as well.
Class Materials
bonus material with purchase
Ratings and Reviews
Amanda Siska
Susan's projects were the best introduction to sewing I could have hoped for! I wasn't able to watch every project, but the ones I saw were simple, VERY clearly explained, and perfect for a beginning seamstress like myself. I'd never used binding tape before, or elastic, but now I'm confident about making my own binding tape and adding elastic waistbands to pretty much anything. I was immediately inspired to make a few skirts for myself after watching the simple children's skirt in this course, and I'm planning to make cloth napkins and an oilcloth lunch sack as well. I wish I'd gotten to see the applique portion, so I think I'll have to purchase the course in order to see that part. I'm positive that it will be just what I need to learn the process! I see that the previous reviewer was disappointed by the lack of diversity of crafts for this course, but I find that the name "Simple Sewing Projects for Beginners" was completely accurate for what it was. Perhaps it was categorized in a craft category, which would still seem applicable. I think it was advertised as having back to school projects to make for your kids, which is an even more detailed description of the course, since it includes clothing for boys and girls, as well as a lunch tote, cloth napkin, cape, and maybe more things I missed. Overall, this was my first Creative Live experience, and I was blown away by how informative and fun it was to watch!
user-c76ced
What a great class! Susan does a fabulous job explaining each project and is great at giving you a heads up on what issues you might face with each project. I've now made two applique projects with another in the works. I've also made two of the girls skirts. Susan gave me the confidence to try and I am really happy with the results. Hope to try the binding tape soon. Thanks for offering this video.
user-c468fb
Fun projects to make for your little one. Susan explains things so clearly. Very nice that she also offers patterns and written instructions for free