Lessons
Introduction to the Catalog Style System
23:54 2File Location and Methods
41:25 3Main Structure of Adobe Lightroom CC 2017
18:09 4Importing A to Z
27:26 5Image Selection Made Quick and Easy
12:34 6Methods of Image Organization
29:26 7Preferences in Adobe Lightroom CC
28:30 8Library, Develop and Map Modules
10:58Book and Slideshow Modules
07:50 10Print and Web Modules
13:08 11Developing Techniques
16:51 12Synchronizing Adjustments
23:05 13Additional Editing Tricks
13:13 14Fast Editing Presets
24:18 15Quick Develop Tool
06:57 16Using Local Adjustments
31:58 17Retouching Tools for Landscapes
22:45 18Dodging and Burning with Landscape Images
19:11 19Additional Landscaping Tools
07:30 20Retouching Tools for Portraits
28:17 21Create an HDR and Panorama
16:00 22Manipulating Image Structures
11:24 23Module Presets and Hidden Presets
18:37 24How to Create a Portfolio
26:06 25Connecting Your Portfolio With Lightroom Mobile
12:22 26Using Adobe Stock
29:58 27Publishing Images to Social Media
28:16 28Creating a Layout for Books
26:56 29Exporting a Book and Beyond
19:11Lesson Info
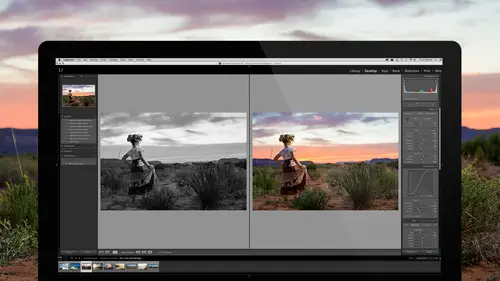
Quick Develop Tool
Okay, so now let's talk a little bit about, we're gonna reverse engines here just a little bit, because there's also another tool for developing in the Library module that we introduced last segment, and that's the Quick Develop area. In the Quick Develop area, it's misunderstood. It feels really bad about it, so I'm going to correct the record here so that people understand what this is for. The Library module, Quick Develop area is not there to quickly adjust your images. That's not its purpose, okay? The Develop module, let's, let me go to a set of images, so let's just go back to our selections here and highlight all of these images here. If I go to the Develop module, and let's just say in the Develop module, I'm highlighting auto-sync and I decide that I'm going to-- Well, first I wanna turn off our tone curve that we have here, so I'm gonna go in and flatten the tone curve. I'm actually gonna go in and reset the entire tone curve, so that-- Sorry, and then flatten this one. Ther...
e we go, okay. I'm flattening the entire tone curve, so that it's not that filmy look, so that we can see what's going on a little bit better. But otherwise, we're keeping everything the same and then I go, you know what? All of these images are pretty good, but I need 'em all to be brighter. Right? For instance, like, here I've got, this set of images here needs to be brighter and so does this set of images right here. All of these need to be brighter. If I take the exposure up on them, like this, all of them go up, but this one looks great and these are a little too bright, right? Now, if I go back over and just highlight this one through this one, and I fix that problem so that they're not too bright. Then I highlight, now I look at all of these and I think, okay, that one looks pretty good, but it could be a little brighter and a little warmer, and whatever. This one also needs the same adjustment, but look at this. This one is exposure plus 1. and this one is exposure plus 1.0. If I highlight both of these images and I think both of 'em need to be brightened up a little bit, and I grab this and brighten it up a little bit, it takes this one down. Because they go to the exact point. The Develop module is exact adjustments, takes 'em to an exact point. However, I can highlight everything in my entire collection and go to the Library. These are relative, so the point of these is that you can go in and say all of these images look good, but they all need a little extra contrast wherever they happen to be. They all need a little bit more brightness, and they all need a little less saturation. I can do that because it's gonna take whatever level they're at and move them up or down, and like this instead of putting 'em to the exact same number. Now, I can just go in here and say, okay, I'm gonna bring the exposure, so I'm gonna use the little exposure up. Then I click it up 1/3 a stop, then I'm gonna take all the black points down a full stop. Then I'm gonna add a little bit of contrast to all of 'em, I'm gonna add a lot of clarity to all of 'em, and I'm also gonna hold down the option key and change, if you look here, if you hold the option key down, I can change the saturation. I'm gonna take the saturation down just a little bit. I'm gonna hit the option key, take saturation down a little bit, and then I can also hold on and I can sharpen them. All of them need to be sharpened just a little bit, so I'm gonna click two clicks of sharpening and then I can-- Let's zoom back out here. Now, all of them have been adjusted, but if I look at say, this image, and go to the Develop module. That image is 1. and this image is 1.73. Where that's helpful to you is if you're shooting a whole bunch of shots outside, and your white balance has gotten it right, but they're all too cold. Highlight everything, warm it up a little bit, but not in the Develop module. Warm it up here in the Quick Develop area where it is relative adjustments as opposed to exact. Same thing's true if you're shooting events, right? You're inside of an event and you're shooting it, and you're taking pictures and your white balance is good, but everything's too warm. Highlight it all, bring the warmth down a little bit. Chances are, they're all decently exposed, but they're all too dark. Brighten 'em up. All together, at the same time, even if you happen to have gone into the Develop module and worked on one or two of 'em, if you don't know where those are, it will just go boop, like that. All of them will come up. It's relative, so that's why you need that relative Quick Develop adjustment tool right there. It's a really important tool if you understand how it's used. If you don't understand that about it, then it's kinda worthless to ya'. This question goes back to when we were talking about creating those camera defaults, and you were talking about, or a question had come in about lenses. Blue Sky asked, "What if you change the lens? "Can you still apply the default?" Yes, because you're using an auto. Okay. So, that's the key. Is every time you're applying something on a default level, you need to make sure it's in an auto mode. Make sure that it's actually doing it auto, so auto lens selection. If you're doing any kind of color, like up here in the Develop module, if you're doing anything up here, it needs to be either as shot or auto, 'cause otherwise it will apply it across the board in a very specific way. Anytime you're doing something like that, you have to add, you have to do the auto correction.
Class Materials
Bonus Materials with RSVP
Bonus Materials with Purchase
Ratings and Reviews
Melissa Maxwell
Worth every penny. I am completely new to Lightroom and it really is like learning a new language. Jared Platt did a great job explaining the most efficient ways to utilize Lightroom. There's a lot of technical jargon that can often make creatives lose interest, but it's important and useful information. I've watched several segments again and again. He's added years to my life and I am grateful. He's not my favorite instructor on this site, though, and I made good use of the 2x button on the screen.
Kat Jones
Well, I've been a Photoshop girl since the beginning and have dabbled with LR and thought I knew quite a bit about it!! It turns out I've just been playing with bits of it! This is an amazing course. I will need to buy it for all the tricky bits that I just haven't quite grasped. Jared is amazing. Clear, concise, methodical, smashing. Thank you, Creative Live. What a service! Cat Jones Wormit Fife Scotland PS - Delightful to see Jared's Scottish piccies - very familiar, although not with the model!!!
Jo Wilkens
Really amazing class. Incredibly informative. Mr. Platt is incredibly accessible and easy to understand. The course is thorough and I can't begin to tell you how helpful this class has been!!!! I fumbled around in LR but couldn't get half of it to do what I wanted, thought it should be able to do, and thought it probably did do (to live up to all the accolades I hear from other photographers).... I'm so happy I'm just about in tears to see what I'm going to be able to do going forward. Thank you, thank you, thank you!