Image Selection Made Quick and Easy
Lesson 5 from: Adobe Lightroom Classic CC for BeginnersJared Platt
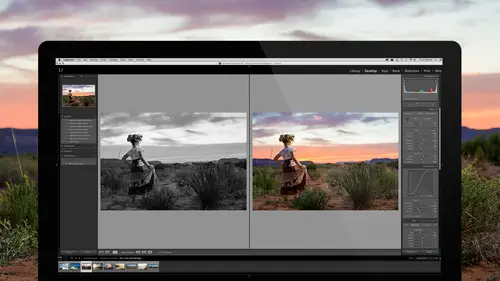
Image Selection Made Quick and Easy
Lesson 5 from: Adobe Lightroom Classic CC for BeginnersJared Platt
Lessons
Introduction to the Catalog Style System
23:54 2File Location and Methods
41:25 3Main Structure of Adobe Lightroom CC 2017
18:09 4Importing A to Z
27:26 5Image Selection Made Quick and Easy
12:34 6Methods of Image Organization
29:26 7Preferences in Adobe Lightroom CC
28:30 8Library, Develop and Map Modules
10:58Book and Slideshow Modules
07:50 10Print and Web Modules
13:08 11Developing Techniques
16:51 12Synchronizing Adjustments
23:05 13Additional Editing Tricks
13:13 14Fast Editing Presets
24:18 15Quick Develop Tool
06:57 16Using Local Adjustments
31:58 17Retouching Tools for Landscapes
22:45 18Dodging and Burning with Landscape Images
19:11 19Additional Landscaping Tools
07:30 20Retouching Tools for Portraits
28:17 21Create an HDR and Panorama
16:00 22Manipulating Image Structures
11:24 23Module Presets and Hidden Presets
18:37 24How to Create a Portfolio
26:06 25Connecting Your Portfolio With Lightroom Mobile
12:22 26Using Adobe Stock
29:58 27Publishing Images to Social Media
28:16 28Creating a Layout for Books
26:56 29Exporting a Book and Beyond
19:11Lesson Info
Image Selection Made Quick and Easy
Now that we have the images in and you can see that all of our smart previews have been built because the now bar is done, so we're done with that and we've synced to Lightroom Mobile as well, look see, they're only syncing four photos and actually those four photos it's a mystery what those are. Every time I'm at my studio, it synchronizes those four photos but whenever I'm on my laptop there are four photos that can't be synchronized and I don't know where they are or what they are but they're somehow not available here on my laptop, but they are at the studio, so when I'm at the studio then nothing's synchronizing 'cause it's all done, but then when I'm out on the road there's four photos that I'm like I don't know which ones those are but they just obviously are not available. And that must drive you crazy. (laughs) It does. So anytime I'm on the road they're always the same four photos constantly synchronizing and not being able to synchronize 'cause they're just like I can't ...
find these. So anyway, so here we are and we're looking at our images and now we want to start selecting these images. So what I'm going to do is I'm going to go instead of working on these images, we'll come back to these later. I'm actually going to go to my images here of a wedding. And I'm a wedding photographer so that's what I do, so you get to watch me select images from a wedding. If you are a portrait photographer, it's about the same thing but faster 'cause there's less images. And if you're a landscape or a product photographer or you just like to take pictures of your kids, well if you like to take pictures of your kids, you might have just as many pictures as I do from a wedding 'cause you might just snap snap snap snap and hope for a good one. But the point is is I'm showing you the absolute worst case which is a lot of images and you've got to go through them and whittle them down. But you can extrapolate to your circumstances don't think just because I'm showing you wedding images that it doesn't apply to you it all applies to you you just need to take the principles and the ideas and the techniques that we're using and apply them into choosing an image from traveling or whatever. Okay so what I'm going to do is in the grid mode it's kind of a confusing ugly mess in the grid mode actually because you're looking at all of these star things and the megapixel sizes and all that kind of stuff is just really annoying to look at, so instead of looking at it this way I want to look at it in a cleaner way. So let me first tell you how to get around here. So inside of the grid module if you click on either a collection of images or if you went and clicked on a folder of images, it wouldn't matter necessarily which one you did, you then look in the middle here in the grid and there's some keystrokes that you need to know in order to operate cleanly and effectively. So the first one is the Tab key, when you hit the Tab key it pulls the sides out. So once you've figured out what you want to look at then you don't need those side tabs so just tab them out and now you have more space. If you instead hold the Shift key and hit Tab it gets rid of all of that stuff, top, bottom, right, left, Shift Tab. So I like to work with nothing showing on the top, nothing on the right, nothing on the left, but I want to see the bottom so I come down to the bottom and this is true anywhere, if you go to the bottom and you click on that little triangle it will keep this bottom area open, same thing's true over here if I wanted to only show this I could click on that triangle but we're only going to need this thing open right here. So now I've got a lot of real estate and I can see all the images down here as well. So the next thing I'm going to do is I want to be in the survey mode which is the End key and when you're in the survey mode, any images that you click and Shift click down here so if I click on the first image and go to the end of all of these images, if I Shift and click right here, it shows me all of those images that are similar together. So I can see all the different images and then I can choose an image whichever one I want, so if I click on this, if I hit the Z key, that zooms in and do you see how fast it didn't wait, it just knew it was sharp because I've built the one for one previews, so I zoom in, and I like it so I'm going to hit the P key for pick, so now it has picked that image, pause. I will get 1,000 emails about this one thing and if you email me I won't respond because I answered it right now. Does everybody understand? Don't ask me about this 'cause I will not answer your email. If you hit the pick key and it automatically picks all of your images on screen you're like what the heck that's no good, 'cause I just want to pick this one, this is what I want to do, I want to add the pick right there, see that little flag, that's what I want. But if it adds the pick to everything, come over to the right hand side, click on this triangle and right at the bottom of the right hand side, there's a button I'm going to make it really big and it says Sync, but if you click on it and it says Auto Sync, everything you do to one image, gets done to all images. So if you pick one, it picks all. So unclick Auto Sync when you are in the library module and you will be fine. If on the other hand you have Auto Sync on and you email me and say you're having this problem, you clearly did not listen when I was telling you. Alright, just little housekeeping for me that's a little me time right there, that will give me a lot of time to play with my kids (laughs) 'cause I hate that question. That's what's so important about this class is that it gives you a ton of pause moments like that one. That's right, alright, so once I've done that, I just picked one image. Do I need 50 images of someone having breakfast? No I just need one image of them relaxing and having breakfast and so then I'm going to click on the next set of images and I can just scan through all the way til oh about there and Shift click and now I've got a whole bunch of images and I can just scan through. And basically what's happening here and this is methodology that I'm teaching you right now. One, always look at your images as a collection, look at them together so that you can choose between them really quickly, if you're looking at them one at a time like this and you're cycling through them like this you're never going to choose the right image and you're going to do it really slowly so it's a bonus, you do a poor job and you do it slowly it's like a super dumb bonus. So instead look at them all together at the same time and then pick them based on comparative review, look at them look for the one that looks great. So I like this where he's looking at her and she's looking at that, I like this one where they're touching and he's handing it to her and she's looking at it, so I'm going to click on that one first, zoom in, I like it yep so I'm going to pick that one and then I'm going to look at the one where he's looking at her and she's got it held. I like this one, so I'm just going to make sure it's sharp yes it is, so I'm going to pick that one, and by the way, if you're operating with this hand on your mouse and this hand on your keyboard it's really annoying to have to zoom in, the Z key is over here and the P key is way over there and so it's annoying to hit Z and then go over and hit P. So instead you could use the tilda key which is above the Tab key, it's that little thing that goes above N's in Spanish. So if you click on that, it toggles between pick and unpick. See that? So I'm just toggling pick on, or you can use the one, two, three, four, and five keys which give you stars, one, two, three, four, five. Alright so those are the keys that are of great interest when you're picking and then the last one is the kiss I'll go in here and zoom, yep the kiss looks fine pick it and then I'm going to go click on the next set and this all looks good here, I'm just scanning through to see, I like this one, zoom in, yeah it's sharp, pick it. I'm going to put the one where she's putting them on here, perfect, and give it a star. Notice now I'm not only just picking but I'm also adding stars, so really the pick is like the entry point, if it doesn't have a pick no one gets to see it it's gone, it's going to be dead. And then one, two, three, four, five stars is just me saying I like this even more than that, so it might end up in a slideshow or a book or something like that. Okay so then I'm going to click on these here and I like see how this one is all about the composition, that's too close to the edge, that's cut off, that one's perfect so I click on that, I feel like is it Goldilocks and the Three Bears too soft, too hard, just right. Okay so that's this one. So when I'm looking it's so easy to find the perfect image when you're looking at them all at the same time so I just zoom in, make sure it's sharp, pick it and give it two stars and then I go to the next one, next set. And that's going to be her looking at the dress. So that's the way I go through the selection process, it's very easy to do it's casual and the thing is things are just going to pop out at you. If you're looking at them like this things are just going to pop out at you and you're like oh okay I like her grabbing onto the dress right there so I'm going to zoom in, that looks good, and pick it and then I like this one where she's trying to hang that dress up, so let's do say this one, zoom in, that's good, pick that one and then I move on to the next. Now the other thing that you're going to notice about what I've been doing is that I am not rejecting images, I'm picking images 'cause you're going to pick more than you will reject, I mean you're going to pick less than you're going to reject so you want to push less buttons just pick don't reject, there's no point in rejecting them. If they have no flag they are rejected. Okay so then I'm going to just can through here and I could zoom in and see about this shot here where it looks like mom's coat or somebody's coat oh no but it's out of focus. Whatever this shirt is, oh that's I think his shirt, her dress, but I missed the focus on it, so I'll look at this one, nope no focus so I'm not going to use it. So now I'm going to look for something else hanging dress right here, click on this, zoom in, yep that's focused pick it and then I'm going to go to the next set of images here, there's some dark ones so let's see if any of those are valuable. This one looks like it could be useful, it's focused but it's really dark, so I'll pick it but then later on when I'm adjusting I can decide whether or not I can fix it or not, whether there was enough information in it. But I can also, if I really want to know I can shoot over here to the right and look at that histogram and that histogram will tell me a lot about how much information I have in there and whether I can recover it. So that is very informative as to whether I can get that back and I can probably do something with that image. I don't need any of these and I'm going to go to the next set of files here where she's looking at, she gave her mom a gift so I'm just going to scan through all of those and I'm just going to look for moments where the mom's looking at it, I like it, I'm picking it.
Class Materials
Bonus Materials with RSVP
Bonus Materials with Purchase
Ratings and Reviews
Melissa Maxwell
Worth every penny. I am completely new to Lightroom and it really is like learning a new language. Jared Platt did a great job explaining the most efficient ways to utilize Lightroom. There's a lot of technical jargon that can often make creatives lose interest, but it's important and useful information. I've watched several segments again and again. He's added years to my life and I am grateful. He's not my favorite instructor on this site, though, and I made good use of the 2x button on the screen.
Kat Jones
Well, I've been a Photoshop girl since the beginning and have dabbled with LR and thought I knew quite a bit about it!! It turns out I've just been playing with bits of it! This is an amazing course. I will need to buy it for all the tricky bits that I just haven't quite grasped. Jared is amazing. Clear, concise, methodical, smashing. Thank you, Creative Live. What a service! Cat Jones Wormit Fife Scotland PS - Delightful to see Jared's Scottish piccies - very familiar, although not with the model!!!
Jo Wilkens
Really amazing class. Incredibly informative. Mr. Platt is incredibly accessible and easy to understand. The course is thorough and I can't begin to tell you how helpful this class has been!!!! I fumbled around in LR but couldn't get half of it to do what I wanted, thought it should be able to do, and thought it probably did do (to live up to all the accolades I hear from other photographers).... I'm so happy I'm just about in tears to see what I'm going to be able to do going forward. Thank you, thank you, thank you!