Shoot with Your Webcam
Lesson 26 from: Video Production Essentials: Create, Edit and Post OnlinePhilip Ebiner, Sam Shimizu-Jones, Will Carnahan
Shoot with Your Webcam
Lesson 26 from: Video Production Essentials: Create, Edit and Post OnlinePhilip Ebiner, Sam Shimizu-Jones, Will Carnahan
Lessons
Chapter 1 Introduction
1Welcome to the Class
02:12 2What Makes a Great Video
03:17 3What Type of Video Should You Make
02:47Chapter 2: Pre-production
4Come up with a Great Video Ideas
05:05 5Plan Your Video
03:30 6The Pre-production Checklist
04:04Chapter 3 Equipment - Our Suggestions for Getting Started
7Does Equipment Matter
01:34 8Our Recommended Cameras
06:00 9Our Recommended Audio Equipment
04:37 10Our Recommended Lighting Equipment
01:47 11Our Recommended Editing Equipment
02:11 12Our Recommended Drone Equipment
05:35 13Quiz: Chapter 3
Chapter 4:Cinematography Basics
14Exposing Your Shots
05:25 15Compose Your Shots
04:25 16Filming Yourself
01:09 17Getting the Right Shot
03:43 18Choose a Background
02:32 19My Office Video Setup
02:54 20Quiz: Chapter 4
Chapter 5: Tips for Shooting with Different Cameras
21Exposing with DSLR and Mirrorless Cameras
06:31 22Focus with DSLR and Mirrorless Cameras
02:35 23Stabilize Your Shots
02:57 24Know Your Lenses
03:18 25Shoot with Your Smartphone
05:10 26Shoot with Your Webcam
05:49 27Record Great Screencast Videos
04:20 28Tips for Better Drone Shots
04:06 29Types of Drone Shots
01:43 30Quiz: Chapter 5
Chapter 6: Audio Recording and Microphones
31Choose the Right Microphone for Your Video
03:14 32Record Better Audio in Any Environment
01:27 33How to Use a Lavalier Microphone
02:47 34How to Use a Shotgun Microphone
00:55 35How to Record Audio with Your Computer
01:27 36Quiz: Chapter 6
Chapter 7: Video Lighting
37Why We Light
01:03 38Use Natural Light
04:14 39The 3-point Video Lighting Setup
07:26 40Quiz: Chapter 7
Chapter 8: Editing Better Videos
41Intro to Editing
02:15 42The Post-production Process
07:50 43Craft a Story with Editing
05:21 44Improve Your Audio with Editing
06:34 45Find and Add Music
05:12 46Design Clean and Professional Titles
03:15 47Increase Video Engagement with Calls to Action
01:29 48Quiz: Chapter 8
Chapter 9: Get More Views - Publishing Your Video Online
49Export the Best Quality Video for Online
02:54 50Tips for Posting Online
05:28 51Grow Your Youtube Channel
04:41 52Quiz: Chapter 9
Chapter 10: Case Studies: Real-world Filmmaking
53Case Study - Corporate Promo Videos with Ghirardelli Chocolate
08:54 54Case Study - Event Videography with Major Lazer
08:39 55Case Study - Documentary Films with Phil
14:24 56Case Study - Shooting By Yourself
15:32 57Case Study - Wedding Videography
08:37 58Case Study - Phil's Livestream Setup
04:23Chapter 11: Conclusion
59Thank You
00:59Final Quiz
60Final Quiz
Lesson Info
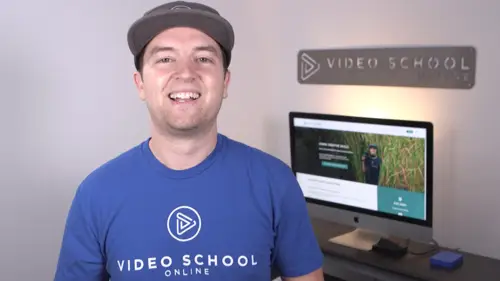
Shoot with Your Webcam
in this video, I'm going to show you how to shoot better videos with your web cam. My number one tip is to add light to actually light your desk or to light your setup right now I have my paper lanterns set up behind my webcam. Two paper lanterns with watt light bulbs in it, both evenly lighting both sides of my face and for my webcam setup, that's what I want. Here's the same shot without any video lighting. The webcam tries to brighten up the pictures so that it's exposed. But in doing so it creates this weird digital noise and it just doesn't look good. This is going to look way better than if you record a video without lights or if you have just the light from your computer screen, a desk light or the light from the ceiling above. Especially with that light coming from above on the ceiling or behind your head, it's going to create weird shadows that don't look great. So light your webcam at the very least turn on your desk lamp. one other tip is to open up a blank white document i...
n Microsoft word or even google docs zoom it in so it's filling up most of your screen and then make sure that you turn up the brightness of your monitor. This can add additional light that will help light your video. Lastly, if you don't have any lights, you can always turn your camera or your desk around or place it in front of a window so that during the day you have nice natural light coming in through their place a curtain or a sheet over that window to make it even softer. Obviously this isn't going to work at night though. One tip is to manually adjust your webcam settings. A lot of people just let it do auto gain for exposure and auto white balance but you can actually dive into the webcam settings. In most applications with the logitech C 9 20 it comes with a little application that allows you to adjust things like focus and exposure and white balance. I downloaded this separate application from the itunes store called webcam settings that allows me to do all sorts of other things like exposure time which is basically shutter speed. All of these things adjust the brightness or the contrast. You can also adjust the saturation if I just want to be black and white or super colorful. The sharpness, increasing the sharpness of my video or the white balance you can see here if I want to make it more cool or more warm. Sometimes the automatic white balance of my camera doesn't work properly, especially with different types of light bulbs and the light coming from outside. So here I can automatically adjust everything to make sure it looks amazing. The next thing is to properly compose your video so you want to make sure that your eye level with the camera or have the camera just a little bit above eye level that's going to make it look more natural. I see so many people recording videos with the camera below eye level. It just looks bad. Make sure you put it eye level. Another thing I see people doing by mistake is giving too much headroom, that's the room or the space above my head to the top of the frame, even though the camera is eye level right now, it just looks awkward. Another one is cutting off the top of your head, it's distracting to the audience and it just doesn't look good. Try to have it so that your eyes are in the top third of your video frame, break down your video frame into thirds. And if you have two imaginary lines, put your eyes on that second line, place yourself in the center of your shot. If you are the main focus. If you're talking directly to camera and you want people to focus on, you put yourself in the center of your screen, you also want to make sure that you're close enough to your webcam. If you're too far, the quality isn't going to be, it's great. And if you're too close, it can just look kind of awkward. So place yourself a foot foot and a half away from your webcam because this is the prime focal length, the prime spot for your webcam to focus on you. So that's the sharpest and the crisp ist. It will be for most of this video. You haven't seen the microphone that I'm using, which is the heil pr 40 studio mic. It's on this boom arm that's attached to my desk and I can move it around. It does pick up decent audio when it's out of frame when it's a little bit lower. But it is better when it's close up like this and there are some times when I want to get the best audio possible and so having it in frame is okay. I just try to make sure that it's not covering my face or distracting for the audience. And my tip number three is to design your background. Whether you want to have a background like this showing off your personality. Of course it looks a little bit different than my regular shot when I'm using my DSLR or a professional cinema camera. It's not as blurry in the background, which I like. But for my webcam setting, I still like to have my photos, my typewriter, maybe a guitar to show off my personality, especially for my Youtube videos, which is really about my own brand. Here's another background option that I have in my office on another wall. I just have a blank gray wall. And this is great. If I do want a cleaner setup, please please please clean up your background. I've seen so many videos. Professional videos, online courses, videos that people are trying to sell something where they're sitting in their room at their desk and they've got their unmade bed with clothes on the floor behind them. Just clean up, even if you're not going to show off your personality or design it clean up. So these are my top tips for recording with your webcam. Thanks for watching, and we'll see you in the next video.
Class Materials
Bonus Materials with Purchase
Ratings and Reviews
seyi ope
i love the way they teach the course. its very understandable
Student Work
Related Classes
Beginner