Lessons
Introduction & Basic Controls
06:10 2Top Deck: Mode Dial
12:55 3Top Deck: Other Functions
03:28 4Back Side
05:18 5Back Side: Function Button
21:08 6Back Side Other Functions
05:46 7Left Side, Right Side & Movie Options
04:07 8Bottom & Card Reader
03:47Lesson Info
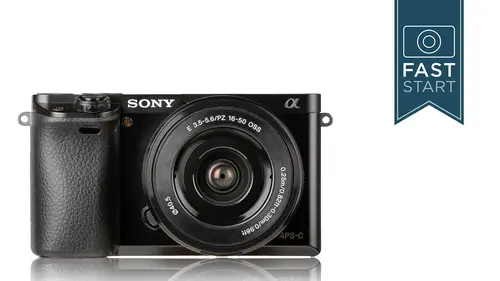
Left Side, Right Side & Movie Options
Let's move over to the left side of the camera. So the kit lens that comes with this camera is an extremely small lens, not the world's greatest lens, but it's very nice in its size and convenience. So there is a zoom ring which also works as a focusing ring, but it also has a power zoom, which is a little bit more helpful in video when you want to have a very smooth zoom from wide to telephoto, for instance. The Wi-Fi sensor is located over on the side. Make sure that's not too blocked when we get into our Wi-Fi section. Inside the door, we're gonna have a little light so that when we plug our camera in for charging, we'll see if it's charging properly, and if it's turned off, then it has completed its charge. The top connector is a micro USB multi-interface, which will be used for either charging our camera. We'll also be using it for downloading images from our camera to our computer. It's also where you can plug in the SONY remote control if you want to trigger the shutter release ...
without actually touching the camera. And then the bottom one is an HDMI jack where you would plug your camera into a TV if you wanted to show videos or stills from the camera and have them show up on the TV. So two different connections there. Over on the right side of the camera is an NFC mark, and this is for all of you folks that have NFC-enabled mobile devices. You are able to transfer images from the camera to your device by simply getting the device very close to the camera. It usually needs to be within about four to five inches for that to work. And there is some more controls that we'll touch on briefly when we go through the menu system and its wireless setup system. And we have our movie record that we have talked about before, and if you want to re-program this button, you can do so in the custom settings. One of the other things you can do, for those of you interested in shooting movies, is you can control when you do shoot a movie, is it in a manual mode or a program mode or aperture or shutter priority mode? Those are controls that you'll be able to take care of when you get in to the menu settings. So let's talk just a little bit more about some of the movie options on this camera. So if you do want to get in to the camera settings, you want to go into recording settings in camera settings page number two, and you'll be able to set the resolution and the frame rate on this, and so this is the resolution shooting at 60i, which is an interlace of 60 frames per second. And 24M is 24 I believe it's megabytes per second. That has to do with the size of the file that it's recording. And then there is the format file. There's a couple of, they're not completely proprietary, but they're mostly used by Sony, the XAVC and the AVCHD. MP4 is a more common basic web format that's gonna be available and easier to work with on a lot of basic computers. And so if you have a very simple basic computer, you want to choose MP4. And the AVCHD is a 2006 kind of a blu-ray design system by Sony, and the XAVC S is a new 2012 Sony format that has a little bit more information. So XAVC is gonna be the highest quality format that this camera can shoot with. There is a limit of 29 minutes that your maximum video can be. If you go 29 minutes, you just need to restart and start the next 29 minute video. There is a four gigabyte limit. If you go over that limit, it automatically starts a new file. You're not really gonna see much difference, but on your memory card, they will be in two separate files if you do shoot for a long time at a very high resolution rate. And we will talk more about some of the movie features, which are scattered about a little bit, in the menu section.
Class Materials
Bonus Materials with Purchase
Ratings and Reviews
user-f49136
You've invested in the Sony A6000 so let John help you discover and understand all it can do with his terrific video class. I'm a visual learner so this was perfect for me. I printed his class materials for easy reference. Thanks to John I'm a beginner with the confidence to go out and play with my new camera!
Debbie Walker
MERCY!!! this was excellent for me!! I am not familar with cameras so this definitely helped me understand better how to use my Sony A6000; I was honestly ready to give up!!! Great explanations ! well worth the time!!!
JulieannaD
I learned more during this class than I did in 4 months of owning the camera ! Finally able to use the focus options properly, including my favorite; Back Button Focus. John is a fantastic teacher, I enjoy all of his classes and his excellent teaching style. Watched all 3 hours of this class in one evening. From now on I will always purchase his classes when I get a new camera. 2 thumbs up !
Student Work
Related Classes
Camera Guides