Lessons
Introduction & Basic Controls
06:10 2Top Deck: Mode Dial
12:55 3Top Deck: Other Functions
03:28 4Back Side
05:18 5Back Side: Function Button
21:08 6Back Side Other Functions
05:46 7Left Side, Right Side & Movie Options
04:07 8Bottom & Card Reader
03:47Lesson Info
Introduction & Basic Controls
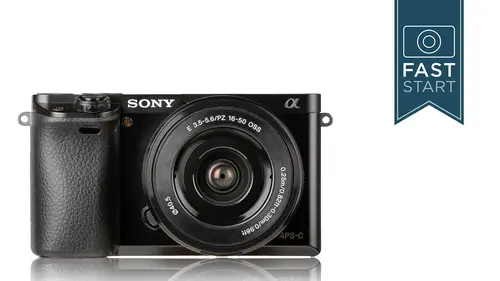
Alright, so we are talking about the Sony a6000, which is one of the most popular interchangeable lens cameras ever apparently, according to the news reports and stats on this. This is a camera that has a very good spec sheet. So when you look at it on paper it's really got a lot of capabilities, and it's got a huge menu system. And that's part of a big thing that we're gonna be doing in this class is going through the menu section, which I have detailed in the accompanying PDF that comes supplied with the class, and this is gonna have the entire menu system on one page with my recommendations for both basic and advanced users. As well as some other recommendations on how to set the camera up for a variety of other situations. So this will come in very handy in the second half of class. To start with we are going to be going over the outside controls, all the buttons, and dials, what they do, and how they would be set for different types of scenarios. So let's go ahead and jump right i...
n to the class and talk about what we're gonna be doing here. So the Sony a6000, great little camera, been a huge seller for Sony. The first part of the class is the outside controls of the camera, and the second half of the class is kinda the inside controls, and then a little conclusion section where we talk about basic operation of the camera. Alright, so you do get a very wimpy instruction manual with this camera. Sony does not supply you with everything in the box from the store. It's, actually most of the information is available online via Sony's website in a downloadable PDF, which is most of the information. And that's gonna have a lot more information than we're gonna have here in this class in this relatively short three hour class here. I am going to be concentrating on all the most important features for taking the highest quality photographs. And so there are a lot of other little things that the camera can do that we're not gonna be spending an exorbitant amount of time on. For instance, you can print directly from your camera, and we're not gonna go through every little nuance detail on how to do printing from your camera. We're gonna concentrate on how to get high quality still images from the camera. Now, if during this class you're wondering, well John, what about lighting and composition. Isn't that important to photographs? It absolutely is and it's something that I talk about in my photography classes, not necessarily a camera class like this. And so I do have a couple of camera classes, a short one and a long one, depending on what your needs, and what you want out of photography. But you can find those at the CreativeLive website by just searching my name, Greengo. Alright let's make sure that your camera is ready for today's class. Hopefully I've done the same as well with mine. First off is charging the battery, takes a couple of hours. You're gonna want to have a lens on and a memory card in. Turn your camera on and turn the mode dial to that green eye camera mode. That's just the simplest, Intelligent Auto mode. I've done that with my camera, so let me go ahead and take a photo right now, just to make sure my cameras workin'. Alright, looks like I am checked off, ready to go, and hopefully you are as well. The first section is camera controls and this is where we take a tour of the camera and outline, and talk about each of the different functions that the camera has. If it's an important feature, it's probably got a button or dial associated to it right on the outside of the camera. So obviously turning on the camera is necessary for the rest of the class, but when you do that, there is a sensor cleaner that automatically tries to clean any dust off the sensor. And it does this all the time but there may be dust that gets collected on the sensor, and we'll talk about that later on in the class. The shutter button is handy obviously for taking photos, but anytime your camera falls asleep. Your camera, because it's very dependent on battery power, tends to want to go into a nap mode relatively quickly. So a light press on the shutter release will wake the camera up and get it ready for operation. The camera has two different control dials. The main control dial is on the top right corner of the camera as you hold it, and then there is a smaller control wheel on the back of the camera. And we'll be using both of these wheels to adjust our shutter speeds, and our apertures, and then we'll also be using them to navigate throughout the menu system to make selections and navigate as I say, just our way around all the different functions of the camera. And so be aware that the control wheel is also an up-down and left-right button, as well as a wheel that spins in either direction. Starting on the top deck of the camera. We've turned our camera on and after that the shutter release is a two stage device, and so when you press it halfway down, as I mentioned a moment ago, it wakes the camera up if it was asleep, and it also activates the metering and the auto focus system. And so if you want to check what the shutter speed is going to be, just press halfway down. If you want to focus you just need to press halfway down. And so get very used to that halfway setting on the shutter release because your finger does end up there a large portion of the time. Now if you are somebody who is a fan of back button focusing, you can do that by going in to the custom setup menu and turning off the auto focus function of the shutter release. Now as you see that box on the left-hand side of the screen is a shortcut. And as we go through this class, I know many of our more advanced viewers watching this class, like to get in and make these changes right away. They don't want to wait for the second part of the class where we actually go through all the functions and the menu. If you want to jump in and do it right now, I'm gonna give you what the information is to where to go and what setting to make in these little shortcut boxes that you will see pop up from time to time. So if you wanted to turn off the focusing of the shutter release, that is where you would jump in and do it.
Class Materials
Bonus Materials with Purchase
Ratings and Reviews
user-f49136
You've invested in the Sony A6000 so let John help you discover and understand all it can do with his terrific video class. I'm a visual learner so this was perfect for me. I printed his class materials for easy reference. Thanks to John I'm a beginner with the confidence to go out and play with my new camera!
Debbie Walker
MERCY!!! this was excellent for me!! I am not familar with cameras so this definitely helped me understand better how to use my Sony A6000; I was honestly ready to give up!!! Great explanations ! well worth the time!!!
user-36c080
Very helpful in learning all the settings on the camera. Excellent clear and useful presentation of a topic that could be dry. I found the suggested settings for different shooting situations a great place to start when venturing into shooting in manual mode.
Student Work
Related Classes
Camera Guides