Lessons
Lesson Info
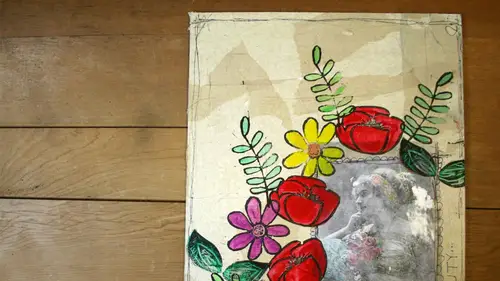
Revealing the Image
We did our base for image transfers what we did was we took a photocopy and image put it down with some jell medium and we've just let it sit and it's marinating and it's doing its thing and then what I'm going to do is start getting us ready to take the image up um, while they're carving away, I'll show how to do this and then they can they can do it the first thing you want to do is like we talked about before, you know, in the first segment we talked about it being dry so I know mine is pretty dry, but I just I'm a nervous nelly when it comes to this, I will hit it with the gun for just a second just to be extra extra sure um if you think yours, is it all still somewhat tacky? It all feel free to heat gun away and this just gives me that little bit of peace to know that we're getting there. So what we're going to do is get this clearly completely dried and then the fun begins because this part is, you know, really it's always exciting to see what the result is when you're done and t...
he thing about image transfers is you're never going to get a perfect carbon copy if you wanted that you would have just deck apologized the image right on as it was and then that's how you get the image exact with an image transfer there's always going to be some spots that aren't perfect and a little bit of lightness to it, which is why I like it because it really adds a cool um effect when you do it, we're going to do that and then what I usually do is very, very lightly score the back of the paper with my scissors or a craft knife whatever you might have handy, you don't want to go too deep and just completely cut it, but I score it on a diagonal one way scored on the diagonal the other way, sometimes I kind of go across and then I go down and what that does is we're going to put some water in here and the water is going to get into those creases and that's what's going to help us lift this off actually going to steal one of your cups of water for a second and use that we're getting spray bottles I think for everybody here um I'm just gonna put some water right down on there and you'll start to see the water seep into those holes where we or the score marks where we scored it's going to do that, we'll hand it back to you guys, so what happens is that water starts to kind of get into the paper and you could just kind of push it around with your fingers, and this is the part where you really want to be kind of careful if you place too hard, you're going to go all the way through the gel medium and down to your base, let layer and you going to scrape everything you just did off which you probably don't want to deal with that kind of defeats the purpose it's like starting over, but what you do is you just very gently find a spot that's kind of loose and you're just gonna rob with your finger and the paper is going to do that thing where he starts to separate kind of fall apart and you'll start to see your image coming out and it's kind of a tedious process, but at the same time, it's always fine because you're just so excited to see how it turns out and am I going to get? Is it gonna work? So I do it right? And even after doing this, tons and tons of times, there's times where I still get really excited, like, I hope I did it right? Even though I know that I've done it a zillion times it's just fun to see. But already I can show you like where I've rubbed a little too hard already I've got a little bit of white showing through in here and that's ok I just want to be gentle with it the other option you have is taking your wife again and using that for just a little bit of extra it's got a little bit of extra grab to it but again you just don't want to push too terribly hard because you'll lose a little bit of that image especially on this slick surface you get a really nice flat image but it is a slick surface so you're more likely to take a little bit extra with you when you're doing it so it's really just a very gentle balance of revealing your image and there's a lot I mean you can do this with any image you want really I I love some of those graphics web sites where you can get the free ice free downloads to use on your projects you can do this with pictures of your kids I've done this on wood and it's a really cool way to display family photos and stuff if you just get some really nice wood pieces and do the image transfers on there is just a different cool way to display family photos that actually has a lot of possibilities to it how are they turning out are we starting to see ok nobody's got just whiteboard that's good glad to hear any me vanessa's is not turning out for some reason we're just gonna tio this whole project it's one of those things were actually goes pretty quick but it's a lot of little tiny footsie stuff and one of the tricks that I have learned is when we're all done what this will take the take the baby wipe again and kind of go over and that usually lifts off any extra little bits of the paper and then we'll also take just a little bit of the deco posh and do the same thing and for some reason that deca pies helped lift off the last little remainders too so it's totally we'll get it all and if not it was meant to stay there well, just tell ourselves that but this is definitely another one of those things that I don't want to completely rush it and push it because it will terror if you d'oh a little more water on there for your water starts to dry up just you really do want a wit? What surface? So if you feel like it's getting too dry put more we're better off more water the better so you can't put too much water I haven't just for me it just helps get it off of there the water won't wash it away the image of the water won't wash the image away no that's our okay able to get it off it just loosens up the paper so that we can take it off I always worry when I do photos of people and I'd go all the way around their face and then I'm like ok please don't rub off a huge chunk right down the center of their face and that's what it's like right there is like I'm always like super slow and super light touch because I don't wanna do anything to mess that up is this something listening for you guys or have you guys done image transfers before done it on fabric it's the same exact is it really uh that's going you can use like old tablecloth like you get at the vintage store and well that's forming or napkins like vintage napkins and transfer photo on that's really cool yeah now what do you use for a medium to do it news the same thing that joe the job meeting or you can use deco pot too it's gonna hope that her face stays intact way reveal it does it look hitters that look weird I'm just slowly fasching this up here have a question from online do you need to use laser copier prints? Do inkjet prints work for photo transfers as well think jeffrey prince will work I would just say the one thing to remember is like when we did talked about dekel punishing them that banks going to run more so you may get if you touch it too much before you start to remove it it's dry, you'll get some potential smearing of the ink that you wouldn't get with a laser jet and it may get a little bit the edges, maybe a little bit fuzzy here just because of how the ink reacts, but I used those all the time, so it's just a matter of knowing and being prepared for that that if well you're putting it down, it shifts a little better slides a little bit, you may just get a little bit of muddling in the color, right? Um if you're using a color print or the or the edges just if you're using black and white, maybe a little fuzzy, but I prefer when I'm doing something like this, if I the crisper, I want the image to be, the more likely I am teo use a laser instead just because I don't want some of that color run she's almost so now what I'm gonna do is just keep using my actually a clean one, take a baby wipe and just kind of lightly go over it and just get anymore little bits that I can kind of off and you'll feel it when you get to a spot where it's not quite all there you'll be like, oh yeah there's still some hanging out karen k in the chat rooms that she's been using this technique on tile and it works great and makes great gifts one mounted and frame so that's a good alternative cool yeah, that sounds fantastic, man finished tiles yeah, that would be really cool would you have to use an unseen liken unsealed tile? I would think so. Yeah okay, so she is revealed when they can see where a couple of spots where a either didn't put it down quite all the way or I just robbed a little too hard but that's okay it gives it a little little character, a little personality so we're going tio dry it off and then we're just going to seal it quickly with just a light coat of decca pies just so that it's kind of sealed an end and as you start to dry it if you run your hand over it you may start to feel some bits that are still there so you can keep kind of working at it and getting because you'll start to see them as you dry it. You'll see like this was that's kind of there so you can go back in again and try to get that last little bit off oh my god really pale I'm gonna do is just get in there and try to get that last kind of bit off and it's kind of up to you like how perfect. Do you want it to be, like, how detailed feel like having that little bit of imperfection on their grave if night he bought it. And this is one of those things that, you know, we talked about this and other classes, but I'll bring it up again that, you know, just make sure that you're doing something like this. You've preserve the actual photo and night trying to use a real photo and that's, an antique of the family of grandma or something, and you've now ruined it. So I always keep the originals of these, and then just scan them in in ism that way.
Class Materials
Bonus Materials With Purchase
Bonus Materials with RSVP
Ratings and Reviews
user-156703
I like the class overall and it was nice to see a process with easy to find materials. It would be very useful for the students taking the class to have a list of materials needed. Clear Gesso, Decoupage and matte medium were mentioned... but which ones specifically and what brands? Also, I didn't see the use of watercolors (only gelatos). I wanted to see watercolors being used as mentioned in the class info.
Becky Holaway
I've taken both of Stephenie Hamen's classes on Creative Live. She's a great teacher, and I thoroughly enjoyed the class.
Rachel Franklin
All new crafting for me. Loved it. Great tips and advice!