Decoupaging the Piece & Adding Gesso
Lesson 6 from: Photo Transfers for Mixed Media Collage WorkStephenie Hamen
Decoupaging the Piece & Adding Gesso
Lesson 6 from: Photo Transfers for Mixed Media Collage WorkStephenie Hamen
Lessons
Lesson Info
Decoupaging the Piece & Adding Gesso
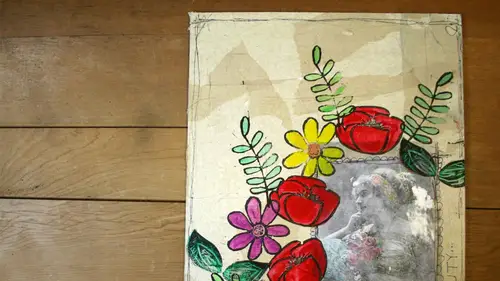
I am pretty satisfied with how she turned out, so I'm going to put my deck a posh and seal her in, and then I'm going to take. We've got in our paper kits. You guys have some vintage, um, sewing patterns. Sorry had a total moment there of losing the word that I wanted to use, um, and we're gonna I gonna use that on mine if you don't want to use that, anyone is something else feel free. I just like how thin that is with the image transfer, just kind of a cool kind of a cool combination. Someone put the deco posh on her, and I'm pushing down a little bit, just on the off chance, any little additional bits decide to come up, and then I'm gonna grab my paper down here. And this was another thing that I find all the time at thrift stores, because it's a nineteen seventies pattern, I once bought a pattern for a priest world, like somebody would only they were hand sewing all the robes for the priests, and they didn't need the pattern anymore, and I was like, of all the weird part, I find pat...
terns for everything, and I just grabbed them and they used them, I should probably, like, hang on to them or something, but I don't all right, come up and off oh, but I'm just going to do the same thing that we did and some of the other classes were gonna deck apart the sign in case you haven't daca possibly for what we're going to do is take our deck a posh what we have here and we're going to put a nice light layer down this material this surfaces all prepped so it won't take a cz much as it would if it wasn't a prepped surface and we're just going to kind of lay that on there just build a little bit of a base and we're just going to add on piece of our sewing pattern if it goes off the edge a little bit that's okay, we can trim that later with our scissors and we're just gonna then seal it in with another layer of the deck, a posh and what this does is it glues it down and then also provides a topcoat stealing to keep it nice and firmly attached tio our base, I'm just going to basically fill this in all the way around the photo, but I'm not going to cover photo at all I want to leave that like it is we'll just add this on and if you don't have this, you can use tissue paper um you can just use other papers if you want it's up to you but if it home you just don't happen to have a huge stash of old sewing patterns because more most normal people don't I just happened to be not very normal and collect where things um you can just grab anything in terms of the tissue type paper and it'll work just fine there's some really like there's some really pretty tissue papers out there now to that air really decorative so you can add some color and some designed to it if that's your style went into this I'm going to do this kind of go over it could because I left her within the frame that the photo was in I'm going to kind of go up to the edge of the frame with my deck apology but I won't get into I'm not going to invade her space because this is my dance space and that's her dance trees so we're gonna let that alone okay let's hear that this will wrinkle I will tell you is that when you're using something thin like this, you're going to get some wrinkling and things but I just leave it I like how it looks you don't you can try to smooth it out but I just I just leave it and the more you put on the darker it's going to get so just keep that in mind if you do a full a few layers it will start tio, get darker. Put a little bit more on here and then once I get this on, I'm gonna dry the whole thing again and then shrimp off this excess paper. How did your image transfers go? Did you guys you feel good about him? Okay, everybody's intently working now on beckham posh so that's over we did that were done moving on came so peace is on and if you like all the lines, you can leave them if you want to tear around them so you have a really blink sleep you can do that too. And it's always like the pattern lands I think they just had some fun visual interest to piece. All right, let's, get this last piece on and then I'm going dry it. Okay? We'll steal this and I'm gonna hit this with the the heat gun again as we'll go over her one more time, it's a nice, even layer across everything and we're going to try that. When we're done with the deck apart, we can put it away way thiss stuff way once this is dry, we're going to prep it for our stamps and then for the final, um bits that were going to dio tio add color to the photo and teo where we stand and so well prepped the surface with, um clear jeff so to do that because you could stamp you could stamp right onto this and then add your schelotto's and would be fine, but I just like having a jess oh prepped surface for that because it has more to do and that's, what it's meant to do is absorb some of the media you're going to add where this is more of a glue sealing this kind of thing, so I want to use jess oh to get the best result for what we're doing, and again, I want to make sure this is really dry before we move on they don't want some of that deco pot is coming, you know, getting mixed with the jessalyn coming through because then I will pride a weird texture where they intermingle if we don't get it completely dry, start pulling troops don't pull away and cut because I'm losing that take some of the edge off in a second here. Now I've got this is what happens when I'm not patient and I rush, I end up like a little hole right there let's see everything you could fix it all playing so rebecca said she's done image transfers is anybody else done member? You've done and what have you done their mind, other materials, everything yeah it's last battle well she's experienced of this this is cool though I have never done it on ampersand board so there you go you're there's a first they were the first thing I just love how it looks when you look at that I did a another class at one point and I did this and it was just fun because they did it with different media and it was it was all on campus, but when you saw if you printed it out this way and he used these materials like you always got a different result and she's fun for people to see like the variation on dh stuff that you can get, you can use the same image over and over and over again but when you use different media and you use, you know and that was just the same kind of canvas over and over again so you throw in all those other surfaces and it's just amazing what you can create. Okay, let me go ahead and take my scissors and just trim off my access here sometimes it's easier to flip it over and go from baba back what's really nice is these scissors have like a nonstick coating on him, so if you get some goo on I'm it'll just wiped right off which I tend to cut stuff and get gu and that's good for me I'm just going to from this graessle just use a craft knife and cut it if you have ah mat underneath and just trim it right up to the edge with that too or if you're better at it you could tear it I'm just afraid of completely ruining it right now so this trim all that off okay and then we're just going tio assumes I get this trimmed up I'm gonna add that clear just so that we talked about to the top I'm getting on getting braver I'm certain of rib rip that maybe a little faster so we're going to trim that if you want the edges super perfect I would definitely like it down on your craft not have a goal but right now I'm not overly concerned about it that's not the point of the class is not a perfect edge right now so get that cleaned up as best we can and then move on all right so you and I clear just so you don't need a whole lot but just enough to basically cover your board and even if you're not going to end up stamping or coloring in a section I still like to have it on everything from the standpoint that they needed the similar finish across the entire piece rather than some parts have shiny deck apologize and some parts have matt colored matte finished um jess oh so and this clear justin when it dries it's kind of like an ultra fine grit to it, which allows the media, the paints and the july does and things to stick to it really nicely gonna spread it across just like that. And then I'm just going to drive this again with the heat gun and get it super dry. No tackiness at all on this.
Class Materials
Bonus Materials With Purchase
Bonus Materials with RSVP
Ratings and Reviews
user-156703
I like the class overall and it was nice to see a process with easy to find materials. It would be very useful for the students taking the class to have a list of materials needed. Clear Gesso, Decoupage and matte medium were mentioned... but which ones specifically and what brands? Also, I didn't see the use of watercolors (only gelatos). I wanted to see watercolors being used as mentioned in the class info.
Becky Holaway
I've taken both of Stephenie Hamen's classes on Creative Live. She's a great teacher, and I thoroughly enjoyed the class.
Rachel Franklin
All new crafting for me. Loved it. Great tips and advice!