Lesson Info
15. Custom Setting Menu Part 2
Lessons
Class Introduction
13:59 2Basic Camera Controls
02:51 3Top of Camera
32:21 4Back of Camera
29:57 5Live View Menu
22:14 6Movie Mode Menu
09:03 7Left & Right Sides of Camera
16:38 8Bottom of Camera
05:44Lesson Info
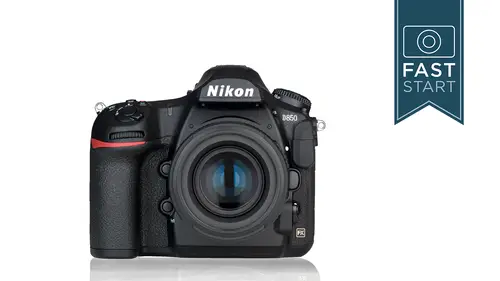
Custom Setting Menu Part 2
The next section is F. Deals with the controls of the camera. And here's where we're gonna get to reassign a number of the controls on the buttons of the camera. The first one is a biggie. The custom control assignment. And so here the camera has a number of different buttons that you can go through and reprogram. And so let's look at a few of the options. It is gonna be impossible for me, I do not have enough time to go into all of the options on every conceivable way for you to reprogram your camera. But I'm gonna show you a few that I think are really helpful. First one, is that there are some people out there, hold your hats folks, that are not interested in shooting movies. They bought a still camera because they want to shoot still photographs. Who would have thought. And they don't use this movie button on the front of the camera. So they can completely go in and reprogram it. And one of the things that's, good thing to reprogram it, is the mode button. 'Cause the mode button is...
way over on the left side of the camera. So if you wanna change modes with one hand, you can reprogram this button. In fact, let's go in and just do this right now. Just to show you how this works right now. So, right now, the movie record button will stop and start the record button. And here, and this mode that I'm in right now, it does nothing 'cause I'm not in the movie mode. So I'm gonna dive in here, and I'm gonna go into custom controls. And I think we're all the way down on f controls. Number one. And you can go through, and it actually shows you all the buttons that you can reprogram. And so the one I wanna look at is the one right here for video record. And currently it's turned off. It doesn't do anything in the standard shooting mode. So I'm gonna press the center button. And there is all sorts of things that we can change this to do. And what I wanna change it to do is the exposure mode. So now, it's gonna change the mode. And let me turn it into the info button so you can see. So now when I press the video record button I can simply turn the back dial. And I can change very quickly. So if I was somebody who didn't really shoot video at all this would be a great mode because now I can quickly change through any of my modes without having to press the mode button over here on the left side of the camera. I can do it all with one hand right here. So I think some of you are gonna like that. Now those of you who like video may not care for it. But, I think normally, for a lot of photographers, that's gonna be a great mode. All right. Next up, let's take a look at another one. So, you can lock your shutter speeds and apertures. I think I mentioned this before in the view finder. You can lock your shutter speeds and apertures. And so in this case, one of the things that you could do is reprogram the function one button, which is the lower button on the front of the camera and that's right down there. And by pressing that button and turning the back dial of the camera you could lock your shutter speeds in. And I didn't mean to go to the next slide. So I'm gonna just go back real quickly. And see if I can hold it on that slide. And do a little demo here for you. So let's go in and reprogram the function one button on our camera. And so we're gonna go into the controls. And we're gonna go into custom control assignment. And we're gonna look for the function one button right here. And it's not just pressing the button. It's pressing the button and turning it. And so I'm gonna go in here. And it's currently under choose image area, which I demonstrated but I don't use very much. And the next one down is shutter speed and aperture lock. And so now, let's change our camera to manual mode. And so now, let's say, if I'm shooting a basketball game, I'm probably gonna wanna be at a faster shutter speed. Let's say I'm at a thousandth of a second. And let's just say I'm at f four on my lens. And I wanna keep this locked in. And I don't wanna accidentally bump my camera and change it. So let me get my shutter speed and my aperture set back in here. And so now I'm gonna press the button on the front of the camera and turn the back dial on the camera. And now that locks the shutter speed. I'll now, pressing that button in on the front lock the aperture as well. And so for what I'm doing on the front, let me move it around so you can see, is I'm pressing the function one button down here. While I'm turning this dial in the back of the camera. And that enables me to lock these I there. So now, even if I turn the camera off and I turn it back on. Let's hit the info button here. Things are still locked in. So it's exactly at those shutter speeds. Now if wanna unlock 'em, I'll press the function one, I'll turn the back dial, I'll turn the front dial, and now I can start changing my shutter speeds and apertures freely again. And so, that's I think one of the neater options that you can use in these custom assignments is that you can choose something for the button to do. But you can also choose something else for the button and the dial to do at the same time. All right, next up, preset focus point. You can have the camera set to a preset focus point say off to the right, or to the left, or up above, or any one of the selectable focusing points. And so what you can do here is set one of the buttons up as a preview point. You're gonna set that point and you're gonna press the AF, where is it, here, you're gonna press the AF mode button on the camera to lock that in. And, let's get the rest of the instructions here, and the selected button for two seconds. And now, you're only limited to one focusing point. And so let me go through this on a quick demo with you. Let's go in here. Into the menu section. And to f controls. F one, custom control assignment. And we're gonna look for the function one button, which happens to be the lower button in the front. Now previously, we were doing the button and the dial turn. This one we're just going to do the button. I'm gonna press the set button in here. And there's, it doesn't look like there's anything there, but remember look for the scroll bar. And so there's all these different things that we can choose from over here. What is that, 10, 15, 20. About 20 different items in here. And so I am gonna choose, in this case, what am I doing here, AF area preset focusing point, right here. So I'm gonna select a focusing point. No function, let's see, what did it say there? Okay. So I think we're, what we can do now is, and it's gonna be a little hard to show you here in the frame but, what I could do is I could select a focusing point off to the side. Let me make sure that I am in the correct focusing mode. And what I'm gonna do, is I'm gonna focus off to the side. And I can't show you this, you can only see it in the view finder. And I focused off the side. So what I'm gonna do, is I'm gonna press in on the focusing mode button. And I'm gonna press in on the function one button down there on the front. And that's gonna lock it in. And so what happens now is I can move my focusing point around with the joystick in the back and whenever I want the camera to focus over on the right hand side, I am gonna hit this focusing one button, fn one button right up here, and it instantly moves that focusing point over exactly to where I want it. And so, if you know that you're gonna need the focusing point in a particular area, that's a quick way of doing it. It's a lot quicker than trying to use the joystick to move all the way over there. Next up, multiple AF buttons. And so this is a great feature that I don't know how many people harness on this camera but if they're not doing it, they're missing out on something. So one of the problems with auto focus is that we have a lot of different options. We have single. Continuous. One point. Multiple points. And sometimes we wanna switch from one to the next. And so, this camera has multiple buttons that we can program in a variety of ways so that we can have the camera focus in a different way depending on which button we press on it. So let me give you an example. Let's say you have the AF on button on the back of the camera for your basic back button focus with single focus. It focuses on a subject and then stops. Well, you could program the pv button on the front of the camera to focus in the dynamic nine point mode so that it's looking over a larger area. And then you could have the function one button set as a dynamic 153 point focusing system. And so depending on how crazy of action you're shooting you could press any one of the three buttons. It doesn't just switch to that system, it automatically starts focusing as well. And all you need to do is go in and program those particular buttons. And so, I encourage you to look through these different buttons. Go to each and every one of them. See if you can find something that they do is valuable for you. 'Cause you can really get this camera to work just exactly as you want and you can really become one with the camera so that you're not even thinking about the camera when you're out there shooting photographs. You're thinking about your subject and how you're getting the best shot. F two multi selector center button. So the center button on the back of the camera doesn't always do a lot or it may not do exactly what you want it to do. And so you can go into a little sub menu and you can control what this does. Usually by pressing the center button it's gonna reset the focusing point to the center of the frame. Which is pretty good. But there's a few other options if you're interested. In the playback mode, one of the neat things that you can do, is program it to zoom in. And then from there, there's another menu that you can dive into. And you can tell it how far to zoom in. 50, 100, or 200% magnification. And so when you're playing back an image it immediately jumps into the one to one ratio 100% so you can see if you have a sharp picture. And so that's gonna make reviewing your images a little bit quicker. Now there are other options in there where you can go to histograms, and thumbnails and so forth. But I think that zoom in option is a very good one for a lot of photographers. When you're in the live view you can reset the focus point to the center. You can also turn the zoom on and off. Or just have it do nothing. And so, little controls to make life easier for you. So, shutter speed and aperture can be locked in a couple of different ways. And so one option was the shortcut option that I showed you. But if you want to go into the menu system and just lock the controls for shutter speed and apertures so that they don't change, you can do that so that it's a full menu setting as well. F four deals with customizing the front and the back command dials so that you can work with them the way that you like them to work, that makes sense for you. So in this little sub menu first up is you can reverse the rotation. Now there are two different ways that you can reverse the rotation. The first is for exposure compensation. And I wouldn't recommend this because things seem to work pretty good to start with. If your camera shows an indicator to the right hand side, which is the bright side, which way are you gonna turn the dial? You're gonna turn the dial in the correct way to correct for that. Now when it comes to shutter speeds and apertures I have found that well, when I'm underexposed I wanna turn the dial to the right. But the camera is forcing me turning the dial to the left to correct for that, which doesn't make a lot of sense. And so what I would do is I would recommend setting this reverse rotation for shutter speed and aperture and it will make manually setting shutter speeds and apertures a little bit more logical as you're reading the light meter. You can completely change the operations of the main and the sub dial if you would prefer to use one finger over the other. Not something that most people do but if you want to, you can get in here and you can do it. You can first change it for the exposure settings which means shutter speeds and apertures and so forth. The other option is that you can change it for auto focusing. When you press the auto focus button, what does the front dial do? What does the back dial do? Maybe there's just an easier way for you to hold the camera and make the changes that you want to change. When you're changing your apertures you can be using the front dial. Or if you're using one of the older auto focus lenses from Nikon you could actually be using the aperture ring on the lens. And so if you wanna use that retro style you could be using the aperture control. But for most people they're gonna leave it on the sub command dial. If you wanna use your dials for the menu and playback you can go ahead and use that. And that'll just enable you one more option as far as being able to change up and down your menu selection and going through the different tabs. The sub dial frame advance. When you are in a playback mode for instance, you can use the sub dial to jump 10 frames ahead or 10 frames behind. You can change that to 50 frames. Or protecting your images. Or a variety of other things when you are in the playback mode. And so the 10 frames seems to be a pretty good option. It fits a lot of people's needs. But if you wanna change it to something else that'll come in handy to help you navigate your images once you're playing back them. All right, f five, the multi selector, which is the little joystick on the back of the camera. Most people love this little device for changing the focusing area and doing auto exposure lock. But if you wanna turn it completely off you can, well, not turn it off, but you can have it restart the standby timer if you want to keep the camera turned on. Release button to use the dial. Now I mentioned this at the top of the class. The way Nikon buttons on many of their big features, you know, like their mode button, their quality, their white balance, you have to press down on the button and turn the dial while you're doing it. Now the other way of doing this, is by pressing down on the button. And then having an invisible timer giving you about six seconds to make the changes. And so, it's a little bit easier to work with the camera with just a single finger. For some reason you can't get two fingers or two hands on the camera at the same time then you might wanna turn this on. But it's kind of the safety protocol that Nikon's already instituted in there. And most people are pretty fine with it. But you can change it if you need to. The metering indicators can be reversed. Some of the older Nikon cameras had different setups for the metering system and you wanted, if you wanted this camera to match those older cameras you could reverse it. It doesn't make a lot of sense on its own so I would keep it with the plus on the right and the minus on the left. That's kind of the normal system that most people have. F eight, live view button options. And so, if you don't use live view and you don't like the camera kicking into live view every time you accidentally hit the button you can completely disable it if you want. You could also enable it only if the standby timer is active. So if the camera falls asleep, it will not accidentally turn on. And so, if you don't use it that much, you don't lik wasting battery power you can put it into a little bit more protective mode here. F nine deals with the light switch on the camera. And so, when you turn that light switch on do you want it to also turn on the light and information display on the back of the camera? In some cases, that could be handy. In some cases that's just a little too much turning on all at the same time. If you have the MB-D18 grip, you can program the buttons on that grip as well as the other buttons on the camera. And so if you do have that grip you can dive in here and look at all the different customizing options available to you. Next tab is with the movie controls. And there's not too many things in here. But the first one is gonna be the big one. Where you can go in and control a lot of the way the buttons work when you are in the movie mode. And so a lot of the button control assignments that we did before are only when the camera is in a still picture mode. When it's in a movie mode, then those buttons can change over to a different type of setting. So you can have your camera set up in two very different ways depending on what mode you're in. Still photos. Or movie photos. The highlight brightness, we showed you this earlier. It's one of the things in the movie mode. When you go into the I menu that shows you the blown out highlights. How bright do you want it to be before it starts warning you with those zebra stripes. And so you can choose many different levels. The lower the number you choose the sooner that's gonna turn on as something becomes bright.
Class Materials
Bonus Materials with Purchase
Ratings and Reviews
Susan
This is a great class with an exceptional instructor, and I learned so much about my new D850 camera! I especially appreciated the opportunity to follow along at a perfect pace with the instructor while being hands-on with my camera. The content was understandable, logical and enjoyable. This is my first class through CreativeLive -- thank you!
a Creativelive Student
Excellent class. Very fast paced which I loved. I have had my D850 for a few months and thought I had it all figured out. I learned some awesome tips and tricks that I am eager to start using. Thanks John:-)
Francis Sullivan
82 yrs old. Been an avid photographers since 5 yrs old. Read and listened to all types of photo teachers. Greengo is the best of all. Every so called photographer can still learn from a master on the D850. Fantastic camera and fantastic teacher.
Student Work
Related Classes
Camera Guides