Lesson Info
7. Left & Right Sides of Camera
Lessons
Class Introduction
13:59 2Basic Camera Controls
02:51 3Top of Camera
32:21 4Back of Camera
29:57 5Live View Menu
22:14 6Movie Mode Menu
09:03 7Left & Right Sides of Camera
16:38 8Bottom of Camera
05:44Lesson Info
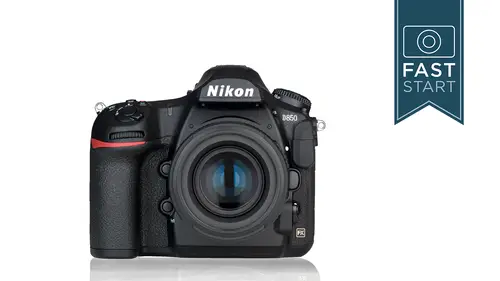
Left & Right Sides of Camera
So we were talking about the back of the camera. On the back, we also have a memory card access lamp and that's gonna light up any time that you are writing information to your memory cards. So most important thing is, don't try to take your memory cards out of the camera if that light is turned on. We also have our speaker on the back of the camera so if you are playing movies that's where the sound is going to be coming from. Now you may have noticed that there's a couple of buttons on the camera that have little color codes by them. And so this little teal colored symbol is gonna be by the quality and the exposure compensation button. If you press both of those buttons together for three seconds you will reset the camera back to its basic settings. The other shortcut is by pressing the garbage can button and the ISO button for three seconds. It'll reformat your memory card without having to dive into the menu system. So these are just a couple of quick button shortcuts on the camera...
. Let's work our way over to the left side of the camera. We have our bracketing button. So by pressing in the bracketing button and turning the back of the camera, we can choose the number of shots we're going to shoot. And we can change the increment of those shots by the top or the front dial on that. And so this is a great way of collecting a bunch of photographs at different exposures very quickly. And so you can shoot three, five, seven, or nine frames at a time. And you can shoot these in different increments as well. And so anywhere from a third stop, which is very small, to three stops, which is a very significant brackets. And you can also use this with the exposure compensation as well. And so, thought we might do a quick little demo here on that one. So, for this case, I have my camera set in aperture priority. And I'm just gonna set an aperture of five point six right now. And, let's go ahead and take a live view. Make sure that we're pointed generally in the right direction you might say. And so, let's shoot this at a bunch of different exposures. So what we're gonna do is I'm gonna reach around and press the bracketing button. Which is over here somewhere. And if I put it into the info mode we can see what's going on. So let's change, and let's shoot a five bracket series. That seems to be enough. And let's do it at a rather significant amount, let's go a stop. Well we, let's go, yep one stop. That sounds good. Okay. And so the other thing is I'm gonna put my camera in continuous high right now. And so the camera will fire through five shots very quickly if I leave my finger down on the shutter release. And so what we can do now is we can go back and we can play through these images. And we can see that one's a little bit on the bright side. And, adjusting through our different exposure levels here. And so, it's shooting the normal one first. And then let's see if we can figure out what's going on. Right down in here, we can see that we got the minus two, minus one, plus one, and the plus two. And then it had the normal one as the very first one of the series here. And so, you can set that up very easy. Press the info button so we can see what's going on. It's currently turned on at five frames a second. So what I wanna do I wanna turn it off. Which is zero f. Which you can either think of as off or zero frames in the bracketing. And so that can be really helpful in some architectural or landscape situations. Over on the left side you will have access on most of your auto focus lenses to a switch between auto focus and manual focus right on the lens itself. We also have a switch on the body for auto focus or manual focus. And so both of these need to be in auto focus if you want the camera to automatically focus. Next up is the little button inside the focusing switch. And this is very important for changing the way your camera focuses. What you'll be doing is you'll be pressing this button and turning the back dial to change the focusing mode of the camera. And this is something that we talked about previously in the live view section. But it's gonna be a little bit different here in standard photography. So, for changing the focusing mode. First press in on the button. Second, turn the dial in the back of the camera. You have essentially three options that you can get to. AF-S stands for single-servo focus. And this is great for subjects that are not moving. The camera will focus on your subject. And then once it's figured it out it stops. And that allows you to recompose into a more pleasing frame perhaps. The next option is AF-C, for continuous-servo auto focus. And this is great for any sort of action photography. If you are shooting any type of sports this is usually the first thing that I change on my camera for that environment because what it does is it focuses on whatever is in the brackets and if that subject moves closer or moves further away it readjusts focus as quickly as it can with the lens. Now you could also flip the switch to go into manual focus, which is something you might wanna do for landscape photography for instance if you have a different way that you would prefer to set up the focus than auto focus. You wanna go in and do it manually, you can do that as well. So, single and continuous are the main options. They're pretty easy choices, 'cause they're very different styles of photography. Now using that same button, if we turn the front dial of the camera we will be changing the AF area mode. And Nikon has a lot of different options on how big of area you can choose. So let's take a close look at what they have available. So, single point is a small bracket where you get to choose one point, and you can move that around the frame to wherever you want it. And this is good for stationary subjects. D nine stands for dynamic area nine point AF. And so what it's doing here is it's looking at one center point, but it's also looking at the nine points around it should the center point not have the right type of contrast information for the camera to focus. Now this is only gonna be available in the AF-C continuous focusing option. So this is gonna be good for subjects that are moving around a little bit. We also have a 25 point system, which is looking at one point but also looks at the nearby neighboring 25 points for subjects that are a little bit more erratic in their fashion. We have the same thing going just a little bit larger here with the d 72 option. And so, these dynamic focusing point options are only available in the continuous focusing mode. And so these are good for tracking subjects that are moving back and forth. Finally, we have the d 153, which uses all 153 focusing points for tracking subjects. Now remember, when you're using all 153 points the camera prioritizes subjects that are closest to the camera. So whatever is closest to you is what the camera is gonna try to focus on. A lot of times that might be too many focusing points if you have a lot of subjects that you could potentially focus on. And so, for most sports action, I prefer to be in the d or d focusing options. The three d focusing area uses one point to start with and then it looks at all 153 focusing points. And it tries to track a subject. And it is using color tracking information that comes from the metering system in the camera. And this is imputing a little bit more smart technology into the focus tracking than the standard auto focusing system. In some cases, it'll do better. And in some cases, it won't do as well. A lot of professional photographers have found that the three d tracking is sometimes a little erratic in what it does. And they're able to maintain more direct control by choosing a d or a d 72 area. Rather than having the whole area as potentially an area where the camera may be focusing. And so it's something worth exploring, experimenting with to see if it works for your type of photography. The group AF area is really simply a five point area where it chooses one in the middle and then it looks around to the nearby notable four areas of choosing. So it's, it's just something between single and d nine. I don't know why Nikon has had to call it a special group area. But it's a good area for subjects that you wanna be pretty precise on but are maybe moving around just a little bit. And then there is auto area AF. And this is where it just simply looks at all the focusing points and chooses whatever is closest to you. Now this one is available in single as well as the continuous option. So, with these 153 focusing points, let's talk a little bit about how they work. Because there is some differences between one point and another point here. So the camera is using a phase detection beam splitter, which means a line has to go through two different parts of the sensor. And so some of these sensors are gonna be good at horizontal lines and some are gonna be good at vertical lines. And so, you need to have a line going the right way through the sensor so that it can measure if it is broken or not. And as a result of this what happens is that some of the lines, or some of the focusing points, are really good at picking up horizontal lines but they're not good at picking up vertical lines. And others are exactly the opposite. They're good at vertical lines and they're not good at horizontal lines. So here is what we have on the camera. We're gonna have some cross type points in many different areas. But some of them are only vertical. Some of them could be horizontal. So the camera has 153 points that it can use for focusing. But not all of those are selectable by you the user. So there are 55, those are the large boxed areas that you can select yourself. There are 99 cross-type sensors, some of which you can select. Some of which you cannot. Some of the them are the in between focusing points between the other boxes that you can select. 54 of the sensors are horizontal sensitive sensors. So they're looking for a horizontal line in these areas. They're not really looking for vertical lines at all. We have 35 cross-type sensors. So if you wanna select an individual point this is where you wanna be. Either in that middle group of three or on the outer two rows of sensors. There are 15 sensors in the middle that will support lenses up to F eight in aperture. Now Nikon does not currently make any lenses that have a maximum aperture of F eight. But they do make a number of lenses that you can add tele-converters onto whereby the final result will be a maximum aperture of F eight. So you take a 500 F four, put a two times converter on it, it's F eight. You take an 800 five six, put a one four converter on it, it's got a maximum aperture of F eight. And so these 15 sensors are gonna be the best, these ones here in the middle, at focusing with lenses that have those tele-converters on them. And so, if you wanna be able to select a cross-type sensor you're gonna probably be choosing that center point in the middle. And so it's the most sensitive one to different types of light and on different types of lenses. Now this does vary from lens to lens. And you may wanna take a look in the instruction manual if you are using some older lenses as to which focusing points are active on those older lenses. Now all points are rated to an EV sensitivity of minus three. The center one is a little bit more sensitive than all the rest. It can measure light and focus all the way down to EV minus four, which is really, really dark. It's about full moonlight. And so, the camera is extremely good. Has lots of different areas for focusing. You can choose many different points. Many different groups of points. And it can focus under very good low light conditions. All right, so just remember on setting the focusing points you gotta press the button in, and turn the back dial and the front dial to change those focusing parameters. Continuing our tour on the left hand side you'll notice there's some symbols for Bluetooth and wifi. We'll be talking about that more later in the class when we get to the menu sections. But this is gonna allow your camera to hook up to a smart device like a phone or tablet. So you can use it as a remote control. Or as a downloading device. Then we have some rubber doors with lots of little ports that we can plug things into. First up is our audio output and input. So if you wanna listen with standard headphones you can plug them in. If you wanna have an external microphone Nikon makes their own. But there's lots of other good microphones that you can get from Sennheiser and Rode and many other companies out there to get better quality sound. Next up is our USB connector. If you wanted to download to your computer you could do so through this connection. If you wanna hook up to a TV, you would hook up through the HDMI port. And you could do that either to, say do a slideshow or show your movies on a TV. Or you can use this as an external monitor or recorder for recorded video from the camera. Over on the right hand side of the camera we have our memory card door. The camera takes two different types of memory cards. It can work with secure digital and the XQD card. So two different slots. The SD card is UHS two complaint which means it has a faster protocol so it can read data and store it a little bit more quickly than the older secure digital cards. A quick word on some of the secure digital cards out there. We do have a lock on these cards where you can turn this, push this down and lock information on the card so it can't be written to or deleted or reformatted. Cards have different sizes obviously. And then there is the bus speed. The UHS two cards have two lines of connections so that it can transfer data a little bit more quickly. If you're shooting a lot of sports you may wanna look at the maximum speed of the card. The faster that is, the faster images will be able to be recorded to the memory cards in the camera. If you shoot a lot of video you wanna think about the minimum speed of the card and get a card that's a little bit faster because when you're shooting video there's a lot of data that's coming in all at the same time. Nikon recommends a speed class of three, the 30 megabytes per second card. And that'll enable the camera to stay well fast enough ahead of the recording rate so that you don't have to drop any frames or have the recording stop for any reason. Now the two main cards that you're gonna use in here, the two cards, is the secure digital and the XQD card. The XQD card is a newer faster card that has a lot more capabilities. And I think for many people who have the d eight 50, they're gonna spend a little bit of extra money to get the XQD card. Especially if they shoot action in any cases. Because the card can, and typically in most cases, record information faster than the secure digital cards. And there is a bit of a difference in the future capability of it. The secure digital cards are gonna be a little bit more affordable because there's a lot of different companies making them. And they're just the most common card on the market today. But the XQD card has some really good potential for anyone who wants to shoot very fast photos and not have that buffer fill up. It's gonna clear out much more quickly with the XQD. Now you can download from the camera using that USB slot. But, if you do wanna get images from your memory card to your computer probably the fastest way to do it is to just plug it into a card reader or directly into the computer itself, depending on what you have. And that way you can not need your camera. Your camera can be off shooting doing other things. And you can download the images as quickly as possible. When you're done downloading your images and you've backed them up appropriately it's a good idea to format the memory cards on a regular basis. This is gonna give you the most lifespan of those cards. And it's just gonna help you clear off all of that data. All the file directories. And have a nice clean start to the next time you're shooting.
Class Materials
Bonus Materials with Purchase
Ratings and Reviews
Susan
This is a great class with an exceptional instructor, and I learned so much about my new D850 camera! I especially appreciated the opportunity to follow along at a perfect pace with the instructor while being hands-on with my camera. The content was understandable, logical and enjoyable. This is my first class through CreativeLive -- thank you!
a Creativelive Student
Excellent class. Very fast paced which I loved. I have had my D850 for a few months and thought I had it all figured out. I learned some awesome tips and tricks that I am eager to start using. Thanks John:-)
Francis Sullivan
82 yrs old. Been an avid photographers since 5 yrs old. Read and listened to all types of photo teachers. Greengo is the best of all. Every so called photographer can still learn from a master on the D850. Fantastic camera and fantastic teacher.
Student Work
Related Classes
Camera Guides