Comparing Texture & Clarity
Lesson 8 from: How to Retouch Portraits Using Lightroom CCKristina Sherk
Comparing Texture & Clarity
Lesson 8 from: How to Retouch Portraits Using Lightroom CCKristina Sherk
Lessons
Class Introduction to How to Retouch Portraits Using Lightroom CC
01:46 2Getting Started: Setting Up Lightroom
09:31 3Retouching Blemishes
11:49 4Creating & Saving Adjustment Brush
09:56 5Eyes Selection
19:13 6Retouching Skin
12:15 7Teeth Whitening
03:09 8Comparing Texture & Clarity
03:32Lesson Info
Comparing Texture & Clarity
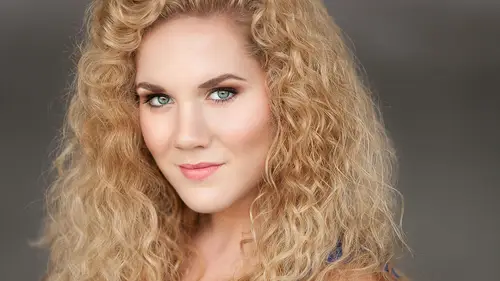
I did want to touch on the difference between texture and clarity because this is a new feature within the new Lightroom. So we have a new slider called texture. It is not only available in your local adjustment brush, but you also have a slider here for the global adjustment. And here's the difference between negative 100% clarity which is what we used to use for skin smoothing, and negative 100% texture over here. And so I know that this is really minute, the differences, but what I want you guys to see is I want you guys to look at these specific areas that I've kind of pointed out for you. So, if we look under the eye, you can see that the clarity slider is gonna do a better job at evening out larger areas of highlight and shadow. 'Kay? And the texture slider leaves those areas alone, and it works on smaller areas. So smaller areas of detail. Okay? Can you guys see the difference there? I know it's hard, it's very slight. Very subtle, yeah. So, that's why your best bet whenever you...
're doing skin smoothing or anything like that, is gonna be to use a combination of the two. When you are doing skin work, moving forward in Lightroom if you have updated. Bring a little bit more color to a very pale person. It seems that a lot of my friends that are lettin' practice on are redhead, very pale, and it looks horrible. And I can't figure out how to bring out the colors 'cause I know they're not sheet white in reality, but that's how they look on the screen no matter what I do. Sure, that's a very, very good question. Probably what I would do is, the same way if I were, y'know, working here. Y'know, I've done that, the mask over the skin area. I would go ahead and... I would probably just colorize that skin a little bit with a natural skin color to give the illusion of foundation on that area. The other thing that you can do, which is not necessarily a Lightroom fix, y'know you've got your skin smoothing. You got your skin smoothing little dot right there. You could add a color. So, for this example, let me just do something silly, and add blue. But you colorize the skin, not to blue. (chuckles) But to something that looks natural to their skin type. The other that I always tell my clients to do 'cause I shoot overexposed as well, is to add 35% more makeup then they normally would so that it gets captured in camera. So that's one fix for in camera, and one fix for post production as well. That could work. Okay? Good question though.
Ratings and Reviews
Laura
Great class, good, clear, easy-to-follow instructions. This is going to have a big impact on my workflow and save me a LOT of time - thank you!
Robin Spencer
Excellent! This program was short and sweet but packed with lots of very useful tips and tricks. I have been using Lightroom for years and still learned so much. All of her time saving tips especially "Sync" were really appreciated. Highly recommend.
JennMercille
As fast as Lightroom is growing and improving, it's a hard to keep up with everything it is capable of. Kristina did a great job of showing how to speed up workflow by retouching in ways that I though you could only do well in Photoshop. This class is super informative and well worth it!