Lesson Info
20. Menu Functions: Connection Settings
Lessons
Class introduction
12:33 2Photo Basics
04:07 3Camera Controls: Exposure Control
03:57 4Camera Controls: Top Deck
21:14 5Camera Controls: Drive and Metering
33:54 6Camera Controls: Back Side
26:44 7Quick Menu Overview
26:28 8Camera Controls: Back Side Navigation
08:21Camera Controls: Left Side, Right Side, Bottom and Front
15:05 10Lenses
06:17 11Menu Functions: Image Quality
13:59 12Menu Functions: Focus Settings
20:18 13Menu Functions: Shooting Setting
21:19 14Menu Functions: Flash Settings
05:31 15Menu Functions: Movie Setting
19:22 16Menu Functions: User Settings
05:38 17Menu Functions: Screen Set Up
09:10 18Menu Functions: Button Dial Settings
15:23 19Menu Functions: Power Management and Save Data Set Up
04:40 20Menu Functions: Connection Settings
13:43 21Menu Functions: My Menu
03:13 22Menu Functions: Playback Menu
08:14 23Camera Operations
13:12Lesson Info
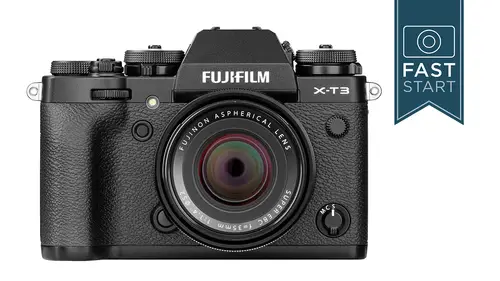
Menu Functions: Connection Settings
next up is the connection settings. This is where things are going to get interesting because the camera can be connected up to a variety of other devices. And so this is either for downloading images or remote control of the camera in some way or another. So let me walk you through some of the different options that we have here. First up is we have Bluetooth, and so Bluetooth is, ah, pretty energy efficient way of communicating. It doesn't work over a large, large distance of space, so it's not gonna work way apart from each other. But if you're pretty close together, it'll work out. So here's the basic steps to hook the camera up to a blue two system. So there are things that you need to do with your phone, and there are things you need to do with your camera. First off with the phone, you are gonna need to download the Fuji Film Camera remote app, and this has changed. Over the years, there's been different models that have come out, and this is a relatively new one here. They've m...
ade a number of changes you're going to then need to go into the camera, which is exactly where we are now under connection settings under blue two settings and setting up preparing registration. From there, you're gonna go back onto your phone and you're gonna open the camera remote and follow the instructions. And I say follow the instructions because there's a whole bunch of ones about picking out the camera and connecting them. You can then do live you shooting, and it's gonna actually hook up through a WiFi system that it will ask you to do. Once you're in that mode, you can import images also done through a WiFi connection. Or you can do a remote release, which is just a trigger on your phone for triggering the camera. So if you don't have one of the other remote, you could just do it on your phone for free. So this is the basic set up. And as Fuji moves along and changes their APS, this general set up may change over time. So be aware that this could change in the future as well. Now, what I want to try is something very dangerous. I want to try to set the camera up in a remote system using these instructions right now here for you. So let me get my phone out and get it set up slightly so that I've turned off some of these settings so that it will actually work in here. Uh, make sure I get this right. Okay, So what we're gonna do is gonna turn this around so that you can see what's going on. And what we're gonna need to do is turn the camera on, go into the menu setting and get in here into the connection setting blue two settings, Perry and registration. So now we're gonna need to go into the phone, and we're gonna open up the Fujifilm app, and it's probably gonna ask us some questions. And this is where I say, follow the instructions. So what are we working with? We're working with an ex system, so I'm going to select the X system. It is one of the interchangeable lens camera. Select that. Which camera do I have? And there's a whole list of them here. I'm assuming they'll Adama's, they come to him. So we're working with the X t three. We'll select that one and we'll proceed with the settings, and we will proceed again. And the phone is now reading the X t three. So I'm going to select that one. It's going to take a moment for it to connect up. Hopefully not too long. All right. I think we've got ourselves paired here, So we're gonna go ahead and press start and we'll do a simple thing. First, we're going to do remote release. So if I just want to take a picture, I'll turn this on and let's listen and see if the camera fires and it's pretty responsive. Working pretty good. Okay, so we're gonna close that one out. And now when things are gonna get a little bit more tricky, I want to try live view shooting. So I'm gonna press that you can see the cameras. WiFi signal is starting to turn on. My phone has asked me to join the WiFi system, and I'm going to say join. This may take a few seconds here, and I think I'm gonna need to press OK to confirm that it's okay to do this. So on my camera, I need to confirm that I'm connecting up with this IPhone, so I'm going to say OK, because I've been making this connection here. And so now I think we're going to get a live feed of what the camera is pointed at. So I'm gonna adjust where the camera is, and I'm gonna go to a little bit wider angle, and I can then do a number of settings here. I'm not gonna do this. A full review of this app, because these things change all the time. But you can go in here and change certain things parameters, depending on how the cameras set up. So right now I can go in and change the I s. So if I want to change it to I s o. It will do that. It sometimes takes a moment for that. I can just press the okay down here. If I want to change the white balance in here, I can change the white balance. Let's say it's incandescent. Knew that doesn't look good. Fluorescent lights. That doesn't look so hot. Let's try Florissant rights number one. OK, that's pretty good. And I'm gonna press OK if I press the shutter release, I can take a photo. And the idea is that I can come over and I can get in the photo myself and come over here, line myself up and then take a photo and see that I'm in the photo or whatever it's set, right? And so that is the basic set up on this. Now you can download images and you can take photos. You can use the shutter release, and they may expand on those capabilities. If you do have the camera set in a manual mode, you can change shutter speeds and apertures esos exposure compensation, White balance, flash film simulation. And there might be some things that I haven't even had a chance to investigate in there. But you can do pretty much, ah, full control over the camera in this regard. So what we're gonna do next is we're going to get it out of this mode, so I'm gonna see if I can close out of it here, and I infinite close out of this and see if I can get back into the menu mode on the camera and go back into the connection settings Bluetooth pairing. And so it's cancelled it. Okay, so that is the your basic Bluetooth set up, and it's kind of a combination of Bluetooth and WiFi. There may be some other ways to get into it as well. In fact, there are. But I found the easiest way is to set it up with Bluetooth. And then, if you want to get into WiFi, have it kick over into WiFi, as I just showed you in that demo. Okay, that is the Bluetooth pairing registration. If you want to delete what you have, you can do so here if you want to turn blue tooth off, which is what I recommend most of the time when you are not using Bluetooth. And so one of the problems with using Bluetooth and WiFi is that it runs the battery down of both your camera and your phone quite quickly. So if you want to play around with it, just make sure that you have charging capabilities not far away, because you can run both of your camera and your phone down to 50% in a relatively few number of minutes of time. And so it does eat up batteries, auto image transfer. So one of the things that you could do is you could be shooting photos, having them transfer automatic uploads to your phone is your as you are taking them now. This can take a little bit of time, and it can't keep up with people who are shooting really quickly. So you may want to do this very carefully with a little bit of testing to see if it works in the scenarios that you're hoping for. So when you are connected up with a smartphone, do you want it to sync up with further data? The location in time, for instance, can be downloaded from your phone to the camera and added into the metadata, which really doesn't take up too much power and so forth. So it's not a bad thing to have on there, so it's kind of nice option. So those are some of your Bluetooth options. We also do have network options where the camera can connect up to a computer with WiFi now for downloading images. I have found this far too cumbersome and slow in general for doing that. And so transferring a whole group of raw images across WiFi is not a great way of doing things unless it's the only way you have or you really need it for another reason. And so for working with wireless systems, Uh, we do have a basic set up here. I'm not gonna go through every detail in here, but there's a simple set up that will hopefully work. If not, then you can go into the manual, said it. Set up and work with that. There is I p address setting in case you need to use that for different networks. We have a PC Auto save, so this goes into a sub menu. If you are trying to save to a computer, there's a simple set up and Emmanuel set up. Most people aren't going to need this because you're just gonna download with a card reader. You can delete the registration of necessary, and then it will show you details of previous setups that you've had. So this is more for tethered shooting. If you want to connect your camera to an in stacks printer, which will wirelessly send a print to your little printer, this is good fun thing, especially if you just want to make some fun prints. You can shoot with your camera. Select which image send that image to the in stacks printer, inhabit pop out of there and have a hard copy of your print in a very short period of time. If you are going to connect your camera physically to your computer with a PC connection, depending on what you are doing, are you using it to read the card and download the information or use it for tethering? And so there's some different set ups here, depending on how you are using the camera. Some general settings? Well, that's pretty specific. So these air general settings for the rest of the camera. So the name of the camera as it appears on these electronic devices, what's going to show up? And if you are fortunate enough to own multiple Fuji X T threes, you'll probably want to give them little separate names. So you know which one is which. I would recommend that if you are downloading images to your phone for simple viewing purposes, you would want to resize your images. They'll go down to about three megapixels, and this will make them a lot faster and easier to transfer them the 26 megapixels. The camera is natively shooting in. You can add geo tagging information, and this is gonna take information from your phone and put it into your camera so it matches things up so you can see where you shot certain photos. The location info is gonna give you information about where you were. Death last, downloaded from your phone. So it's not exactly where you took photos, but where the download came from, and then a button setting. So if you have one of the buttons on the cameras as programmed for WiFi, you can have it set for WiFi or for Bluetooth Perry and you get to choose which one of those buttons are how that button works. In this particular case, Last up is just general information about the address of the camera on its Bluetooth address. And then, if you've made a mess of things you've gone in, you've changed too many things, or you just want to set it back to the factory default settings. You can come in here to the reset wireless settings and reset the entire communication system of the camera back to the factory default system. So one of the things is that if you are connecting up to a computer, you can hook it up to a lot of different Fuji software. Now I'm not gonna go through in high detail here and talk about all these different options. But Fuji has a lot of different options for computer software. It depends a little bit on whether you're on a Mac or on a PC, whether you're downloading, whether you're tethered shooting, whether you're trying to remote control the camera or what. One of the more interesting ones, I thought, is that people love the Fuji film style so much they shoot raw. And they got mad because when they took it to their computer, they could not get the images toe look like Fuji's J pegs do in camera. So the Fujifilm X Ross Studio you download your you take your images off your camera, you download them to your computer. You then connect your camera up so that what happens in this software is it sends the image back to the camera so the camera can process the image, and then it sends it back to your computer, processed with look that you might like. And so it's an interesting way of solving the problem, because then the cameras software is producing that new image that you were working with on your computer. So it's It's another tool in the many tools that they have for solving various problems. So be aware that there are a lot of different software options out there. You probably want to go to Fuji's website and read more up about these if you do want to use these for tethering or other purposes.
Class Materials
Bonus Materials with Purchase
Ratings and Reviews
Justina Tumaite
Thank you it's super helpful. I loved it :)
Robert Felice
I loved this class! How much did I love this class? I loved this class and I don't even have an X-T3! I have the Fujifilm X100V, a camera similar enough to the X-T3 that this class easily covered 85% - 90% of the features on my camera. It's also a camera new enough that there isn't much available on how to use it. This class got the job done for me. Well done, John!
Eric Geerts
I've been with CL for quite a while and I pretty much got used to (all of) John's top quality classes. Kinda been waiting for this one over the last months. So thanks again, John, for your consistent 5 star quality standard!!
Student Work
Related Classes
Camera Guides