Lessons
Prerequisite #1: Basic Metalsmithing Tools
18:08 2Prerequisite #2: Tools for Soldering
14:21 3Prerequisite #3: Soldering Basics
21:14 4Class Introduction
09:39 5Design Considerations for Bracelets
10:33 6Choosing Your Materials
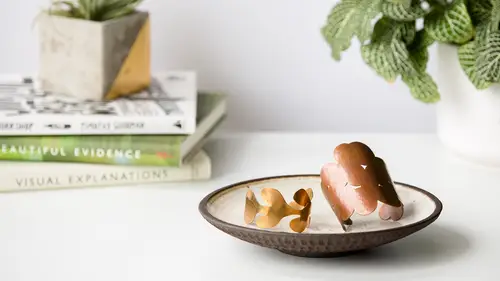
16:12 7Sawing Bracelet Blanks
26:47 8Forming Cuff Bracelets in Wire and Sheet
21:41Determining the Length of a Riveted Bangle
08:11 10Creating a Standard Rivet
16:26 11Creating a Tube Rivet
09:25 12Making a Hinged Bracelet
21:02 13Drilling Holes Cutting Interior Shapes And Finishing Your Clasp
10:33 14Soldering A Basic Round Or Oval Wire Bangle
28:56 15Soldering Other Shaped Wire Bangles
35:17 16Soldering Wire to Sheet to Create Bangles
08:44 17Soldering a Basic Round or Oval Bangle from Sheet
14:09 18Soldering Other Shaped Sheet Bangles
05:59 19Pickling Metal After Soldering
05:42 20Filing, Sanding, and Basic Finishing of Bracelets
11:50 21Patinas: Achieving a Dark Finish with Liver of Sulfur
08:37 22Patinas: Creating a Heat Patina
05:21 23Patinas: Green and Blue Liquid Patinas
08:56 24Sealing and Finishing Patinas
08:35 25Taking Your Bracelet Designs to the Next Level
03:45Lesson Info
Sawing Bracelet Blanks
So now let's go ahead and talk about cutting out our bracelet blanks. First of all, you can absolutely 100% go online and order bracelet blanks. They're usually called bracelet blanks. If you're like, "I don't want to cut anything, Megan. "I don't want to deal with it," you can do that. I personally find that they're kind of expensive and I want you guys to be able to make whatever it is you want to make, so we're gonna talk about cutting out our own bracelet blanks. Let me pull some more tools up here for us really quick. First thing is you can actually make bracelets out of wire. Wire, I of course precut everything to try to make it a little bit smoother here, but wire is gonna come usually in a coil or coil tighter on like a little spool. That's the word I wanted. You can absolutely 100% cut your wire with wire cutters, but know that you're gonna have to file the ends. If you have thicker gauge wire, you can cut it with a saw, which we're gonna talk about how to use the jeweler saw ...
in a minute. But you can cut it with a saw and it's gonna reduce some of your filing. I'll show you guys that when we get to the saw. But in general, like I'm pretty lazy and usually my jeweler saw is like far away and my wire cutters are always next to me, so I'll just cut my wire with wire cutters and quick file the end. But I know that you guys are way more excited about how we can make these fancy shapes cuff bracelets, so we're gonna talk about that. There are a couple of different ways to transfer your design to metal. There's tracing paper and rubber cement, which we're gonna talk about in a second. You also have the option of printing or photocopying onto sticky labels, so if you buy like a full sheet of labels, I have friends who do a lot of piercing and so they'll just take all their designs, print it out on one sheet, stick it on the metal, start cutting. I happen to be a little bit more old school, so I don't do that. Then the third one is drawing or scribing directly on metal. If you're cutting out a really simple shape, like let's just say we wanted to cut a rectangle, you can go ahead and just take your ruler and your Sharpie, and let's just say I wanted to make, I'm gonna check this here. Yep, that's what I thought, six inch sheet. So if I wanted to make this into a little half inch bracelet, cuff bracelet blank, I could just take my ruler, take my Sharpie here. Then just go ahead and draw my line. Now this is really, this works perfectly well for something like this, right? It's a quick simple line. I'll leave it under there. It's a quick simple line. I can cut it out fast, not a big deal. I don't like to do this for more complicated shapes because what happens is as you're sawing, you've got oils in your skin, you're touching the metal, and pretty soon this line that you draw all nice starts to like disappear as you're working. So it's fine for cutting out really simple things, but if we've got more complex shapes like our little vaguely organic shape here, for that we want to do something that is a little bit more permanent. So that's where we can use our tracing paper and rubber cement method. What I did here was I first drew this pattern. You could draw it in your sketchbook. I happen to draw it on tracing paper because it's what was sitting in front of me. But then because I like to be able to replicate my designs, and because I also sketched this in pencil, and pencil will smudge on tracing paper, I went ahead and took a second piece of tracing paper and just traced over it in Sharpie. So now I've got a slightly more permanent design that I know I can work off cutting with without having to worry that I'm gonna smudge it or lose my pattern halfway through, and get really mad, and have to redraw it, and all that stuff. So now what I can do is I'll go ahead and just cut this pattern out so that it's basically the shape. Then just to make my life a little bit easier, I had kind of precut down some of my metal here. But if you did not do that, it's really important that you always place your designs as close to an edge as possible. So let's just say I had a bigger sheet of metal that looked like this. I'm not gonna take this design and stick it straight in the middle there, right? It's a total waste of material, and it also means I have to try to cut in there, and it's such a pain. So if you're working with a bigger piece of metal, always kinda stick right to an edge. This I think literally is just gonna perfectly fit right on here. We're gonna be a little short, but that's okay. We'll make it work. Then what we want to do with rubber cement if you have not learned the proper way to use rubber cement, what you actually are gonna do is spread it onto both surfaces and let it dry. I always spread mine on the metal first because I find that it takes it a tiny little bit more time to dry on the metal than it does on the paper. Then I'll go ahead and put it on my paper as well. In case you missed that step, I flipped the paper over so I'm putting it not on the side I drew on, but on the other side. So now I'm gonna go ahead and let that dry. I think someone before in the previous class asked me like, "How long do let it dry?" The answer is til it's dry. Usually you can kinda walk away and you'll see it'll get less shiny. So what I tend to do in my own studio is that I will actually just work on something else while that's drying, so that's what we're gonna do. I'm actually gonna set this aside and we're gonna start by cutting out just our plain and simple little guy. The first thing that we need to do is choose our depth saw frame. Now again, it'll make your life easier especially if you're buying big sheets of metal to cut with something a little bit bigger, right? If I have this six inch saw frame and I'm sawing through, I can pretty close to get to the end of this six inch piece of metal, right? You can see how if you're doing a lot of bracelets, a six inch deep saw frame is gonna make your life so much easier. That said, if you only have a three inch saw frame, as long as you're not going any deeper, if you're not using metal that's any bigger than six inches, we can get away with this. So I'm gonna use this just to show you guys little tips and tricks if you don't have the deeper saw frame. Deeper saw frame is easier, but not essential. All right, so then the next thing we have to do is choose our saw blade. Unfortunately, this does not come magically preloaded with the saw blade. It comes like this and then you'll have to put the saw blade in yourself. So saw blades if we thought metal gauge size was confusing, just wait 'cause saw blades are even more confusing. From zero up, it's pretty logical. The bigger the number, the thicker the saw blade, right? So one is thicker than zero, two is thicker than one, going up from there. But then we have these fancy numbers that say 1/0. That's actually pronounced one aught. Don't ask me, I didn't make it up. In this case as the numbers get bigger, they get thinner. One aught is thinner than zero, two aught is thinner than one, and down from there, so it kinda works in either direction. Don't ask me, I did not make it up, but that's the way it works. A general rule of thumb is that the thinner the metal and the more intricate the design, the thinner blade you want to use. There are charts on the internet if you're one of those people that needs to know like if I'm using 20 gauge metal, I should be using X saw blade. I am not that person. I am like, "Oh look, there's a non broken saw blade laying on my work bench. It's probably good enough." The truth is for what we're doing here, it's probably good enough, right? Unless you're cutting something really really really thick, like a really thick piece of metal, or you're cutting something with a crazy intricate design, pretty much any saw blade between like a one and a one aught, anywhere in there, you can get away with. You're gonna be just fine. I think most of what we have here are one aughts, but I could be totally wrong because of course none of them are in their packaging anymore, so I'm gonna go with the it's good enough school of saw blades. Saw blades are sold by the dozen. When you're starting out, I would get a couple dozen because they're gonna break. We're gonna talk about, we can talk about troubleshooting for anyone who's breaking a lot of saw blades, but even if you're really good at sawing, your saw blades are gonna break. So just buy a couple dozen to start. Have them around, also they tend to be one of those things that just wander off on your workbench. Like I said, that's why I just pick up whatever one I can find. Saw blades have teeth, so if we've got our dozen here, they usually come wrapped up and I'll just pull one out. I don't know if we can see this in our teeny tiny little camera there. Probably not, so let's go back to our keynote. I think it's easier to see in my blown up illustration. You can see saw blades have teeth and they have a direction to them. If you're one of those people who does not have amazing vision, do not fret because there is a very simple trick to tell the direction and that is literally to run your fingernail over it. If it slides down, that means you're pointed in the right direction. If it catches, it's upside down. For a lot of people, that's a lot easier to tell than actually trying to stare at it. The general rule of thumb and actually as sad as this makes me, I'm gonna take out this nicely tensioned saw blade. We're gonna start from scratch. What you want is we have our saw from this way, our teeth always go out and down. The reason for that is that's the direction we're cutting, right? So always facing out and down. Always take a minute to do that. All right, now we're gonna go ahead and actually load our saw blade into our saw frame. Our saw frame here has these little plates. So see, there's two little plates at the top, two little plates at the bottom. I don't know if we can see that in the camera there. Your saw blade is actually gonna go in between those plates. It's those two little plates that hold it together. You'll start, I don't know if I can come in. We're gonna go to our bench pin because we're gonna talk about that in a minute too. I'm gonna start by literally putting the top of my saw blade in between the top two plates. I'm gonna push it so that it actually hits the top. If I was like showing you guys it this way, it's gonna hit the top of this. See? I can't go up anymore, so that's where I want to put that and then I'm gonna tighten the top nut. In general with these, hand tightening is the way to go. You don't need to do any more than that. That said, I have met some pretty crappy saw frames in my day. These are a fairly inexpensive tool and sometimes it shows, right? You can buy really expensive saw frames. I don't buy really expensive saw frames. I just sort of envision them as being a disposable thing because we're talking about like 10, 12, $15 bucks, so if they break, it's not the end of the world. But know that sometimes what you'll see is they'll either come with a lot of oil on them. That's to keep them from rusting while they're in storage and shipment. If that's the case, I'll come in there between the two little plates with either just a paper towel to get the oil out or I'll even come in with a little sandpaper to really clean that up so that it grips. But sometimes I found that just over time, they don't want to hold as well. So if I'm having trouble with my saw blade sliding out, I might take my pliers and just give this a tiny little extra turn. All right, so this side is the easy, except I totally put the saw blade in backwards. There is a time when you can make that work, but this is normal sawing is not that time. All right, so saw blade in the top. Now this is where we want to make sure that this goes in nice and tight. The other thing we want to watch out for here is we don't want this like crazy angle happening. It should be nice and vertical. So now we have to put it in the bottom plate, but we want to make sure that this has got some tension on it, and that means that we actually are going to need to press this against our table top. There are some people I know who will literally take the handle of this, and just put it on their sternum, and press. That hurts me, like I can't do it. I don't recommend it, so what I like to do is take, whether or not you're left handed, left or right handed, most saw frames you're gonna find the nuts are on your right hand. So I like to take the left, my left hand, put it here and then basically press my body against this. Our table wiggles a little bit. Let's see if I can get this without our table moving. In your own studio, obviously you're gonna want to find a countertop or something sturdy. Thank you, you can sit down now. Something that allows you to just press a little bit. I actually work at like a little Ikea butcher block type table and I have to get up and go to another workspace to tighten my saw blade because every time I push in my table, it does exactly what this one does. Just wants to roll out of the way. So you could also go to a wall or something that's not gonna move to get that tight. Now what we want, so tightness is something that you can maybe try to look for, but the easiest way to check is actually just to take your fingernail and we want this really like high pitched thing. This is even could be a smidge tighter. I'm gonna make it work, but I would actually prefer it to be slightly more high pitched than that even, but that's gonna be our check for tension. So then once we've got our proper tension, there are a couple of other things that we need. One is saw blades work best when they actually have some lubrication on them. This goes by a lot of different names, BurLife, Cut Bur, something like that, literally give it a swipe. In a pinch, bar soap, I've used a candle, like I had a Christmas candle and I was like, "I don't know where my BurLife is." Christmas candle, we're good to go. This definitely works better, but pretty much anything that's got a little bit of like waxy oil to it will work to lubricate your saw blade. This is not like a you put it on one time, and you saw for hours and hours and hours. If it feels like it's moving a little tough, add another little swipe of this. This is like four dollars, it's so cheap, totally worth just using. The other thing is when we're sawing, we want to put on our safety glasses just because eyes are important. Things break. We want to make sure that we are being safe. Now anytime you're sawing, you want to set up at a bench pin, and we talked about the bench pin in the pre-req video. But basically, this is a support structure that's gonna make it easier to saw because it's got this notch out of it so we can actually work in the middle and support our metal in both sides. If possible, you always want to set up your bench pin so that it's about chest height. You can see this is a taller table for a reason. If you can saw at a countertop or something that's a little bit higher, it's gonna make your life easier. You don't want to be like towering over what you're sawing, so chest height is best. Like I said, I actually use like a little Ikea cart that's a little bit higher that I just use for sawing, and then pretty much all my other work tables are low. Don't let anyone tell you that you have to buy a fancy jeweler's bench. I've been doing this for a long time and I do not actually own a jeweler's bench. You can pretty much make do with anything, but really pay attention to the height on sawing. Also make sure that you're sitting nice and square to this, right? Don't sit off to the side or off at an angle. Get yourself comfortable. Get yourself in this kind of proper position. It's going to make life easier. When you're sawing, it's really important and we'll actually cut some stuff out in a second so you guys can see this. When you're sawing, it's really important that you don't put your opposite hand in front of the saw blade. It's really easy to want to do that instinctively, right? Like I'm cutting my metal, I'm just gonna like hold it here so it doesn't move. Then what happens if your saw blade breaks, it goes right into your finger. I have nightmares about students doing that. It freaks me out, so we always want to make sure when we're holding that we're actually holding this so that our fingers are out of the way. A couple questions that came up before. You do have to hold this. You can't clamp it and the reason is that we're actually gonna be moving our metal itself and not our saw, so you do have to hold it. Sometimes it's gonna feel a little bit awkward to hold it with your hands out of the way, but it's really really really important that you get in the habit of doing it right. Now with all that said, the other thing that's really important to keep in mind is that you should relax when you're sawing. I know I'm like, "Don't put your hand there," but relax and that's because the number one reason that people break saw blades is because they're forcing, right? This is not something where I'm like aggressively pushing it through. You're actually moving really nice. In fact, a lot of people like to describe sawing, the people who do it a lot, as a zen activity, right? It should feel kind of zen and relaxing, so if you're doing it and you're like super tense, remember like someone said it was zen. If that does not help you, the other one that I've heard is picture this wooden handle to actually be like a glass Christmas ornament, and if you hold it too hard, you're gonna shatter it in your hand. That's another way to think about not holding it too much. Now when we're sawing, I'm just gonna go ahead. We're gonna get started. Starting is actually the hardest part. Pretty much I say like break all the rules when you're starting and just get it started. You'll see in a minute we want to saw vertically, right? I'm gonna come up to vertical, but for now I'm just gonna do kind of whatever I need to do to get this started. Sometimes that means kind of dragging it for a second. Cutting straight into an edge of metal is actually one of the hardest things to do. It's easier to come in at an angle, but we're cutting in a straight bracelet blank. So now what I'm gonna do is if you see here, I'm just making nice smooth up and down strokes. I am not actually trying to push the saw blade forward. I'm letting the saw blade do the work. I am instead just focusing on moving up and down. (saw grinding) Someone asked me before, "Which side "of your line do you cut on?" It really doesn't matter. You cut on whatever side of your line you want. In truth in my own studio, I wouldn't use a Sharpie this thick because now I'm kind of trying to guess where the middle of my line is. It's okay, it doesn't have to be perfect. But so now I'm gonna go ahead, oh. Then sometimes are saw blade breaks because you're trying to talk to people while you're also cutting. If that happens, it's no big deal. We take it out. Last time I think I tried really hard to break saw blades and it never happened, so I'm kind of excited that it actually just did. So sometimes your saw blade breaks. I also find, so now we're cutting on copper, copper is like, I don't know. I find it less friendly than other metals because for some reason it's softer. Can I have someone push against my table again please? All right, so same thing we're just gonna put this guy back in here. Perfect, that's better. Do you hear that one? That's nice, nice high pitch. A little more BurLife. Come back in here. Just keep cutting. Megan, quick question. Yes. What percentage of the saw do you like to pull through? Yes. You know what I'm saying with that? I do know what you're saying. Thank you. Your goal should really be to use, so there's a point where the teeth stop, but your goal should really be to use like I would say 85 to 90%. The longer you can make your strokes, the better. Thank you. That was a great question. Now you can see I'm just about to run out. Can't go any further. Not a problem. I'm just gonna back this out. Turn it around. Obviously if I had a six inch frame, I could just barrel right through, but I don't. Well, I do but I'm showing you guys what to do if you don't. So now what I'm gonna is flip it around and start on my other side. (saw grinding) Once I get this cut, we'll talk about how to do some of our curves and more complex shapes. All right, so now we have a straight line, which is really not that exciting, so let's cut something a little more fun. Now at this point, I would say that looks pretty dry. It's not quite as shiny as it used to be, so I'm gonna go ahead and put our template on here, and just kind of line that up, and really just press this down so that it's not gonna come up when we're working. Then if you've got a little excess of rubber cement on there, you can just go ahead and rub any of that off. All right, so now when we're cutting out curves, the most important thing to remember here is that we want to move the metal and not the saw blade or the saw frame. So we're obviously gonna keep our saw frame working nice straight up and down, but we're actually going to move our metal to cut these curves and even these sharp points. There's a reason that I made this shape look like this so that we would have some nice little sharp points to turn. Now I'm gonna start cutting into this in what feels like a logical way. What we might find after a little bit is that like somewhere along the way, we run out of room or we start hitting like the back end of this. So we're just gonna cut, and see what happens, and 'cause this is what'll happen in your studio too, and then we'll figure out if we have to come in from a different direction. So again, I want to keep this nice and vertical. So I'm gonna cut in here and you'll notice where my hand is, back behind my blade. (saw grinding) So I'm just gonna keep this here. Now when you get to a really sharp point, literally what you're gonna do is just move your saw blade up and down while you spin the metal around it. So you can see, I'm kind of hitting this edge, but I think we can get through, so I'm gonna keep cutting. (saw grinding) I'm not gonna make you guys watch me cut this whole thing out. That's why I have one already cut out, but I want to just do another corner too to show you. This does not take very long and I'm actually sawing slower than I would in my own studio because I want you guys to see what's happening. This is not one of those things that's gonna take you like hours and hours unless you're doing something really really really complex. But in general, it's not so bad. Now you can see here like I can't follow my line because I've hit the backend of this. So what I'm gonna do is I'm actually just gonna go ahead and back my saw blade out. Usually at some point I get impatient and I kind of bend my metal. So let's see if I can get this out without breaking it. So kind of work it out backwards. I'll take this out and now I'll just come in, and start cutting in here from a different direction. You might have to just kind of finagle. Again, that's why if you're gonna cut out a lot of really big bracelets, this is nicer, right? If I were doing this in my own studio, I would just take this guy, cut this out, or you can also split the difference. I think a lot of times in my own studio, I have like a four inch deep, so I'll use that a lot because I can kind of get a little bit further and then cut from the other direction, but really get that cut out. So any questions about the basics of sawing? Michelle. Mic, please. I'm kind of a spazz and I'm wondering if like, can you saw slower than that? I mean I feel like I would be-- Oh yes. Okay, okay. Yeah, there is no like you must saw at a certain speed, so if you're like, "I need to really take my time," you can absolutely take your time. Then you put your design on tracing paper, but could you like print something off of your computer and use like printer paper or-- You can use printer paper. What I like about tracing paper is that it's a little bit thinner so it's less paper. The paper's always gonna create friction, but like I said a lot of people will print on like sticky labels. If you're gonna take the time to print from your computer, sticky labels are a really good way to go because then you can skip the whole rubber cement step, and just like peel it and stick it on. Obviously, that works best if you're working with like a whole sheet of things to cut out, but you can always just print something, and cut out part of the sticky label, and stick it on. I know that we did not talk about how to cut out interior shapes, but I'm gonna make you guys wait a little bit til we get to that. Instead we're gonna actually go ahead and do a little bit of forming of our cuff bracelets. Then we'll come back when we get to our hinges and talk about how to cut those interior shapes 'cause it's a little bit different. But hopefully, you guys are all good in terms of the basic cutting.
Class Materials
Bonus Materials
Bonus Materials with Purchase
Ratings and Reviews
user-d7f7ae
This is a great addition to Megan's metalsmithing series. She makes the topic really approachable. Bonus that metal patinas were added in to the class. I loved the class!
a Creativelive Student
I really enjoyed this class! It was very informative and gave me a lot of ideas for expanding a jewelry line to include a variety of bracelets and finishes.