Filing, Sanding, and Basic Finishing of Bracelets
Lesson 20 from: Foundations in Metalsmithing: BraceletsMegan Auman
Filing, Sanding, and Basic Finishing of Bracelets
Lesson 20 from: Foundations in Metalsmithing: BraceletsMegan Auman
Lesson Info
20. Filing, Sanding, and Basic Finishing of Bracelets
Lessons
Prerequisite #1: Basic Metalsmithing Tools
18:08 2Prerequisite #2: Tools for Soldering
14:21 3Prerequisite #3: Soldering Basics
21:14 4Class Introduction
09:39 5Design Considerations for Bracelets
10:33 6Choosing Your Materials
16:12 7Sawing Bracelet Blanks
26:47 8Forming Cuff Bracelets in Wire and Sheet
21:41Determining the Length of a Riveted Bangle
08:11 10Creating a Standard Rivet
16:26 11Creating a Tube Rivet
09:25 12Making a Hinged Bracelet
21:02 13Drilling Holes Cutting Interior Shapes And Finishing Your Clasp
10:33 14Soldering A Basic Round Or Oval Wire Bangle
28:56 15Soldering Other Shaped Wire Bangles
35:17 16Soldering Wire to Sheet to Create Bangles
08:44 17Soldering a Basic Round or Oval Bangle from Sheet
14:09 18Soldering Other Shaped Sheet Bangles
05:59 19Pickling Metal After Soldering
05:42 20Filing, Sanding, and Basic Finishing of Bracelets
11:50 21Patinas: Achieving a Dark Finish with Liver of Sulfur
08:37 22Patinas: Creating a Heat Patina
05:21 23Patinas: Green and Blue Liquid Patinas
08:56 24Sealing and Finishing Patinas
08:35 25Taking Your Bracelet Designs to the Next Level
03:45Lesson Info
Filing, Sanding, and Basic Finishing of Bracelets
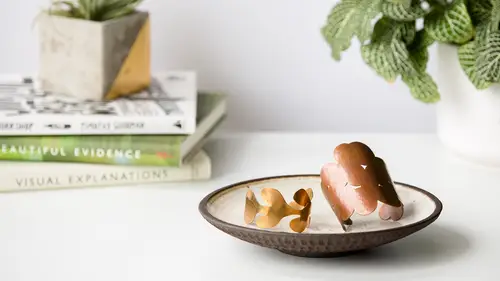
So now I want to come back and talk a little bit more about filing, sanding and finishing. We sort of have alluded to these, but we haven't actually really gone into this in detail. So I sort of mentioned this at the beginning, but if you're doing something where you're cutting out a complicated shape, in a perfect world you want to file these edges before you bend this. I was just so excited for us to make things that I was like, forget it, we're just gonna start bending. But in a perfect world we wanna file this beforehand. And the reason for that is you're gonna get some like funkiness, irregularities on your edge, especially if you're just learning how to saw for the first time, but even if you're like coming in from different angles, sometimes you end up with little points and things. So the first thing you wanna do with anything that you have sawed is just to come in and file around the edge. Where's my flat file? File around the edge to clean up. And you always want to match the...
edge, like the shape of your file, to the shape of what you're filing. So in this case if I'm doing an exterior I can use a flat side for that, so this is an exterior curve. But in the corner I might use something that's either a little bit sharper, like I could come in here with a corner of this. If I had an interior curve I might use like the round side of this. Let's pretend this is supposed to be an interior curve. So I can use the round side. And so my goal with filing this is I'm not trying to round my edges, I'm not trying to go this way around. I'm just trying to clean off any kind of burrs or surface irregularities, so I'm really just kind of, this is probably easier to see, like a flat piece. I'm just trying to kind of skim the metal this way as opposed to coming around this way. Does that make sense? So you wanna go in and file like that to clean up any kind of saw edges. On something like a cup like this, too, if you really wanted to, because this is kind of a lot of annoying filing, you could use that same sandpaper trick where we just laid it flat and sanded it, if you've got straight edges like that. So that's the kind of first filing thing. But then if you did any kind of soldering, then we also need to again do that sort of solder, file cleanup. So you can see in this one, you know, if I was filing this here, I've got this little excess solder, so I would come in here, clean that up, obviously, in our other example we trimmed this end off. But I would come in here, clean this up. And kind of get that. But you can see here, I have a lot of solder happening here, so this is a case where, you know, once I got this joint soldered properly, I would have to take some time and actually file off this solder to get it to go away. That's why we never want to use more solder than we need. On something like our round piece here, I might come in with the half round side of my file and file in like this to clean that up. And sometimes you might have to kind of come back to this, so what I've found is that like you think you have all your solder cleaned up, and then you start coming in with your sandpaper and as you sand you realize there's still a little bit of solder, so then you'll just come back in with your file and kind of repeat the process until the whole thing, all your excess solder is removed. And then same thing if you realize as you're making cuffs that you had ends that needed to be filed, you can come back in and check that. It's always good to just sort of do that like with bracelets that personal comfort test. Right, can I slide this on? Is it scratching me? Do I need to kind of file it a little bit more? So you want to check with that to make sure it's nice and smooth. And in case we haven't seen, we're starting to bubble here, so that's a good sign. We've got those like surface bubbles forming. Yes, now you can see how they're like clinging to it? That's a great shot. So that's what we want, that's how we know it's working. It's still pretty copper colored, so we're gonna let that keep going for now. But I want you guys to see that it's working. So we're just gonna keep an eye on that magic. So then the next step after we've filed is that we want to actually use some sandpaper to actually smooth the edges and remove any burrs. So I mentioned that we don't want to come around with our file, but if you feel this right now it has this kind of lip to it. And so I want to take some sandpaper. So sandpaper, I think I have a cheat sheet. Yes, our sandpaper grits, 150, so smaller numbers are coarser, bigger numbers are finer. So to take off the edges you want to use a fairly coarse sandpaper. Something in the, I think they're all pretty fine. Something in like the 250 to 400 range. If you don't have a lot of surface scratches I wouldn't go any coarser than like 400. 'Cause then there's no point, you're just putting scratches back in. So to start with I'll just take a little bit of sandpaper. And just kind of go like along my edges. Just to kind of clean this up. Now, from a work flow standpoint, we have sort of been jumping around a little bit. So just to kind of keep in mind what we're doing here, what you actually want to do is cut something like this out, then file and do kind of your basic sanding, getting out any deep scratches, do that. Then we would form it and add our hammer texture if we were doing hammer texture. So we're cheating a little bit on finishing, but the reason that we're cheating a little bit is 'cause if we're soldering something we would do all of our soldering, then come back and do our filing and finishing. So that's why I held this off until the very end. So first I'm just taking my sandpaper, and I'm gonna go ahead and just kind of run my edges, make sure they're nice and clean, get any burrs off. Kind of work my way around, doing that. Then we can actually use our sandpaper to remove any kind of surface scratches from our metal. So the way that sandpaper really works is it's a process of actually putting finer and finer scratches into your metal in order to get it actually to look shinier in the end. And depending on your goals in terms of finishing is how much sanding you wanna do, as well as how scratched up this is. So this has a lot of surface scratches, but none of them are particularly deep. So if I can if I think I can get away with it I'm gonna start with like a 400 or a 600, something that's not super coarse, 'cause I don't need to do those steps if I can avoid it. So I might come in here, that's some 600, so we'll try that. So what you wanna do is sand in one direction and then alternate the other direction in the next grit. So I would sand this in one direction. And again, this is something that I would do before I hammer textured. And depending on how much hammer texturing I was gonna put in this I probably would hardly do any sanding, to be perfectly honest. I would get out any really deep scratches, 'cause the hammer's not gonna take them out. But the hammer's gonna put in a decent amount of texture, so I'm not gonna worry about it. But then I would jump to my next grit, which I think we have some 800 here, let's see. 600. Oh, we don't have 800, we have some, well, we do, we can use some 800. So usually you jump about 200 at a time, so like 400, 600, 800, 1,000. And then if you really want surfaces to get crazy, pretty, shiny, then you might continue to go up from there. If you're gonna do something like a patina, you want to get out any kind of serious surface scratches and put a nice consistent finish on it, but you don't need to go crazy with the sandpaper. So now I would take my 800 and go the opposite direction. So the kind of downside to sandpaper is this works really well if you are working on, say, like a nice flat surface. Clearly it's a little bit awkward on this. So the other thing that I like to use are what are called polishing papers, or sometimes they're called micro finishing papers. And just like sandpaper they come in different grits, but the grits are identified purely by color. So I don't actually know. I believe this green is a 400 grit, that's one of the coarsest. And then this blue is a little bit finer, and this white is really fine. So you can either use those instead of sandpaper, or what I usually do is do a couple coats of sandpaper and then work these up from here. I find because this is actually like a little bit of a fabricky paper, it's easier to cut pieces... Than it is to tear them. So I can come in here with this. And you can see this is really putting in like, hopefully you can see, this is really putting in some finer scratches in here. So, if I were really going to try to get this fancy, then I could work my way up through this. And I'm not gonna stress about this too much because we are gonna start to play with some patinas, and for the patinas a lot of what's important is more so that it's a nice kind of even surface finish, because there's no point in getting this to a high polish if we're gonna patina it, so. For those of you are interested in making things a little more shiny, that is something we go into more detail on in the Statement Earrings class. But in this one since we're going to do patinas, we're not gonna get crazy with that. So I'm just kind of giving this a nice surface finish here. 'Cause in a minute we're just gonna stick a patina on it and turn it a color anyway. So the one other thing that I do want to bring up is that you can also use a flex shaft for finishing. So what you might find is that you can either get... Some sandpaper bits. Of course I should have pulled these out beforehand, but that's okay. So you can get things that are basically like sandpaper on a little roll here. But beware, these are pretty aggressive, so even if it says, it might say this is a 400 grit, it's gonna be way more aggressive than your 400 sandpaper because it's being operated by a super high powered motor. So one of the things that I really like is this bristle disc assortment. So this, if you are like I don't wanna sand but I have a lot of finishing, you can put these in the flex shaft, run them along the surface, and even though they look like they're really skinny they basically do the same job as sandpaper. So that's an option if you really want to go into finishing. And again we do a little bit more of that in the Statement Earrings class, kind of en route to making things shiny. But I know you guys only care about making things colors. (laughs) We're gonna move forward and talk about that. So you can see we're starting to have it come off. Some of them are starting to look a little bit yellower than others. Like the one that's in here, that's starting to look a little bit more yellow. This is also not a thing that you should actually just put your fingers in, use your copper tongs. So we're starting to get there, but I think it needs to stay just a bit longer. So we'll let those keep cleaning. And from a work flow standpoint you would do this before you would file, before you would sand, at the very least. You could file before or after, but you wanna use this to take off that surface before you sand. Otherwise you're just creating more work for yourself.
Class Materials
Bonus Materials
Bonus Materials with Purchase
Ratings and Reviews
user-d7f7ae
This is a great addition to Megan's metalsmithing series. She makes the topic really approachable. Bonus that metal patinas were added in to the class. I loved the class!
a Creativelive Student
I really enjoyed this class! It was very informative and gave me a lot of ideas for expanding a jewelry line to include a variety of bracelets and finishes.