Choose a Location
Lesson 2 from: Food Photography: Capturing Food in Your KitchenPhilip Ebiner, Will Carnahan
Choose a Location
Lesson 2 from: Food Photography: Capturing Food in Your KitchenPhilip Ebiner, Will Carnahan
Lessons
Dive into Food Photography
1Course Introduction
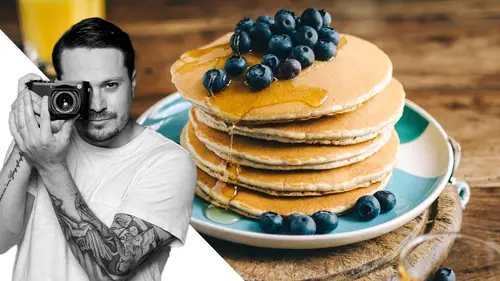
01:21 2Choose a Location
03:15 3Design Your Food and Setting
05:38 4Light Your Food
06:06 5Camera Options: Smartphone vs. Fancy Camera
02:44 6Camera Settings (for people using manual settings)
03:58 7Compose Your Shot
05:25Lesson Info
Choose a Location
So the first big thing is finding a location. Now, I'm gonna kind of jump ahead in food photography. What I've kind of learned and been taught and you'll hear this a lot is that lighting is king because we wanna make this a diy course, we're gonna focus on completely natural light. We're not gonna use any artificial flashes or strobes or anything like that. So our location is very dependent on natural light. You don't wanna have really, really harsh shadows because you'll start to see differences in food and it'll look not as natural and appetizing all that. So a lot of food photography depending on your style is done with very soft diffused light. Imagine the sun coming in really, really hard and it's just really bright and it creates this deep, deep shadow. Diffuse light is like basically putting a white bed sheet in front of that sun and, and spreading the light out. So it's nice and soft and easier on shadows. That being said, shooting inside is much easier than shooting outside wh...
ere there's this harsh sun. Now, again, what's easier in finding natural light is just finding a really nice window where there's light coming in. We want to find a window where we're gonna get less hard light throughout the day. Now, that being said, where we are, we're in southern California in Los Angeles. And we would wanna aim for kind of a north facing window because that will be a consistent light throughout the day. If we face west, the light's gonna get brighter as the sun starts to set. It might start poking through. If we face, if we have a east facing window, we might start to lose light throughout the day as the sun kind of move over depending where you are in the world. This may change. Um And it also may change based on the weather and, um, things like that today is kind of a cloudy day. Um So a lot of the light coming into Phil's apartment is very diffused. Um So we kind of got lucky with that, but you kind of just wanna be cautious. So I'm here in Phil's kitchen. Kitchen is obviously where you kinda wanna start looking for your window. Um Mostly because this is where the food's gonna be and you can potentially use the kitchen as a background, um, as opposed to creating your own background, which might look later. So let's take a look. There's really only one big set of windows right here. Um They've got blinds in them. Um, the sink is right here, which is kind of a bummer, I think if the sink weren't here, this might be a really nice spot to shoot these don't open, it looks like because this is here. I also know that that's east. So if we start shooting this direction, I know that the sun is going to be moving away from us here. So it's gonna get darker as the day goes on. I'd like it to stay as consistent as possible. So there's a big window over there in the dining room area. So let's go check that out. So this window is great that way north. So we've got our north facing window. Um It's pretty big, having a bigger source is nice. It will cover a bigger area. The kitchen is back there, which I just came from so I can shoot from this way and have depth or if I wanted to, I can shoot from this way and create a background cloudy outside. We're in southern California often. It's not that cloudy, but um, we got some nice diffused light. If I wanted to diffuse this more, I can hang up a sheet. Um So this is great. So let's get a table that we can now set in front of here at this height at the bottom of the window and uh we can get started with our next lesson. Oh, that's nice. You know.
Class Materials
Bonus Materials
Ratings and Reviews
Student Work
Related Classes
Food Photography