Compose Your Shot
Lesson 7 from: Food Photography: Capturing Food in Your KitchenPhilip Ebiner, Will Carnahan
Compose Your Shot
Lesson 7 from: Food Photography: Capturing Food in Your KitchenPhilip Ebiner, Will Carnahan
Lessons
Dive into Food Photography
1Course Introduction
01:21 2Choose a Location
03:15 3Design Your Food and Setting
05:38 4Light Your Food
06:06 5Camera Options: Smartphone vs. Fancy Camera
02:44 6Camera Settings (for people using manual settings)
03:58 7Compose Your Shot
05:25Lesson Info
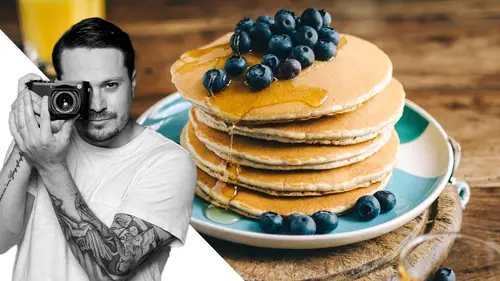
Compose Your Shot
There's four major angles that I always try to shoot when I'm shooting food, there's this angle which is kind of a 45 degree angle, which is always the one I end up using. There's a flat angle or more of like a hero shot. That's more on the level of the food. So that's really gonna dependent on your background. And then what's getting really popular nowadays too is the overhead shot and we'll try those and then there's also detail shots. So let's go ahead and start with the 45 degree angle shot. So here, I'm kind of just at my normal stance. I'm about 57 and I'm looking right at the food and it's kind of exactly what we've been shooting and what we've seen, I'm gonna back up just a little bit. We've taken out our negative fill so that we can kind of show you our compositions and you can see everything. So this is much more about compositionally, got our settings going and let's snap away. So the cool thing about this shot is again, you've been watching this throughout the lessons, but ...
you see kind of all the details, the background has really become really just the table itself and we're focused on how you would normally sit at a table and eat. It looks a lot more appetizing and it's a little more, um, nice to people that they've, they've seen this image before, every day of their lives. So let's talk about kind of our hero shot. Uh, this is more on the level here. It's not gonna work as well for a salad. But check out these other shots where it's right on the level, you're able to see more of the actual food itself because it's kind of protruding and not in a bowl or a plate. I'll show you with the salad, what we would normally do would be finding a background. And for us remember that kitchen in the background, we're gonna use that as kind of our, we're in the home, we're in the kitchen, which is a great thing to do. If you don't have a background like a backdrop or like a wood plank or something, you do, just use your kitchen or your house or something in the background that will be way out of focus. So let's step back. We're gonna be on the level of the food. We're gonna get back to our normal settings. Focus on our salad. So you can see this is really incorporating our style and everything that we have in the background. We have our fork and our napkin and the food is front and center, we can see it. I think I might actually for this, rotate the toast and do it again because I wanna be able to still see the toast and still gain that look right. So here the toast is rotated, we can see it a little bit better and, uh, the food is right front and center. What a good looking salad. So now let's do the overhead shot. I'm still using my 56 millimeter on my crop sensor camera and that's still around an 8085. So I'm gonna get on a chair to see how high I can get and see if I can still capture what I'm trying to get. If you have a zoom lens, you might be able just to get up here and zoom out a little bit. Um If you have a bigger tripod, you might also be able to achieve this. Luckily, my screen pops out a little bit, so I'm able to just center it. So the best thing to do is just our tables a little small. So you can still see our kind of settings there, our toast and our salad is there. I'll take a shot and I would probably add in some negative fill or some bounce for my style. Um, and you can just pull that right up like we did before I try to center the plate as much as I can because that's really the main focus of what we're trying to do. There you go. And that's an overhead shot. You probably see these on Instagram a lot. It's getting a little bit more popular and it's really nice because you really see the layout and the lines of everything and most things are gonna be in focus because they're all on the same level. Right? So, check out these other shots with these other foods. You can see how you can see the circles, the lines, it's appetizing. It's interesting. Um It kinda is a good menu item. So depending on what you're using with your food, um you can show these kind of anywhere. So for the fourth uh composition is detailed shots. Now, this lens, I've been using my 56 millimeter, I know right off the bat, it does not get me that close of focus. So I'm gonna change it to my kit lens, which is something you guys all probably got with your cameras. And this one's actually kind of a cheaper 55 to 18. This will allow me to get closer detailed shots. Now, you can see the light keeps going in and out and our video is having a little bit of trouble too because the sun is going in and out and there's clouds, you just kinda have to stay on top of your game and pay attention to your settings and adjust accordingly. So let's get up close. Um You can see already I'm losing some light So I'm gonna iso up or slow my shutter down a little bit just to achieve these detailed shots. And here depending on what you're doing, I'm just gonna get a nice close up shot of the food, the detail and everything I can, the bread as, as well. And you never know if you're shooting this for a client or if you're shooting it for a blog or just to show on Instagram, you always want options to show sometimes when I'm shooting for a client too, I'll shoot the little, the vinegar and oil or the fork or the tomatoes. Just stuff that really like kind of accents the whole mood because you never know what you're gonna be using this for depending on what you're doing. If you already know what you're using this for, you wanna make sure to get those detailed shots and the shots you need specifically. All right. So that's all our compositions. Remember all 445 degrees Hero overhead and details between those four, you should be able to cover your entire food for any reason or anything you need, whether it be menus, blogs, Instagrams just for fun, postcards, um whatever you really need. So just remember to keep your options open, keep your eyes open and use your compositions in tandem with what we taught about lighting. Try to figure out where you want your composition to be and then bring in that neg fill, bring in that bounce card and try and work around and it's a delicate balance of finding that correct, perfect shot.
Class Materials
Bonus Materials
Ratings and Reviews
Student Work
Related Classes
Food Photography