Camera Settings (for people using manual settings)
Lesson 6 from: Food Photography: Capturing Food in Your KitchenPhilip Ebiner, Will Carnahan
Camera Settings (for people using manual settings)
Lesson 6 from: Food Photography: Capturing Food in Your KitchenPhilip Ebiner, Will Carnahan
Lessons
Dive into Food Photography
1Course Introduction
01:21 2Choose a Location
03:15 3Design Your Food and Setting
05:38 4Light Your Food
06:06 5Camera Options: Smartphone vs. Fancy Camera
02:44 6Camera Settings (for people using manual settings)
03:58 7Compose Your Shot
05:25Lesson Info
Camera Settings (for people using manual settings)
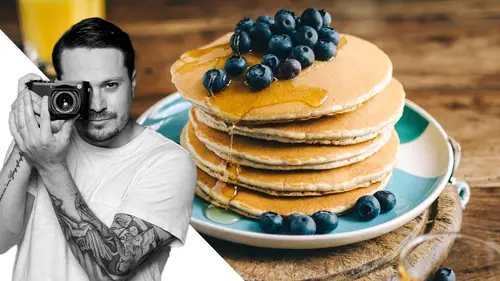
So those of you who are using uh mirrorless or Ds LR cameras or a camera where you can adjust manual settings, let me really quick, just go over the settings that I use for exposure. So the three settings that you always want to pay attention to and this is some basic photography are iso aperture and shutter. So all of those that we're gonna use to create the exposure that we want. Again, exposure is going to end up on your specific style and the lighting darker if you like brighter if you like, depending on which way you're going iso is where we'll start. So depending on your camera, you may want to adjust your iso and that meaning sensitivity of how sensitive your camera is to the light coming in. So I'm gonna be able to shoot around 204 100 with this camera, which is where I like. The bummer part about ISO is if it's darker and you start bumping up your iso, the grain is gonna start coming up, which isn't always nice to look at. So depending on your camera, you wanna aim at an ISO w...
here you'll get enough light in, but you'll also not see too much grain because that'll start to look not as clean and as sharp. The next setting you want to look at is your F stop or your aperture. Now, this is kind of uh another style choice. It's probably one of the ones that I adjust the most, but the lower the F stop number, which means the bigger the hole that the light comes in, the more that will be out of focus. So if you shoot wide open, if your lens can open up to a 1.41 0.2 more things will be out of focus and less things will be in focus. So if you're shooting food, I tend to aim around a two 0.8 because I do like that nice soft background. I don't wanna open up to a 1.4 this lens will go to a 1.2. It might be a little nutty and some of the food might not end up in focus. You can kind of tell already that in our shot, the toast is totally out of focus. F stops, really kind of where you wanna look at as far as what's in focus and what's out of focus and your specific style. Again, I'm aiming for a 28 at ISO 400. The third thing is the shutter. Now, that kind of depends on what you're doing. It's nice to have a tripod because we can kind of aim at it and set up our composition and let it sit there and walk back and forth as opposed to bringing your hands up every time. So your shutter is really gonna be the one that you're adjusting the exposure to. Pick your iso, pick your f stop. Now, pick your shutter, depending on if you're using a tripod or not. We've been shooting at 1/60 of a second which is kind of slow, but because we're on a tripod, we're able to shoot as low and as high as we like, which gives us a lot of room to make decisions based on our iso and our F stop. If you're not on a tripod and you start to move, I'd say below 60 closer to 30 even lower than that. Uh a second, you'll start to get some camera shake because it will start to see the motion of the light moving around. So it's safe to be on a tripod if you're gonna have those lower shutters. And depending on how bright your window is, what time of day it is and where you are in the world. So all of these settings cannot necessarily be done with an iphone, which is another major difference. Let's talk about the lens choice really quick. I'm using a prime lens. It's a 56 millimeter on a mirrorless uh crop sensor. So really, that's more like an type of Ds LR lens, I have to step back a little bit because it's not necessarily a macro lens for detailed shots. You would want a sort of Mac Pro lens or a long lens where you can kind of zoom in and you can check that focus to get more detailed shots. We'll talk more about compositions in the next lesson. You can also use a 35 millimeter, a 50 millimeter and 85 millimeter Really just finding your style. And what you got is the best way to go about these things, kit lenses for cannons or Nikon's, you can find a cheaper 35 millimeter 50 millimeter lens online. Um And they look really great and add a lot of depth of field for your food photography. So if you don't have a mirrorless or Ds LR camera with interchangeable lenses, you can always shoot with your smartphone and still get a quality photo. You'll have more options with the bigger cameras, but you're always able to shoot with any camera you have. And the next lesson we're gonna aim at different compositions and how to position yourself to shoot your food.
Class Materials
Bonus Materials
Ratings and Reviews
Student Work
Related Classes
Food Photography