Edit Your Photos
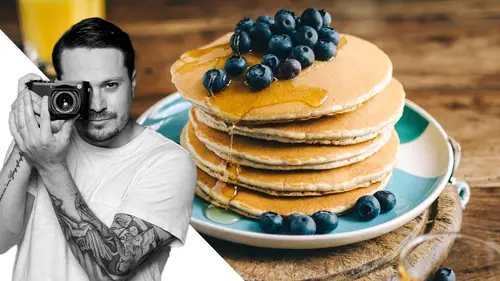
Lesson 8 from: Food Photography: Capturing Food in Your KitchenPhilip Ebiner, Will Carnahan
Edit Your Photos
Lesson 8 from: Food Photography: Capturing Food in Your KitchenPhilip Ebiner, Will Carnahan
Lessons
Dive into Food Photography
1Course Introduction
01:21 2Choose a Location
03:15 3Design Your Food and Setting
05:38 4Light Your Food
06:06 5Camera Options: Smartphone vs. Fancy Camera
02:44 6Camera Settings (for people using manual settings)
03:58 7Compose Your Shot
05:25Lesson Info
Edit Your Photos
Hey, everyone. This is Phil, the man behind the camera for the rest of this course. Today, I'm going to walk you through editing your food photography. I'm going to try to simplify it as much as possible so that whatever photo editing software you're using, you'll be able to understand the three key points and the three key things to do with your photos. I basically pare it down to crop color and exposure. So with cropping, we're just going to adjust the way that the photo is composed using cropping with color. We're going to change the saturation of our food to make it look more colorful. And in the last part, we're going to expose properly changing whether we want it to make it brighter, darker or parts of the image brighter or darker. So here I'm in lightroom and again, I'm going to try to teach this in a way that whatever program you're using, you'll understand whether you're using Lightroom Photoshop iphoto on your iphone on your Android. There are usually features to crop, there'...
s usually features to change the exposure and change the saturation. And that's pretty much all I'm going to be doing later on, I'm going to talk about a special few features that lightroom has that your editor might have that are cool to play around with. But for now, let's start with crop. This is the photo of the salad that will took in the very beginning and we can scroll through some of these and see. Let me find one that is actually another one that I would do more cropping on because will did a really good job composing this image actually. So say I take this one and I can open up my crop feature and this opens up my crop module where I can basically zoom in zoom out, rotate slightly. Say we did want to just zoom in a little bit more on this salad. Make sure that it's in the center of our frame because before when we were zoomed out all the way it was actually a little bit over to the left of our frame. So we're just going to zoom in to make sure that this is directly in the center, maybe put it down at the bottom a little bit so that the cell that's actually in focus is in the middle. You don't necessarily always want what you shot to be in the direct center. But for this photo I do, so I'm gonna crop it that way just by using the crop tool, zooming in a little bit and pressing return on my keyboard. OK. So I'm happy with my crop. The next thing I'm going to do is skip down to color or saturation. So I have this saturation bar right here. And again, whatever you're using, you might have a little bar, some numbers that you can increase or decrease. And if I increase this all the way you'll see what happens. Wow, that is way too saturated. But it gives you the point that I'm trying to make that this bar helps you desaturate or increase the saturation. You can also plug in numbers specifically if you have a number in mind. So I would just look at your photo and see does it need a little bit more color? Will's camera, the settings, the raw settings that he's using typically, it will need a little bit of a boost in saturation on his Fuji camera. If you're using an iphone or a smartphone, it usually adds a bit of contrast and good saturation that you might need to not need to increase. You don't want it to look unnatural, but you do want the colors to come across through your photos. And just this compared to if I bring up the comparison, the right compared to the left, it looks a little bit more bright, inviting, colorful and tasty. So boosting that saturation can help. The last thing I'm going to do is play with the exposure and this is where the beauty of shooting in raw file mode helps because the shadows and the brights of your image can really be manipulated. On most photo editors, there's going to be an exposure bar where you can just increase or decrease the exposure of the overall picture. So what this is doing, it's brightening up every single part of my photo or darkening it. And this is good because sometimes if you are running a blog or putting photos in a magazine, a lot of food photos are very, very bright now will loves the more contrasted a little bit darker photos. But I actually tend to like some more brighter photos and it's really your style. It depends on what you wanna do. So with this bar, as I mentioned, you can increase or decrease this overall ex ex exposure of the whole image down below, we can actually change the exposure of different parts of our images. So here we have our highlights, shadows whites and blacks and you might have something like this on your photo editor as well. For example, if I take my blacks and I increase the blacks, you can see that it's really just affecting the darker parts of the uh this image. So these shadows under the plates under the leaves of the lettuce this dark of the pepper back there. So if I increase or decrease that, you can really see what's happening over here on the left this vinegar that's really darkening. And if you do wanna add contrast to your photo, you can do it that way by decreasing them blacks and then increasing the whites or the highlights contrast is basically how dark your darks are and how bright your brights are. And usually having a more contrasty image will make your food look a little bit better, a little bit more appetite. And again, that's what will was doing in person live when he was using the black negative fill phone board versus the white bounce card. That's what he was doing live in person. But you can also do that kind of thing in post in terms of just adding some contrast, I can also play with the shadows which are not as dark as the blacks. It's kind of the midrange darks, it's from the middle grays to not quite black and then the highlights which are bright but not necessarily white. So I can, if I boost this, it's controlling some of the whites in this this salt and the plate. And so boosting that might a little bit might make it look a little bit better too. So if I look again at the comparison, I can do some different comparison views. You can see here on the right, very bright, colorful, nice, appealing on the left. It's a little bit duller, but again, it starts from the very first image that you shot with. So let me just reset this. So I'm just gonna undo original photo then to our final photo. Hopefully you can see the difference. And this one, hopefully you think is a lot better. So let's move on to some more professional advanced techniques that you can consider doing for your images. I think I'm gonna go over to my key lime tart. So let's take one of these key lime tarts. This has some greens in it, but the greens aren't that vibrant. Now, I want to make the colors more vibrant and I could just take the saturation and boost the saturation a lot. But what happens is that the saturation of the orange and the yellows in this tart itself get boosted the saturation of the browns and everything else gets saturated as well. What if I just want to boost the greens? Well, in lightroom, what you can do is go down to these HSL color and black and white module down here. I can actually take this color picker right here or by going down to the green slider down here, but I'm gonna use the color picker and then I take the color picker. I go over to my image, I select the color that I want to affect and I click and drag up or down. Now, if I drag all the way down, you can see what happens. It takes away the color of just the greens and the yellows that I'm picking right now. But if I boost it, it really increases that green without increasing the yellows and the oranges of this tart. Now, if I select this tart and I wanna boost that color, I can do that. Maybe I'll just take a little bit of the yellow right in the middle of the tart and boost that. And so that's the way that you can boost the colors of a specific object. If I go over to my soup, for example, let's go back to our soup photo and I do it here. So I take my saturation and I go to my red, I can really boost or decrease the saturation of my red without affecting the greens or maybe I want the greens to pop out a little more. So I'll decrease the reds, make those greens pop out. Maybe the greens, I want to desaturate a little bit and so that the reds pop a little bit more. So you can pick a specific color that you want to increase or decrease the saturation of. Now with all of this, you don't want to go crazy because you don't want it to be unnatural. You want your colors to look appealing and appetizing. And if it looks like it's some sort of color added to it and unnatural, unnatural, it's not going to look good. One other thing I wanted to show you the power of shooting raw images. One of the photos that was a little bit dark was this photo of the coffee beans and the coffee here. What I would do is go up to my blacks and shadows and boost those. So you can see if I boost my blacks and my shadows look how much detail comes from the darkness within here. You can see this steam actually coming up from the coffee. Let me zoom in here and then I will decrease the shadows. If I boost the shadows, you can see the steam in there actually, which is a cool thing to do and you would only be able to get that detail from the darkness by shooting raw. And again, that's what the difference is between a smartphone photo and a photo shot in raw mode using a professional or prosumer Ds LR or mirrorless camera. OK. So that's pretty much it. That's what I wanted to cover with editing your photos. Remember you want to crop to make sure that your composition is perfect. You want to color and make sure that the saturation looks good and makes your food look appetizing and then you want to expose and change the exposure of your photos so that it's as bright or dark or contrasted as you want. Let me know if you have any questions otherwise, thanks again for taking this course and we'll see you in the future.
Class Materials
Bonus Materials
Ratings and Reviews
Student Work
Related Classes
Food Photography