Lesson Info
14. Meter With Strobe For Color Film
Lessons
Class Introduction
13:12 2Why Strobes & Film?
05:09 3Using Sync Speed
10:21 4How To Avoid Ghosting
05:45 5Equipment Overview
04:12 6How To Use Your Camera With Strobes?
06:27 7Triggers & Receivers
03:39 8How To Set Up A Light Meter & Strobe Unit
08:03Demo: Equipment Set Up
07:59 10Create A Natural Light Look
10:05 11Light Modifiers
09:39 12Catchlight In The Eyes
08:41 13Metering Overview
03:40 14Meter With Strobe For Color Film
22:44 15Meter With Strobe For Black & White Film
26:00 1645 Degree Light Placement
09:01 1790 Degree Light Placement
15:01 18Backlight Placement
04:13 19Feathering Light
08:07 20Lighting For Groups
25:44 21Speedlights with Film
08:42 22TTL Vs Manual Mode
09:21 23Gear For Location Film Photography
03:26 24Set Up On Location
04:08 25Know Your Film Lab
16:21 26How To Find The Right Lab
14:47Lesson Info
Meter With Strobe For Color Film
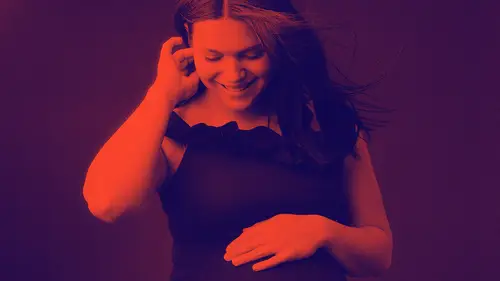
So when metering with color film, I have found the most reliable approach is to go in there, take an incident meter reading. I have a hard time saying those two words together. Meter reading of the darkest shadow in my image. And I do that for a couple of reasons. See, there's Betty. So first of all, I want to make sure that the darkest part of my image, is perfectly exposed. So I know, remember my meter is trying to find middle gray. If I'm starting with my middle gray reading at the darkest part of my image, then that means all the other highlights are gonna fall into place. And they're gonna fall into place on this end of the spectrum. Instead of on this side. You never want to underexpose your color film. So I meter this way with window light, I meter this way when I'm outside, but I certainly meter this way when I'm working with strobes. And this is what I get. So this is done, this was an image shot with strobes in studio, metered in the shadows, incident metering with my strobe.
That's how I do it. And again, meter in the shadows, so shadows here, with my strobe. I'm gonna demo this in just a second but I want to talk about something. So this works great for me and like a dream every time. Because I work in a studio that has giant white walls everywhere that are pretty close. So if I have my lights coming here, and I'm getting highlight here, I'm getting shadow here, and I'm metering in my shadow. I'm getting light reflected back off of that white wall, that's kind of filling in the shadow. And I have measured the light in that studio so many times. I've been working there for 11 years, so I know that light really well. And what I know is when I am working with my strobes, and I'm working with those white walls, I usually have a two to three stop difference between my highlights and my shadows every time. Now, like I said, I'm a self taught photographer. So, when I was first learning all of this and learning strobes, I was learning it for me and for my work so I could create pretty pictures to give to my clients. I never thought in a million years I'd be up here on Creative Live, teaching people how to do this. So, I didn't concern myself with trying to figure out why it always worked. I just knew, that in my studio and my space, I always had a two to three stop distance between my highlights and my shadows, and if I metered for my shadows, then that meant that darkest part of my image was perfectly exposed, and the highlights would fall into place. So it was great. But then I started teaching this. And I started going out into the world and in different locations. And what I found really quickly, obviously, is that the different rooms that I work in, don't always have giant white walls everywhere. You know, I was working, I was teaching studio lighting in a ballroom in San Antonio. And it was really big and really dark and if I had my light here, and took a meter reading here, there was nothing to bounce that light back. And so, there wasn't that three stop difference. Suddenly, to get a good shadow reading, I was having to turn that lights all the way up, and getting like a five to six stop difference. And you don't want that. I'm gonna show you why, I'm just gonna show you. And then this is why, this is what happens. I've since learned why. And I'm gonna teach you this in just a second. So when you have that big of a gap between your shadows and your highlights, what happens is, is this, these highlights, the highlighted parts of your image, go into that extreme overexposure zone in your metering. So, with film. I just want to back up for just a sec. I want to show Betty again. So with film, you never lose highlights over here. You're never losing highlights. You could be at plus six, you could even be at plus seven, and you're not, it's not gonna blow out, it's not gonna go white. But what does happen is your negative gets so dense that it's hard for a scanner to read. It's hard for light to come through, it's hard to get a print off of, and you start introducing kind of unpleasant color shifts. Green wacky things start happening. This goes beyond the happy place for overexposure for film. So if you're in a situation with your strobes, and you have your strobes set up so that you have more than that three stop difference, it's gonna throw your colors off, things are gonna start to look weird. So instead of having that pretty soft look, you're getting a harsher, flashier look. Does that make sense? And people talk about this now. Now I've learned that there's this thing called lighting ratios that people like study in school and I had no idea. All I know is that it doesn't look pretty. And so, if I'm in a situation now where I'm getting more than a three, four stop difference between my highlights and my shadows, I'm gonna bring in a reflector or I'm gonna bring in, you know, like a V-flat or something, to bounce that light back. When I'm metering for color film, and I'm metering for the shadows, my goal is to be in that three stop, two to three stop window, before my highlights and my shadows, and that's how you're gonna create that really pretty soft look. So, big difference, right? In the tones of those. And it's all the same exact lighting setup. Isn't that fascinating? I think this kind of stuff is really interesting. Now, another reason I want to talk about this, is because I hear from people all the time, that are like, "Okay, awesome Sandra, that's great. "We get it. "You like things that look soft and natural." But I don't, I don't want light and airy, I don't want that. I want more drama in my light. And so, they think that they can create more drama by playing around, like turning up those lights and doing those sorts of things. So I either get that, or I get people saying, "Well, I'm gonna really, really, really over expose my film, "because I want to create light and airy." And that was where you're thinking like a digital photographer, where you think, if I over expose, I am gonna blow out the image and it is going to look light and airy. And that's actually not the case either. Because as you can see, this one looks softer than this one. And this one's way more over exposed. So it's kind of a different way of thinking when you're thinking like a film photographer, then thinking like a digital photographer. But I also want to just point out that you can meter this way, you can meter for the shadows, you can have that. And your images don't have to necessarily look light and airy. You can have a little more drama in your images. They don't have to be that, way back drop light airy look all the time. And these are all that same exact setup, metered for the shadows, you know, two to three stop difference between my highlights and my shadows. So, with metering for color film, with strobes, you always want to make sure you're metering for your shadows, and you want to make sure that you don't have more than a three stop difference between your highlights and your shadows. So let me just, now that I've explained it and we've talked about all the theory. Let me just show you how it looks to meter like that. So when I'm saying metering for my shadows, what exactly do I mean? And we're just gonna do it here. Would somebody like to be my volunteer? Or I can always meter Betty but you guys are cuter. Don't be shy. I'm gonna just move this. Come on up here, friends. Or, yup, awesome. Thank you. It's like when I was teaching kindergarten and I would just call on somebody. Nobody volunteered. So this is exactly how I would set up my light if I were actually taking Amy's photo. So I'd have it in here, nice and close. Are you worried? You're like, it's so close. And I don't know what it's set to right now but we're just gonna meter it and we're gonna find out. And, we are in a really big studio. And this light's gonna go on for days. So I have a feeling we're gonna have to bring in a reflector. But let's try it. Where is my, I know Betty, excuse me Betty. So when you're taking a test reading, there's always a button on your trigger that says test, that will pop that light so you can see. So, I'm here, I've got my ISO set to 400, which is the box speed of the film I'm shooting. I'm at a 60th of a second, because that is the sync speed of most film cameras and I'm in flash mode. So I know that when I hit that button to take a reading, the meter's gonna pause and it's gonna wait for me to hit the test button on my trigger, fire that light before it takes a reading. So, let's do this. So we have light coming right here, so we've got that pretty highlight here, we've got shadowy here. Kind of. I mean, we have studio lights. (laughs) Not quite as much. And, if I were to take a shadow reading, I'm gonna come here, I'm gonna do bulb out in the shadow. And I always meter with my bulb facing in to the shadow because if I have my bulb here, and call that a shadow reading, the reality is, this lumisphere is getting some of this light that's coming here and some of the shadows. So this is more of a mid tone reading. Where as here, when that bulb is completely facing the strobe, that's a highlight reading. I want a shadow reading, so I'm gonna come in here, and I'm gonna hit it. I'm gonna hit my trigger. And I'm getting F2 in the shadows. Let's just see what the highlights are. And F8 in the highlights. So what is that? Five six, four, two eight, two. I still have to count things cause I just can't remember. So it's a four stop difference. I don't want to be at F2 in the shadows because that's just too low. So I'm gonna bump up my film. My goal, is I usually like to get to F4 in the shadows when I'm working with studio lighting. I know if I'm F4 in the shadows that I can have Amy here, let's pretend you're an adorable baby, and I could work with her by herself in F4. I could even open up to 2.8 if I wanted to really quickly and just get a little more depth of field. I like shooting wide open, I like those kind of soft images. And I know that if I'm going between F4 and 2.8, that's a stop difference. I don't have to change anything on my lights, because film's awesome. And it has that latitude, so it's really quick. I can just do that. But I also know, that I could quickly bring more people in and at F4, I could take a group photo without having to change my lights. So for me, that's always my goal is to get a reading of F4 in the shadows. So I'm gonna turn up my light and because I'm using the Profotos, I can do that just with a click of the button. Isn't that amazing? So now I'm at 2.8s, so we went up a stop. So we're gonna go one more. And now I'm at F4. So F4 in the shadows. I'm just curious. It's at 7.4. That's exactly where it's always set up in my studio. (laughs) So I just wanted to say, I'm like, oh, is that the same? So that's how I would do it. That's how I would meter my color film and then I would go ahead and take the picture. So easy easy peasy. Thank you, Amy. And now, let's see it in action. Are you ready? I just want to demonstrate how you would use strobe when you're mixing it with your natural light. So, I'm in my studio here but this is kind of the same situation you would be at if you were working in a client's home or on location somewhere. Maybe you're at a wedding reception or something. And you have window light that you could work with it, but it may not be enough that you need to boost it a little bit with strobe light. So, we actually have a lot of light. We're in this beautiful studio. We have south facing windows, we have all these white walls bouncing it around. And, because of the way we meter for color film, chances are we don't have enough. So, I'm just gonna take a natural light meter reading. Really fast. And we're gonna see. So I'm gonna come over here, I've got my light coming this way so I'm gonna meter in my shadow. And, that's 2.8 out of 30th. Which, isn't terrible. But, I don't love shooting handheld at a 30th, so, with natural light. So, I'm going to bring in my light and I'm just gonna boost that light a little bit. And show you how it's done. So when you're using a strobe and you're mixing it with window light, my goal is to always make my studio light look like it's window light. I never want somebody to look at one of my images and say, "Oh she totally shot that with a strobe." You know? So, to do that, first of all, I'm gonna look at the window light and see what it's doing. So our window light's coming this way, so we have highlights here, and we have shadows here. So I'm gonna bring my strobe in in that same direction. Whatever side of the room my window is on, that's the side of the room I'm gonna put my strobe here. Now, if I had my strobe over here, then we'd have light coming from the window, light coming from the strobe, and we would be creating more of a flat light situation or crossed shadows. You don't want that. You want that to look like natural light. And so you're just gonna give that natural light a little boost. And so you're gonna bring it in in the same direction that it's hitting our subject already. This is a Profoto B2. Which are great little lights. And what's great about the Profoto system is that they come with these air remotes as your trigger. So, remember, trigger goes on camera, receiver goes on strobe. These strobes have the receiver built in. So it's just nice that way. The other great thing about these is that you can control them. Control the power. Right from the air remote. So, after we meter her, if it's like, it's not enough light or it's too much light, I can turn it up or down from my air remote instead of having to come over and fuss with the battery pack, which is nice. So we're gonna put it on and then we're gonna meter. And when we're metering with strobe, we want to make sure that our meter is set up to work with strobe. So we're gonna go from sunshine to the little flash icon, so that we're all ready. And we're going to have the ISO set and we're gonna have the sync speed of whatever the sync speed is for your camera set. I always set my sync speed at a 60th of a second, even when I'm shooting with the Hasselblad, cause I like that there. And then we're going to meter in the shadow and pop our flash for the test. And now we are at plenty of light. So we're at F4 in the shadows at a 60th of a second. And, I like to meter at F4. I like to get my light to be F4 in the shadows, because then I know if I'm working with a family, you know I work with family and kids, it goes really fast. If I have more than one person in the shot, I can easily be at F4 and everybody's gonna be in focus. But if I'm working with an individual or a baby, and I want to open up to 2.8, because film's so awesome with its latitude, I can do that without changing anything with my lights and it'll be perfect. So that's how I do it. Again, we're gonna test, and I'm gonna take a highlight reading, just to see. And my highlight is at F11. So, F11, eight, five six, four, that's a three stop difference between my highlights and my shadows. Which is exactly what I want when shooting in studio with color film. You never want more than a three stop difference between your highlights and your shadows. If I didn't have these giant white walls here, bouncing this light back, I would bring in a reflector. Alright? Let's take your picture. So, I always want my lights to look like natural light. And remember, the closer your light source, the softer the shadows. I'm going for soft shadows, so I'm gonna bring my light right in there really close. And we're gonna take your picture. Here we go. (sighs) Just relax. Good, that looks good. Bring your chin down for me just a little bit. That's nice. (camera clicks loudly) You guys, by the way, even though I got that F4 in the shadows, I'm shooting these at 2.8. (camera clicks loudly) And I like that look, it's just gonna be a little more depth of field, which I like. Turn your body facing this way. All the way around. And then turn over the shoulder, yeah, there you go. That's good. (camera clicks loudly) Now these photos are going to look very natural lighty. (camera clicks loudly) She's gonna be beautiful. Alright, all done! Okay. And, this is what those photos looked like. So they do have all those qualities that I love about my natural light photos. So again, I've got that really pretty soft light, I've got that nice direction, I've got that good chunky catch light. It's everything I ever wanted in a photo. There it is again. So, really, really pretty. You mentioned that you can still meter in the shadows but get a more dramatic effect, and you showed some samples. Are you just modifying the distance and the size of the light at that point? That's a really good question. Is there another technique you're using? I don't ever change anything. (laughs) I can get a different look and a different amount of drama, honestly, based on communication with my lab. So I have a whole section I'm talking about, labs and what they do. But, and you'll see this too with the black and white work. You can meter for your shadow so that you're positive that you got nice, dense negative but there's shadow detail where you need it to be. So none of the areas in your image are ever gonna look, are ever gonna be underexposed. But then you can ask your lab in scanning to scan for your highlights. And so when they scan for the highlights, then that makes those shadow areas look a little richer and a little deeper. But then you get those really nice, dark shadows that are dark, not muddy. Does that make sense? Because you still have that information in your negative, so they just look, they're just richer shadows. So I actually don't change anything but to answer your question, yeah, you can control a lot by the distance of your light, how close it is, the size of your modifier. All of that. You can play with your style and what works for you. Just make sure you're metering properly. Does that make, does that answer your question? Yes. Okay, cool. From Danielle, that was about metering if you have multiple lights. And I know that you only used the one light. I do. Can you talk about why you just used the one light and if you would meter differently if you had that reflector there? Yeah, okay, so remember I was saying that, when I started figuring this all out, I was just trying to figure out a way for me to get through the dark days of a Seattle winter, right? That was my goal. And my goal was to recreate that window light. So in my mind, I told myself, well, when I'm working for my kind of work, I only ever use one window. It's not like I'm working with multiple windows. So I only ever use one window, and I like that look. So that's why I started just using one light. It was because I was trying to recreate those photos that I get with natural light. Now, I have used multiple lights. So sometimes I'll come in, for holiday photos, for example. Some times I'll use a white backdrop, and I want it really bright, so I'll come in and I'll have my main light here and then I'll light the backdrop with another light, that sort of thing. It's not something I do all the time. But as far as metering, I would meter the same way. I mean, I'm always metering for that shadow. Because with film, that's really important. No matter how many lights, what I want it to do, or the look I'm going for, I want to make sure there's enough information on my negative so that I'm able to get a good scan and a good print. So I think to answer that question, I'm trying, I'm going through it in my brain right now. I'm looking at the set up. So if I had, let's say I had a light here, and I had a light here, maybe like a hair light or something. I would still find the shadow. Cause even if, I'm gonna be my subject for a second, if that's okay. So even if I have the light here, and I have a light here, I'm probably gonna have a shadow like here. Then I would meter for that. Because if that shadow's properly exposed, that tells me that I'm gonna have enough good information, on my negative, so that I can have my lab scan it the way I want it scanned. And I kind of control it with that.
Class Materials
Bonus Materials with Purchase
Ratings and Reviews
a Creativelive Student
Wow! with a lot of online stuff out there one can become rather overcome with too much information, however, the way Sandra presents her courses is just perfect! Her honest and simple and easy to understand approach was just what I needed. Not once did I think she was just going through the motions, she really loves what she does and it shows. To be able to rewatch and rewatch was also a key for me. Since I have dyslexia I have to take things one half step at a. time. After completion of the class I had a new found confidence when using strobes. A must have.
Micah Hewett Images
Out of all the classes I own on Creative Live, Strobe Lighting with Sandra is my FAVORITE! She is an incredibly kind and gifted teacher. She explains everything on a simple level and then gradually build to more complex issues. I am 100% happy with this course. Thank you Sandra!!
Amy
Do you own a film camera? Then you NEED this class. I knew I *kind of* wanted to try shooting with a strobe, so I bought this class as some encouragement. But honestly, I half expected to do the class and not actually buy the strobe (because strobes are scary!). But as soon as I finished this class I IMMEDIATELY bought a strobe, umbrella modifier, a backdrop, and seamless paper (in Storm Grey because I basically want to be Sandra.) I felt so empowered to shoot with strobes and film and suddenly what had seemed terrifying now seemed doable. My very first test roll turned out great after following Sandra's easy tips. Now that we're in the winter months, I can shoot indoors with my film camera and strobe! Thank you, Sandra, for so generously sharing your knowledge with us and for being such a great teacher! And to anyone even remotely considering this class, DO IT. There's no way you'll regret it.
Student Work
Related Classes
Lighting