Lessons
Class Introduction
13:12 2Why Strobes & Film?
05:09 3Using Sync Speed
10:21 4How To Avoid Ghosting
05:45 5Equipment Overview
04:12 6How To Use Your Camera With Strobes?
06:27 7Triggers & Receivers
03:39 8How To Set Up A Light Meter & Strobe Unit
08:03Demo: Equipment Set Up
07:59 10Create A Natural Light Look
10:05 11Light Modifiers
09:39 12Catchlight In The Eyes
08:41 13Metering Overview
03:40 14Meter With Strobe For Color Film
22:44 15Meter With Strobe For Black & White Film
26:00 1645 Degree Light Placement
09:01 1790 Degree Light Placement
15:01 18Backlight Placement
04:13 19Feathering Light
08:07 20Lighting For Groups
25:44 21Speedlights with Film
08:42 22TTL Vs Manual Mode
09:21 23Gear For Location Film Photography
03:26 24Set Up On Location
04:08 25Know Your Film Lab
16:21 26How To Find The Right Lab
14:47Lesson Info
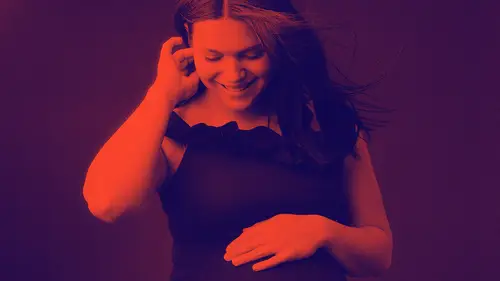
Light Modifiers
Another way, that you can control the look of your light is with the light modifiers you choose. This is where it gets fun. We're gonna start talking about light modifiers. So again, when I started working with light modifiers and trying to figure this out. What am I going to buy? What do I want? I looked to what I knew already about window light. That's where my education was. Was the window light. So what do we know about window light? What do we already know? Well, we know that the size and the shape of the window that we work with affects the way the light looks on our subject, right. So we know that a big window is going to give you soft to few shadows. So think about this if you're working like a wedding or whatever. Anytime, we've all been in We have a big giant window, that's huge relative to the person you're working with and you have them right there and that light is just super soft, going to have these really soft shadows. And we know that a small window is going to give yo...
u sharp defined shadows. So if you have a little tiny window, I always thing of those little windows that are in people's front dors, sometimes, you know and you stand somebody right up to that window. That light's gonna come and it's going to be like a spotlight. It's like taking all that outdoor light, turning it on its side and pushing it through this little tiny window space. It's like a flashlight. So those same rules apply to light modifiers. If you can do it with a window, you can do it with a light modifier. Same rules apply, light is light. So a big modifier equals sharp, soft to few shadows. So I have a giant seven foot octodome in my studio that I love. I'm obsessed with. So this image was shot with that modifier. Again, it's in really close and you've got these kind of softer, more diffused shadows. And just a pullback, you can see softer shadows light in the backdrop. And then, this is the, a digital image of just that pull back. So you can see, big huge modifier, big modifier, softer shadows. Close in, the closer you are, the softer your shadows. And then that light is turned down. All those things kinda work together to create that look. I also want you to notice a couple of things in this photo. First of all, notice how that light off of that big modifier is filling up that whole room and is spreading pretty evenly across that backdrop. That's important to me because I work with little kids. So I wanna be able to bring them in and have them on the backdrop and have them be anywhere on that backdrop and have good light on them. Cause they're gonna run around. They're gonna move. What I also want you to notice, is that over here in the corner, Pardon my messy studio, I have these heaters cause sometimes I'll turn up the heat for, if I have a newborn in there. But look at this shadow on the wall with the heater here. And I want you to remember that because we're going to look at it again with a small amount of fire. But do you see how kind of soft and diffused that shadow is? Even though it's on the other side of the room? That's because we've got that huge modifier. So big modifiers, soft shadows. Small modifier, sharp defined shadows. So this one I brought in a 24 by 32 softbox, which is the smallest modifier I have. I buy big modifiers. But you can totally see a difference in the shadows on his face, where they're much sharper. It's almost like a line. He's got dark darks in there and from the pull back, we see that too. We have that deep, darker shadow there and those sharp shadows on his face. And then here's the pullback of the studio shot. So we see shadows here. We see shadows here that we didn't have with that really big modifier. But then come back here and look at the shadow of that heater and it's much sharper, much more defined. So you can really see it there. So, again, large modifiers, soft to few shadows, small modifiers, sharp, defined shadows. That's how I buy and choose light modifiers. I really think about that and I think about the look that I want in my work. So, oh you guys haven't met my posing doll in this class yet This is my posing doll. You'll see her later. She's live in studio today. We're going to use her. But you'll see her in a lot of my examples. But anyway, so again, this is that huge seven foot octodome. We've got really even light across the backdrop. We've got soft shadows here. And you can see it in the studio. We're not even getting a shadow off of that stool. It's just really, really, really soft and then I brought in the five foot octodome, which by the way, is still pretty big. Like a five foot octodome is a pretty big modifier. But even with that difference, we see a little more shadow detail here and you can even see some subtle shadows but they're there on the paper. So here they are side by side. A little bit softer, a little more even, a little more here. Now, I wanna point this out. And I was gonna go in and color correct it but then I was like, you know what, this is a good example. So can you see the difference in color tones in these images? So, these are digital photos, I took with my digital camera. This one I'm using my Helen Chrome lights and this one I'm using the Alien B lights. And this is what I'm talking about with that white balance thing, that happens with digital photography. So you can really see a difference. Strobes, they're all daylight balanced but they are, I mean in theory, they're all supposed to be the same but they're not. They're always a little bit different. The modifier you use will make the light a little bit different and when you're a digital photographer, that is much more of a problem, and you're always kind of battling with white balance thing that if I had taken these on film, you wouldn't see that. Isn't that amazing? It kinda blows my mind. Now, when I'm showing people this whole thing, on big modifiers, soft shadows, small modifiers, more diffused shadow, I always get the question, 'Okay well that's great Sandra, 'you work in a studio. 'You have room for a giant seven foot octodome.' which is true. That octodome has been set up once and has never been taken down. Because if you've ever tried to get a seven foot octodome or photobox on a speed ring, you have not lived. So, I don't touch it. So then the question is, 'Ok but what if you want 'that same beautiful big diffused light 'but you're working on location 'or you're not in a huge studio 'that has giant ceilings?' You know, you're working in people's homes. You're like that woman I told you about who's working Manhattan and climbing up stairs. Then what do you do? What kind of a modifier do you do? And so for that, I wanna show you this. So this is just a small. It's technically a pretty small modifier. It's a little 24 inch Westcott shoot through umbrella. I can show you it. I have it here. By the way, $24 for this bad boy. But when you hook it up to your light, this, all this white really becomes your light source because of the way the light hits it. And the beauty of these kind of umbrellas is that they will bounce light all over the place, all over a room. You put a light in here, in this kind of a modifier and it honestly just goes everywhere, which you can see here. So, this little modifier is lighting up that room even more than that seven foot octodome did. So we're getting even light across here and on my portrait, that light looks really similar to that big seven foot octodome. So something like this can be a good option for you if you are looking for something that's going to create those big soft shadows but that isn't a seven foot, giant modifier. So here they are side by side, the seven foot octodome and the shoot through. So pretty similar right? Isn't that interesting? The only problem with these kinds of shoot through umbrellas is that they're a little bit harder to control. So if you don't want light spilling and bouncing all over your room, if you just wanna kinda control it and get it more on your subject, it's gonna be harder to do it with something like this. But it is a really great option to have if you are wanting to create that big light modifier look but you don't have the space to do it.
Class Materials
Bonus Materials with Purchase
Ratings and Reviews
a Creativelive Student
Wow! with a lot of online stuff out there one can become rather overcome with too much information, however, the way Sandra presents her courses is just perfect! Her honest and simple and easy to understand approach was just what I needed. Not once did I think she was just going through the motions, she really loves what she does and it shows. To be able to rewatch and rewatch was also a key for me. Since I have dyslexia I have to take things one half step at a. time. After completion of the class I had a new found confidence when using strobes. A must have.
Micah Hewett Images
Out of all the classes I own on Creative Live, Strobe Lighting with Sandra is my FAVORITE! She is an incredibly kind and gifted teacher. She explains everything on a simple level and then gradually build to more complex issues. I am 100% happy with this course. Thank you Sandra!!
Amy
Do you own a film camera? Then you NEED this class. I knew I *kind of* wanted to try shooting with a strobe, so I bought this class as some encouragement. But honestly, I half expected to do the class and not actually buy the strobe (because strobes are scary!). But as soon as I finished this class I IMMEDIATELY bought a strobe, umbrella modifier, a backdrop, and seamless paper (in Storm Grey because I basically want to be Sandra.) I felt so empowered to shoot with strobes and film and suddenly what had seemed terrifying now seemed doable. My very first test roll turned out great after following Sandra's easy tips. Now that we're in the winter months, I can shoot indoors with my film camera and strobe! Thank you, Sandra, for so generously sharing your knowledge with us and for being such a great teacher! And to anyone even remotely considering this class, DO IT. There's no way you'll regret it.
Student Work
Related Classes
Lighting