Meter With Strobe For Black & White Film
Lesson 15 from: Film Photography with Strobe LightingSandra Coan
Meter With Strobe For Black & White Film
Lesson 15 from: Film Photography with Strobe LightingSandra Coan
Lessons
Class Introduction
13:12 2Why Strobes & Film?
05:09 3Using Sync Speed
10:21 4How To Avoid Ghosting
05:45 5Equipment Overview
04:12 6How To Use Your Camera With Strobes?
06:27 7Triggers & Receivers
03:39 8How To Set Up A Light Meter & Strobe Unit
08:03Demo: Equipment Set Up
07:59 10Create A Natural Light Look
10:05 11Light Modifiers
09:39 12Catchlight In The Eyes
08:41 13Metering Overview
03:40 14Meter With Strobe For Color Film
22:44 15Meter With Strobe For Black & White Film
26:00 1645 Degree Light Placement
09:01 1790 Degree Light Placement
15:01 18Backlight Placement
04:13 19Feathering Light
08:07 20Lighting For Groups
25:44 21Speedlights with Film
08:42 22TTL Vs Manual Mode
09:21 23Gear For Location Film Photography
03:26 24Set Up On Location
04:08 25Know Your Film Lab
16:21 26How To Find The Right Lab
14:47Lesson Info
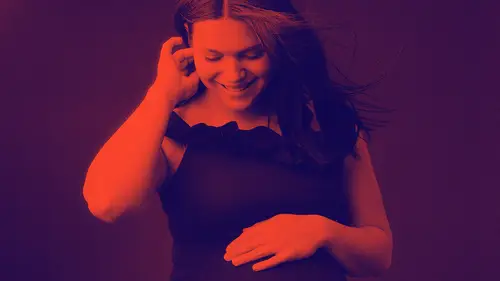
Meter With Strobe For Black & White Film
So metering for black and white. Hello black and white. So in some ways, black and white is so much more, so much simpler than working with color film. Because instead of looking at color tones and all these different choices that we make when looking at color films, we're really just looking instead at contrast, lights, darks, green texture, all of that kind of stuff. And that's the fun of black and white. That's why I love working with black and white. When it comes to metering black and white, it's a little bit different than color too. So with color, like we were just talking about, the rule for me is, you meter for those, honestly, the rule for everybody is or should be (laughs), meter for those shadows. With color film, you wanna make sure that those shadows are properly exposed because you don't want underexposed muddy shadows. With black and white, there aren't those kind of real rigid set rules. So for black and white, you really want to concentrate more on metering for where ...
you want your detail to be. And Daniel Gregory's black and white class, he did such a great job of explaining this and how it works with the zone system and all of that. For me, I like things simple. And so I just tell myself meter for where you want your detail to be. So if you're metering in your shadows, remember, the meter's job is to find middle gray. So if you're placing that meter here, it's gonna turn that light to middle gray and all the other highlights are gonna fall into place. And you're gonna end up with an image that's a little brighter, that shadow detail is visible, you can see it, you have a lot of detail in there. But if you want a little more drama in here, you can meter for your highlights. And then all the tones fall into place this way. So it's really about metering for where you want your detail to be with black and white. And with black and white and strobes, this is true as well. You can meter for where you want your detail to be, and then you can also control the look of it with your scans in the end. So this one, what I did, this is Ilford 3200, this is my dad too, by the way, you can say, "Hey, Mr. Coan." So Ilford Delta 32 is a beautiful film, it's actually the only film stock, however, that I rate at something other than box speed. I always go in and I rate this film at 1,600. It does really well there, you know, people talk about it in the industry all the time, that it's kind of really should be a 1,600 or so speed film. So I already am overexposing it one stop because I'm rating at a 1,600. And because of that, I don't go in and meter for the shadows, I meter for the mid-tones because I know I'm already giving him extra light to that shadow because I'm overexposing it a little bit. So I meter with my bulb out for that mid-tone reading like we were talking about. Like under the chin or so. And then I can control the drama of the image, the lights and darks with the scanning. So I'll meter for the mid-tones and then ask the lab to scan for the highlights, Which is something I do a lot with my black and white work. And honestly, shooting at that way and having the labs scan at that way can produce a real consistency in the look of my black and white work regardless of the stock I'm using. So here's an example. So Fuji Acros 100, Kodak Tri-X 400, Ilford Delta 3200. All different film stocks, all lit the exact same way, metered the same way and scanned the same way. And honestly, they look pretty similar, right? So at this point, really, what we're seeing in the differences is the grain texture of these. With film, the smaller your box speed, the smaller your ISO number, the finer your grain, the smaller your grain. So that Fuji has like hardly any grain, it's just really smooth, really beautiful. The Tri-X Portra 400 has a little more grain detail. And then that Ilford Delta has that really beautiful chalky grain that I love. But I think that this is fun to see in a studio lighting situation where you have such controlled lighting that you can control the look of your image and you can kinda make them similar. You can make them different depending on how you light, how you meter, what you wanna say with that. Which isn't that fascinating? I love that one. So when I meter for black and white, I meter for where I want my detail to be. So let's just demo that really quick. So same exact lighting situation, this is how I would have the light in my studio. And again, I like that natural light look so I have my big modifier and I have it close to my subject and I have the light turned down. And then I would decide where I want my detail to be. So if I did, if I want detail in that shadow and I want the overall image to be a little brighter, then I would put my meter in the shadow and I would take a shadow reading, just like I did with the color film. If I want more of a mid-tone reading, so I'm making sure I'm kind of even between my highlights and my shadows, then this is what a mid-tone reading looks like, ends right under the chin, it's the classic. You take that. And I wanted a highlight reading, so I really wanted to make sure this was metered and I wanted more drama, darker shadows in here, then I would take a highlight reading. Now, this is where using studio lighting with film and using studio lighting with digital camera is really different. So remember, at the beginning, I showed that picture of those two images that I'd metered the exact same way. And one was super blown out and one wasn't. Well, that was because of metering. When you're metering with strobes and studio light, you always are metering for your highlights with digital because digital doesn't have the latitude range on the high end and it will blow out. But with film, you can kinda wiggle around with it a little bit more, with color, you can meter for those shadows and that would blow out a digital image, but it's not gonna blow out a film image which is really fun. Another quick word on metering, you're so good, by the way. (laughs) Another quick word on metering is you'll notice that I'm coming right in and I'm getting all up in her face with my meter. That's because, what do we know about light? We talked about this earlier. The closer your light, the brighter it is. So if I have her sitting here and I'm metering like this, I'm gonna get F22. But if I'm here down at her face, I'm getting F11. So you wanna make sure that you're actually getting an accurate reading, it's really important. And so you're metering right where your subject is, right where you want that detail to be. In your face, sorry, did I hit you with the meter? No. Okay. (laughs) And then try not to hit your subject with your meter. Very important. All right, thank you. Let's see how we do this with black and white. Now I'm gonna talk a little bit about creating that natural light look in a studio room that's more like a traditional studio room where you don't have a mix of ambient light, you don't have a big window that's you're just boosting, but you're just kind of creating your light. So remember, we talked about how the bigger your modifier, the softer your shadows, the closer your modifier, the softer your shadows. I like that kind of soft shadow look, that's my style. And so that's what I'm always trying to recreate. Even when we're in this room, I want my images to look like maybe they were window light, maybe not, not really sure. And so one way to do that, A, I shoot with a massive modifier, I also use a massive modifier because I work with little kids a lot. And this modifier with light up this whole room so the kids can run around which is awesome. But it's also gonna give me really beautiful soft shadows. And it's pretty. (laughs) So that's what we're gonna do. So I'm gonna shoot this with the Rolleiflex, and I'm shooting Ilford Delta 3200. Now, Ilford Delta 3200 is the only film stock that I rate at something other than box speed. Most of the time, whenever I'm shooting my film, I rate it at box speed and that's fine. Ilford Delta has this really narrow window as far as its latitude goes, and I like it just a little bit overexposed. When I rate it at 1,600, it's kinda that perfect place where I want it to be. I mean, it's kind of standard, like a lot of people who shoot film and shoot this film in particular will talk about how they actually rate it as a 1,600 film. I'm one of those people. All that said, you can totally rate it at 3, and it's gonna be fine, I just like the look of that better. When I'm shooting on the Rolleiflex, there's a little sync spot here where you can add your trigger. Or in this case, I'm using a sync cable. This is my sync cable, it's super duper duper long. One end of it plugs into my strobe and the other end plugs into this sync spot here on the Rolleiflex. The only reason that I use the sync cable as opposed to a trigger is because it doesn't fall out. (laughs) Sometimes the triggers can be heavy, and if I bump the Rolleiflex or something, the trigger will fall out, this stays there. It's nice and secure. If you don't have a sync cable and you do want to put a trigger on, you totally can. And this is how you do it. So this is just my PocketWizard, I have the other PocketWizard attached to the strobe. And I can just plug it in using a sync chord. So one end goes here. And then I just plug the other one into the Rolleiflex. And just like that. Now, you can just let it dangle. You can hold it, whatever you wanna do. I'm just gonna let it hang. But it'll work the same as the sync cord, it'll work just fine. So we can actually take a couple with the PocketWizard, and then I'll do my normal thing with syncing it. And I'm gonna meter her, so like I said, I'm going to set my ISO at 1,600 for this one. And because I'm shooting the Rolleiflex, which is a leaf shutter camera, I actually don't have a sync speed which is awesome. So I'm a little freer in where I can set that shutter speed. So if I want a darker backdrop, I can have, I can shoot at like 250 or 500, I like, my happy place is like 125 with this camera because again, I like to let in a little extra light. So I'm gonna set my shutter at 125. And then I'm gonna take my reading, and because I'm already overexposing this film a stop by rating it at 1,600, I'm going to take a mid-tone reading. And you just fire your flash by pressing the test button there. So I'm gonna come here and gonna pop it. And it is at F11. And fun fact, my camera's already set to F11 at 125, 'cause (laughs) it's always the same when I actually do it in this room because my light's always the same, which is great about shooting with strobes. So let's take a couple of shots which use this PocketWizard, and then I'm gonna go to my normal setup. And here we go. Bum budum. That's right about where I want it. All right, oh, it's so pretty. This is the prettiest camera ever with the prettiest light and the prettiest girl, you're gonna love these. Okay, ready, just gonna. (laughs) You're laughing, sorry. Good, and you're gonna want to look at the top lens there. (shutter click) Beautiful. So with the PocketWizard, it fired, it's just fine. I'm gonna take it out though 'cause I, it's just my habit to tether to this, with my sync cable. Here we go, beautiful. (shutter click) Super pretty. And let's do one really up close and then let's put a fan on you. So these are these great little filters that allow you to kinda zoom in. I'll show you, they're great, so then I can get a little closer. By a little closer I mean a lot closer. Gorgeous. Oh my gosh, it's the prettiest. Good. (shutter click) And just relax. Kinda lean in on your hands like a little. Good. That's great. (shutter click) And now look down at your hands, pretty, don't move. So one thing about the Rolleiflex, you guys, is that when you're looking in it, everything's backwards. So if you see me moving the camera, it's because, after all these years, it still messes with my head a little bit and I forget which way to move it, it's really pretty. (shutter click) All right, let's put the fan on you. So I'm gonna go ahead and put a fan on her. I know one of my big worries when I first started shooting with studio lighting was that I wasn't going to be able to capture movement or spontaneity. And I work with little kids, it's a problem. Now I know you totally can. Even if you're shooting at a 60th of a second, whatever that sync speed is on your camera, the flash is going to freeze your subject, but you can still kinda create fun movement in your images. And so one of my favorite things to do with ladies is to turn on the fan, get that hair moving. And bring out your inner Beyonce. So let's do this. Again, I want hands on your elbows, I mean elbows on your legs, you know what I mean. (fan blowing) That's good. Kinda swoosh this side for me just a little. (shutter click) Gorgeous. Look down towards the fan. And give that hair a toss again. Now look over at me. (shutter click) So pretty. This is so fun. I think if we get this, we can get both sides going. Isn't it fun, everybody loves a fan, I know. (laughs) Okay, sit up nice and tall. Good, hands on your knees, good. Oh, it's so pretty. That's cute. Oh, it's really good, we've got like. Look over towards the light for me. Oh, it's pretty, actually, look the other way for just a sec. No, look back at me, sorry. (laughs) I can't decide what I want you to do. Yeah, look straight at me, good. (shutter click) Good. Now, just serious face, mask of serious, I know it's hard when there's like a fan on you. (shutter click) Gorgeous. Look over at the light for me. Okay, I want you to look at the light. And really wanna get that hair going. Good. Yeah, look at like here, good. And then I want you to laugh a little bit, like ha-ha, like oh, you're hilarious. (shutter click) Good. Now look right here at me. It's great. Give a little ha-ha. (shutter click) Beautiful. Good, we're done. Okay. So here are some of those images. The fan. I tell you, it's so much fun. If you ever wanna bring out the best in like a nine year old girl, put a box fan on her. (laughs) It's amazing. But we got all that fun light moving around with these photos, which was really really fun. And then again. Looking up, that hair. So a couple of things I wanna point out from that video really quick. So first of all, I was using, I thought people might wanna see these, so I brought them. On the Rolleiflex, these are little Rolleinar lenses. And they come in plus one, plus two, plus three, plus four, I think. And they're like little macro lenses. So you can put them on your Rolleiflex so that you can get closer. I like to get up in people's faces. A couple other things that I wanted to point out is that, so that was my studio, that was that giant seven foot OctoDome I was talking about. And you can see how I had it pretty close to her. And I had it up. Having that light up is how we're getting that catch light here. So the higher your light up, the higher your catch light goes up, but again, you just kinda wanna think about, I'm always trying to think of my Softbox as if it were a window. And generally, I'll have my Softbox up a few feet higher than my subject. The other thing I wanted to point out 'cause I didn't know if people had questions, but giant giant Softbox, right. And you'll see that I was in here with my Rolleiflex and standing in front of the light. And because that light source is so big, I can do that and it doesn't matter, I'm not gonna cast a shadow or anything because most of the light's coming here and coming down, so me being in front of it like that isn't really a problem. The other thing I wanna say about shooting in studio with the Rolleiflex is, if you've never done it, you totally should because it's really the most fun I've ever had. It's great, but what's great about this system and why I love using these cameras in studio. From a portrait photographer, especially somebody who works with kids, is what's great is you get that Rolleiflex on a tripod and you get your people going, you've got your light. And with that camera, you can adjust your focus and I really just said it, I kept looking in the camera just to make sure, but sometimes when I'm working with little kids, once I have them in focus and I'm shooting at F11, I know that they can move around on that stool a little bit and they're still gonna be in focus. Which means I can sit here with the camera and they're in focus, and then I can just talk to them. And just like we laugh, and we tell jokes, I have puppets. It gets exciting up in there, and then you can just keep taking those pictures without having to readjust your focus. So this is a great option for studio film shooters. Plus it makes me feel like Richard Avedon. (laughs) 'Cause he would put his Rolleiflex on a tripod and shoot, and who doesn't wanna feel like Richard Avedon? Kaley Walker who asked, "Do you ever meter "the background and adjust your shutter speed, "lighter or darker, for a lighter or darker background? "Or do you usually shoot pretty close to the background?" So how do you work with background colors and darkness, lightness and-- Yeah, that's a great question. So I work with people. So my concern is always lighting my people, and that's what I look for. But you can totally change the color of your backdrop or the lights or the darks if you're shooting black and white with how close you are. Right now, this lighting setup is pretty close just because we're here in the space. But generally, I'd like to have my light farther away. So what do we know about light, again, we know that the closer the light is to the subject, the brighter it's gonna be. So if you have your subject here, right by the backdrop, and you have your light here. Well, that light is not only close to your subject, it's close to your light. So you're gonna get more light on that backdrop, and you're going to, that backdrop's gonna be brighter. But if you have your light pulled out aways and you'll have your subject close to your light 'cause you just wanna keep your subject close to your light. I do anyway 'cause I wanna create that soft pretty light. Well, now that light is further way from your backdrop so there's gonna be less light on the backdrop, it's not gonna be as bright on the backdrop. So it'll make that backdrop look a little bit darker. And we're gonna talk about this a little bit too in the next segment when we start talking about things like feathering and how you feather your light. You can also control how much light hits your backdrop in that way and then control the color of your backdrop. But to specifically answer that question, I'm a portrait photographer so I'm always metering faces. That's what I'm concerned about. The backdrop, I have just kind of a simple gray backdrop and I have the white walls in my studio. And that's kind of all I ever worked with and I'm not really concerned. They can, depending on, we're gonna talk about this when we get into labs too, depending on the person's skin tone, sometimes the color of the backdrop can change a little bit regardless of how I'm lighting it, because a lab is always going in and making adjustments for skin tone, the lab's job is to always make your skin look really good. And different skin tones then, because the way you adjust color on a negative scan, and again, we're gonna get into this, can change that backdrop color a little bit. And it's something, but it's something I personally don't worry about so I'm not back there metering like I necessarily would with a digital camera. So this question is from DAR Photo, who is Donna watching from New York City, who says, "Would you, do you ever meter the shadow, "the highlight and the mid-tones, "and then average to get your aperture? "Is that, would that work?" Yeah, I mean, you know, yes and no. So remember, I was talking about, when I was first learning, all I knew was that, if I had more than a five stop difference, it looked bad and I didn't really know about lighting ratios and all of that. (laughs) That's kinda, so some people will do that. They'll come in and they'll meter. They'll take the highlight reading, the mid-tone reading, the shadow reading and then kinda average it out. When shooting film, I don't do that because film has that latitude range. So I know that, if my shadows are perfectly exposed, that my highlights are gonna be about three stops over and that film can completely handle that, I'm not gonna lose any detail in those highlights and I'm not gonna lose any detail in my scan. Unlike if I were shooting digital and I did that, then I would blow up the highlights, it would be too bright. So when you're shooting strobes digitally, I guess it makes more sense to make sure that you're metering more for those highlights in your mid-tones and maybe taking an average makes more sense, I don't do that with my film.
Class Materials
Bonus Materials with Purchase
Ratings and Reviews
a Creativelive Student
Wow! with a lot of online stuff out there one can become rather overcome with too much information, however, the way Sandra presents her courses is just perfect! Her honest and simple and easy to understand approach was just what I needed. Not once did I think she was just going through the motions, she really loves what she does and it shows. To be able to rewatch and rewatch was also a key for me. Since I have dyslexia I have to take things one half step at a. time. After completion of the class I had a new found confidence when using strobes. A must have.
Micah Hewett Images
Out of all the classes I own on Creative Live, Strobe Lighting with Sandra is my FAVORITE! She is an incredibly kind and gifted teacher. She explains everything on a simple level and then gradually build to more complex issues. I am 100% happy with this course. Thank you Sandra!!
Amy
Do you own a film camera? Then you NEED this class. I knew I *kind of* wanted to try shooting with a strobe, so I bought this class as some encouragement. But honestly, I half expected to do the class and not actually buy the strobe (because strobes are scary!). But as soon as I finished this class I IMMEDIATELY bought a strobe, umbrella modifier, a backdrop, and seamless paper (in Storm Grey because I basically want to be Sandra.) I felt so empowered to shoot with strobes and film and suddenly what had seemed terrifying now seemed doable. My very first test roll turned out great after following Sandra's easy tips. Now that we're in the winter months, I can shoot indoors with my film camera and strobe! Thank you, Sandra, for so generously sharing your knowledge with us and for being such a great teacher! And to anyone even remotely considering this class, DO IT. There's no way you'll regret it.
Student Work
Related Classes
Lighting