Cityscape Image: Selection Using Color Range
Lesson 15 from: Capturing and Processing Night PhotographyTim Cooper
Cityscape Image: Selection Using Color Range
Lesson 15 from: Capturing and Processing Night PhotographyTim Cooper
Lesson Info
15. Cityscape Image: Selection Using Color Range
Lessons
Class Introduction
01:47 2Safety And Scouting
01:28 3Photo Pills App
03:45 4Civil Twilight Image Prep And Test Shots
12:40 5Setting Intervalometer And Capturing Cityscape
04:04 6Light Painting: Equipment Overview
03:20 7Light Painting: Composing The Scene
03:14 8Light Painting: Setting Sky Exposure Ambient Light
08:06Light Painting: Color And White Balance
05:12 10Light Painting: Mixing Warm And Cool Light
14:58 11Review Cityscape Library
02:01 12Opening Images In Lightroom And Moving In Photoshop
19:29 13Cityscape Image: Layers Theory
07:56 14Cityscape Image: Selections And Mask Theory
05:48 15Cityscape Image: Selection Using Color Range
08:27 16Cityscape Image: Altering Masks
05:36 17Review Light Painting Library
03:01 18Light Painting: Opening As Layers In Photoshop
11:00 19Light Painting: Layer Masks
12:05 20Light Painting: Edit Review
07:59Lesson Info
Cityscape Image: Selection Using Color Range
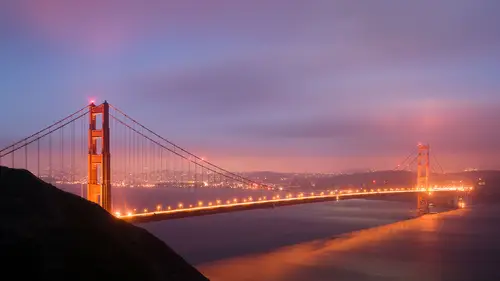
So I'm gonna choose select, color range. Now, we're back in here where we started off a few minutes ago. What we're gonna do is use sampled colors and click on the orange, and you can see now, this is basically a preview of the mask. If I do that, only the white areas are going to be showing through, so let me bring up my fuzziness. And you can see now, this is ultimately what the mask would look like. Alright, now, what I wanna do, is I wanna select these highlights, and I want the highlights from this layer, but I want everything else on this back layer to be visible. So we go select color range, and I'm gonna click on this orange, and I get a really small selection, not nearly all those lights. So if I want those lights to be in there, I have to add them to the selection by using the add selection eyedropper. Now, when I click on these whites back here, you can see they begin to get added. Don't be afraid to zoom in either. You can get right in there. And in addition to clicking, yo...
u can also click and drag, and as I'm clicking and dragging you can see this white appear up in here. Alright. Space bar lends a hand, you can see, as I press my space bar down, I get the hand tool and I can move around the image. And I can click, and I'm adding all of these spots in by just clicking and dragging across. So that's one way to add more into your selection, again just clicking and dragging. Another way is to use the fuzziness slider, and the fuzziness slider chooses extra colors. So this is orange, but that's also kinda orange too, so the fuzziness slider as I understand, you want that exact orange, but as you increase the fuzziness, it'll choose other hues of that orange, or other brightnesses of that orange, and this isn't turning out at all the way I want to, because this is very close in value, or close in color. So thankfully, several years ago, the color range tool added probably one of my favorite features, and that is the ability to choose highlights, mid-tones, and shadows. Now this is really cool because really, all I want is my highlight on this layer to show through. So if I choose highlights, it automatically sets your image to looking like this. Let me just change my preview here, go to greyscale. Again, remember the whites are what it selected. Boy, that's pretty good because I really wanted those lights coming across that bridge to be selected, and this has done a pretty good job of that, and it hasn't included everything else. So, we also can play with our range. And this range slider is gonna say, choose slightly darker highlights, or slightly brighter highlights. So if I push it all the way to the right, what it's doing is only choosing the absolute brightest highlights in the image. As I move it to the left, it's including more and more highlights. Alright. So now at this point, what we're doing, let me bring this back here. What we're doing is we've got nearly this whole bridge selected, all of these lights, including all of this glow around here, and the city lights in the background, which look rather nice at this point. And nothing else will be selected. But, this cloud. Alright, now. I'm just gonna click okay, and explain to you why I'm allowing that cloud to be in. Sometimes, when you're making selections, it's easier to allow some areas to be selected if we can get rid of them easily. So this seems to be like a really nice selection of the car travel across the bridge, the bridge itself, and that looks fantastic. But, oh by the way, it's also including this bit in the cloud. But that bit of a cloud, I can easily get rid of later on. So what I'm gonna do, and what I did, was say, I like this selection the way it is, I can take care of that later, no problem, let's go for it. So I did. Alright, now. At this point, what I will do is go down and click the front-loading washing machine, or the add layer mask. Now what that will do is turn this selection into a mask. And already, you can see exactly what's gone on here. So, here is our mask that we created, and what I did folks, is I hold down my alt option key and clicked on that mask to bring it up here, and that was what we were seeing in the select by color range tool. Alright, we can see the lights back here. And you see the lights in the city here, and quite a bit of the bridge. So what this mask is allowing us to do is only see the lights in those areas from the darker image, but all the brighter image underneath it is showing through, and that's what we're seeing here. And that's a real easy way to make a very, very accurate selection. Okay. So now what we'll do, is we're gonna zoom in to 100 percent, and you could also double click on your magnifying glass, or you could hit command one, that also brings you up to 100 percent. And we're gonna look around, and this looks a little false, and the reason is, and I'm gonna show you the mask again by alt-clicking on the mask, the reason is, is these areas are very sharp-edged, the selection is so perfect, it actually causes us problems. So what we may need to do is blur the image a little bit, blur the actual mask. And you'll see that up in the properties when you click on the mask, that we have this feather tool. And you can grab your feather tool and move it up, and what I want you guys to notice as I'm moving this other tool, I want you to look in this area right here, and watch how it starts to sharpen up a little bit. There we go. So now, by feathering the mask, we have actually sharpened the image a little bit. Not technically sharpened, but make it appear more sharp. Alright, so. Now we've got our feather up a little bit on our mask, and we're getting the highlights coming through it. Let me just take this eyeball off so you can see where we were. You can see how we've brought more detail in there, also back into the city lights as well, alright? Now, at this point, we're free to do whatever we want. I personally would like to have a little bit more contrast in the sky. I'm going to make a selection of the sky by using select color range. Now I wanna show you that the sky is actually on this layer though, right? Because this black is not showing us any of this sky. So the sky we're seeing is on this layer below. So I'm gonna click on that layer to make the selection. Select color range, and let's try our midtones. Alright, now. At this point, using our midtones in select by color range, we can change how the selection is going to appear simply by moving these sliders. This is our white slider, alright? So I'm gonna pull that down, and I may move my shadow slider up, and we can start to see that we have all of this sky selected, except for this small area, and again, I'm gonna leave that go and just click OK. Alright, we had a selection active, so when you create an adjustment layer, let's say curves, then it is going to take that and turn it into a mask. Alright, so here's our curves layer, here's our mask, I'm just gonna pull that up to the top, and I'm gonna look at my mask. Alright. Well I really wanted the whole sky selected, but this area isn't, and that's not a problem because I got the bridge wires just the way I wanted them, down in here looks good. This is where we're gonna come in and just adjust our mask.
Ratings and Reviews
Phillip Ziegler
This course, along with the others by Tim Cooper, are outstanding. His demonstrations and explanations are so clear and easy to follow. I've been out doing long exposure night photography using what i learned from Tim and and delighted by the results.