2:00 pm - Menu Systems Continued: Setup and Custom Functions
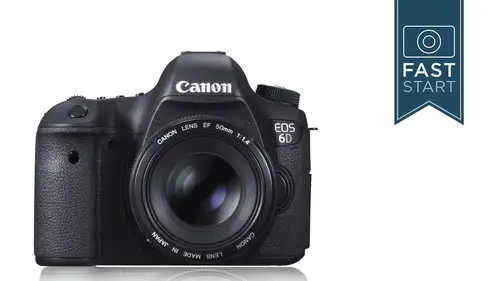
Lesson 12 from: Canon 6D - DSLR Fast StartJohn Greengo
2:00 pm - Menu Systems Continued: Setup and Custom Functions
Lesson 12 from: Canon 6D - DSLR Fast StartJohn Greengo
Lesson Info
12. 2:00 pm - Menu Systems Continued: Setup and Custom Functions
Lessons
9:00 am - Product Overview
14:55 29:15 am - Photography Basics
06:31 3Button Layout: Top Deck
34:01 410:30 am - Button Layout: Back Side
28:26 511:00 am - Button Layout: Other Sides
11:38 611:15 am - Lenses
11:27 712:15 pm - Menu Systems: Shooting and Movies
32:34 812:00 pm - Displays
13:08Lesson Info
2:00 pm - Menu Systems Continued: Setup and Custom Functions
I am going to dio a horrible self portrait here okay just cause this works here and so it's so you can't really seem to well what's going on now what I'm going to do so that they can kind of see his first I need to focus I'm just going to manually focus this just to keep this simple let's see there we are focused pretty close and let's see if I could do this I was trying this out you know I could did I find it ok so that's a little dark and scary which might be good okay so kate if you can work with this one so here is the image that I got and I'm going to go back into camera image viewing and it's down here at the bottom and you know that's really dark and I'm just going to take it again and it looks pretty bad okay it's not that bad but all right so I'm gonna go back to remote shooting and let's adjust the s o tio four hundred make it a little brighter and see if I can get my finger here I have a hard time finding the button is that button there we go okay so that's a good one all ri...
ght so now so you guys keep watch over my shoulder here will go back into image viewing scroll to the bottom suppose I could have flipped on the grids and here's my image and it's kind of a goofy image which I am totally fine with and let's email that to kate and we're going to send that off and that should be done now so I'm not too bad not too bad not the fastest thing in the world well we cannot wait to see if we can not wait to see it and we hope that we hope that you guys are all having fun out there taking photos on yours on your little hookup yeah ok let's let's finish this thing off here okay all right so we're back kind of in the deep mud of custom functions there's a function called safety shift and this will shift your shutter speeds in your apertures that you set in this cheddar priority or the aperture party mount generally I would disable it there are some special high end users that might want to go in and play with us but for the general user I'm goingto say it's not something that you want to do all right custom group number two deals with auto focus tracking sensitivity so for anyone who shoots sports this isn't the best camp in the world but if you are shooting sports you can adjust the responsiveness on how fast it tracks new subjects that it sees now should you have it a zero or responsive or locked on my opinion is if you shoot field sports soccer football, basketball hockey, field hockey, rugby cricket trying to think of all the different sports out there where there's a lot of players interfering with one another I would tend to have it either a zero or towards locked on which means it stays on a subject that you're focusing on if you're shooting individual athletes like a skier or a runner coming down a hill I would put it maurin responsive where it's more quick to react to it the problem with field sports is when the referee runs between you and your subject how quickly do you want it to refocus on that referee and so if you're not sure I would leave it at zero if you're shooting on a lot of field sports I would try it mohr on the locked on mode next one acceleration and deceleration how fast are your subjects changing speed so if you're going to shoot track and field and you're shooting the start line if you're shooting football or soccer where players air stopping and starting very quickly you might try adjusting this to level one or level two so that it adjust the speed mork quickly because the camera doesn't know how fast your subjects are accelerating or decelerating or just maintaining speed and that's going to help fine tune it normally the first image in a I servo is a balance between getting the focus just right and being able to take the picture and this is where I would normally leave it if you're getting too many pictures that are out of focus, you could change it mohr to focus the problem is is that the camera won't fire until it's really, really sure that's in focus on dh so a lot of sports photographers would leave it on the release mode because capturing the moment is more important than getting exactly one hundred percent perfect focus they don't mind ah slightly mys focus image as long as it's taken at the right moment now trust me they want it in perfect focus but they would rather have an image taken at the right time next up also dealing with focus is the second image justus we talked about how important is the speed of the shot to shot shooting versus focusing for most people? I would leave it in the middle you're going to have to look at your own photographs to be a judge as to whether you should here this more towards the speed setting or the focus sitting. If you're getting too many images that are too out of focus for what you want to use, you want to go to the focus and if the camera's not firing when you wanted to fire, you need to go more to the speed setting next up we're dealing with things dealing with auto focus and so on your external lights there are lights that turn on to help focus and if you're a private investigator sitting in a car on the other side of a darkened street, you don't want this light coming on it's also kind of irritating for speakers if you're going to be people photographing people on stages and so forth, so this might be something that some people might want to disable it does help in focusing under low life when your camera can't focus, what do you want it to do to continue searching or to stop? The people that wanted to stop looking are typically bird photographers or sports photographers with really big lenses because if it can't find it usually stops pretty close in that range and if it continues to search it's going to go all the way down to minimum distance to try to look for something and they go all the way back out to infinity and so if you do wildlife photography bird photography in particular you're going to probably want to put this on stop focus search but you're going to do some testing on your own to make sure it works for your type of photography talked a bit about this earlier orientation point linked to the f and so normally when you have this set to zero let's say you select the right focusing point in this case when you turn your camera vertical it's no longer on the right it's at the top of the frame if you change this to different, what you can do is set one point for horizontal and said a different one for vertical so that it stays roughly in the same position. And so my recommendation on this one is to change it, to select different f point. So this is kind of the first one that I think is very handy to be able to choose different points. Now it is going to move on you when you go from horizontal to vertical. Next step number eight superimposed a dis slay, and so on your camera as you're focusing, do you want those little red lights to turn on when you're focusing for most people it's a helpful aid? No, knowing that their camera focused in what focussing points it used to grab that focus, last one in this grouping is micro adjustment. Normally, this is on disable, you can go in, and you can adjust your lenses. Let me talk a little bit about this. Normally your camera and lens is designed to focus on a subject, but sometimes they focus in front, and sometimes they focus in back of that subject, so that would be called front focus or back focus and all lenses front focusing back focused to a small degree, and sometimes they add up enough to where it's a bit of an issue in actual focusing of a subject and if you would like to correct for this yourself in camera you'll need a focusing target I tend to use a ruler for this and then you're going to need a measuring device I tend to use a yardstick for this and you're going to focus on your target and you're going to see if you're focused exactly where you're supposed to be in focus now you khun by this lens align mark to for about a hundred bucks and you're going to focus on the lens line target and then you're going to see is what I'm in focus actually truly and focus or something in front of or behind it in focus now I haven't gone to the expensive buying one of these so I just use a couple of yards sticks and review a ruler and a yardstick I focus on the vertical ruler and then I check on kind of the angle the yard stick to see if I'm actually focused in the right area now when I did this recently with one of my shallow depth of field lenses I noticed that when I focused at zero my camera was front focusing by just a couple of millimeters about a sixteenth of an inch but the settings that I could adjust it to anywhere from a setting of minus twenty two plus twenty and then does not refer to millimeters inches or any other distance it's just a general reference scale in this case, I would set my camera tow plus five to correct for the slight focusing air that lands has with that particular camera. And so, in order to do this, I would set aside maybe a half a gn hour or an hour of time, depending on how many lenses you have, you're going to need to gather all your cameras, lenses, tripods you're going to want to have a ruler and some sort of measuring device, you're going to want to have your camera set to the highest quality shallowest depth of field possible, so some of the settings that you're going to do in your camera are listed right there. The steps that you're going to want to do is you're gonna want to manually unfocused your lens and then focus it on the target and take a picture he may need to use mere lock up to make sure that you were getting a truly sharp picture. Magnify the images and comm param and see where it looks the best by adjusting the lands. And so when you get in to do this, you're going to want to adjust by the lens. You don't want to adjust everything by the same amount, most likely, unless it was just your camera being totally often that's pretty rare that your cameras off by any noticeable margin I have gone and I've done this with all my lenses and I have some lenses that are plus ten and some lenses that are minus ten on dh various settings between those and so that's what you can expect if you want to take the trouble to go do this now this is something I don't recommend for beginning photographer because they're likely to mess it up so you gotta be really careful about this and follow those steps very very carefully in then you can go in and do it so it's something I recommend for our intermediate and more advanced users okay custom functions group number three just general operations the dial direction that u turn in time value an aperture value doesn't make a lot of sense to me okay look at the screen you see that a layer on the bottom which way would you turn the dial in order to get that indicator in the middle? Would you turn the top of the dial or the bottom of the dial going towards the right? Well if you said the bottom that's the way kanan thinks if you said no I would turn the top of the dial we'll then what you want to do is you want to reverse the direction of this style it makes it just a bit more logical in turning it because I usually associate it with the top of the dial when I'm doing it however if you use the camera with the vertical grip try it there as well because it it goes back and forth what side of the dial you're grabbing it on if you do choose to change the focusing screens it does change the meeting in the camera slightly so you did need to let the camera no what focusing screen you are using so if you change the focusing screen you need to come here and change this in the camera as well the beginning of the day we talked about the little lock button on the back of the camera and that's going to lock a certain number of features in the camera I like toe lock the quick control dial because that could be very easily bumped but if you want you can also lock the main dial and the multi controller so that none of your settings are easily changed if you were shooting sports photography and your cameras were kind of bouncing around and buttons were getting pressed all the time or they're going in out of camera bags and you didn't want him to change the list you specifically wanted them you might check off all three of these depends on which one of those dials you want toe lock up alright we talked about this when we talked about the viewfinder what you see going on in the viewfinder the warning symbol you get to choose why that warning symbol comes on when the cameras set to the black and white monochrome mode or when you've gone and changed the exposure of the white balance if you turn on the esso expansion or your spot metering is accidentally said all three of these things or for these things are things that could be tragic if you didn't know they have you had him turned on and you were just shooting in that mood so might be nice to have some of those warnings turned on the final one in here is going in to customize the buttons on your camera talked a little bit about this before there's a shortcut in the quick menu you can go in and customizes many buttons as you want there's a few things that I've gone in here and change but I'll let you investigate it and make your own changes and then finally the best part about the menu system is my menu this is where you get to program the menu to the settings that you most wanted. Now we have a question from somebody in the audience about a short cut for doing bracketing this is where you would put it in here what you go to if you go to register to my menu, you look through the entire list of things that you think you might like to have and here's a few of the common settings that I like to have in my camera very easily accessible, and I don't wanna have to dive through seventy some items on the menu to find, but you can find your own grouping and you get a collect up about, I think, six of them in here to add to your favorite settings in here, and so once you do that, you'll be able to sort them, you can delete them, you can have more of them, you can delete all of them, and you'll be able to organize it. And when you display from my menu with last thing you want to do here, display from my menu means that when you press the menu button, it's going to come back to this menu setting here, which has the most important things it's, kind of like the presets on your car radio, you get to come back to the stations that you like the most related to that someone was wondering if you can save your camera setting somewhere. They said that they sent their camera weight of the cannons repair facility and came back, uh, empty. No, you cannot get to know your nikon friends might pester you, saying that we can save our camera settings on dh there is no way of doing that in that scenario in the canon camera, thank you, any other questions might be a good time, because we're we're basically done with the camera this point we're got the operations how I recommend setting the camera for some different modes any catch up questions on the menu? This would be a perfect time, okay? There was a question on whether or not the sixty can do tethering I believe it can I have not worked with it in that manner, but it could do wireless hook up to your computer but wired I have not done it, but I believe you can. We had a few questions about the dust elite setting image image image is their skin name's casey asked his destiny data affect a rod or just the jpeg dust? A late data from what I recall affects the raw image so it will fix it on raw images. It's the only thing that I can think of in the camera that will fix it that will adjust a raw image in any true fashion okay and there's a question from sam is it true that the camera always focuses with just one of the auto focus points that is, it doesn't average the focus from two or more points because an interesting question you can use one point where you can use eleven points to focus if you choose eleven points, what it does is it chooses the focus closest to the photographer closest to the camera and so if you have eleven different items on each of the eleven points, it's going to choose whatever one is closest to you. If there happens to be four things that are equally close to you, it's going to choose those for and it's going like those up awesome, lauren cause olen asked when testing the micro adjustment on lenses. If you make the test let's, say at two millimeters, uh, two meter, I don't know if they think they mean two meters subjects, and the net for meter could result in a different focusing focusing area that that could be the case. The problem is, is that it's very hard to do. Focus checks on infinity because there's nothing infinity distance away and it's really hard to work in that environment. So you end up shooting something that's fifteen feet away or ten meters away or something like that, but generally it's, not a specific distance that it's often focusing it's kind of a percentage and so it's. Not likely, that it's going to be much different at ten, feet as it is a twenty feet.
Class Materials
bonus material with purchase
Ratings and Reviews
Emmon Scott
There’s a saying in golf that it’s the swing, not the club, that counts. I’ve found that true in photography, where the most artistic photographer I know uses a Canon Rebel and an old film camera. His stuff wins awards and gets chosen for big exhibits. As recently as this past summer (2017) he told me he MIGHT upgrade to the camera this course covers, the 6D. Not the newer 6D Mark II — this one. If he gets it, I hope he takes this course. Is this course relevant in 2018, six years after the camera came out? To me, it is. I’ve read the hype about newer cameras — and they sound great — but I like the idea of seeing if I can do more with the 6D in my bag. And this course has already helped with that, really explaining the options and techniques for focusing, techniques I’ve started using and that have impacted how I composed some shots. The teacher, John Greengo, is the guy I’d want to meet behind the counter at a camera store. He knows the camera inside-out and upside-down. In this five-hour class, he takes you through every button, dial, and menu option — judiciously skimming past things less likely to be useful and focusing time on the key stuff. He’s a smart teacher and this is a smart class. Other examples of things he spent time on that caught my attention: How to adjust this camera and shoot remotely with an iPhone. How to use "mirror lockup" to keep the camera still at slow shutter speeds. How to update firmware. If you another camera and John Greengo offers a Fast Start course for it, my guess is you’ll find it worth your time.
flygirl
This was an awesome class. This helped me so much in learning my camera better. I am so impressed with all of John Greengo's classes. His level of detail in going over the functions of equipment and cameras is so awesome.... he always gives the best UNBIASED information.
Terry
John's style is fun, personable and professional. While I've used the 6D for a short while, it was comforting to learn a few tricks and short cuts. Also the preferred settings information was useful. Feel more confident that I will get better shots and be able to make adjustments more quickly. Don't expect any tips on situational shooting; lighting, composition etc. This is an in depth look at the 6D options, set-up, preferences and nice explanations for the choices. John's presentation was easy to understand, well paced and arranged with excellent graphics. One thing that may have been missing... the C1, C2, C3 set-up. This is a little different than the 7D. Recommended.
Student Work
Related Classes
Camera Guides