Lessons
Lesson Info
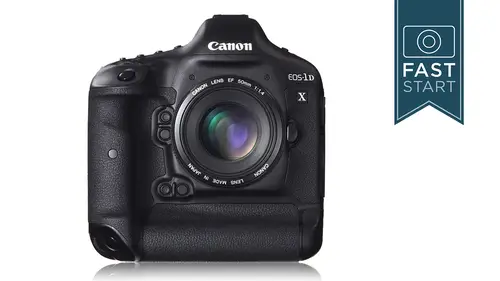
Display Screen
I'm not going to explain everything that's going on in the top l c d a lot of it is just really obvious stuff, but some things that we're going to talk about maura's we get into the menu system where we can make the settings the d plus is what's known as highlight tone priority you probably you're going to want to have this turned off. I'm going to show you how to do it little bit later on same with auto lightning optimizer over in the bottom right hand corner, you can do multiple exposures. This is something you probably don't want to have set on all the time mere lockup is another feature that we can use, and this is just a warning that it's turned on and bracketing. So if you see any of these things turned on with the yellow arrows pointed out it's just kind of a warning that the camera is set up in a way that you may want to be aware of. Okay, over on the back side we have that little screen down there where we're adjusting a lot of the playback features and recording features and ...
so you can record different types of file formats to different cards and you can see and do that with the controls right next to this, but you can get a quick glance of it without having to dive into the menu system and so there's some of your options for image quality that you can record if you were hooked up to the gps system, you'll see the gps logo come up depending on what sort of movie quality you have set. F h d stands for full high definition nineteen twenty by ten eighty in pixel dimensions. If you are hooking the camera with the bluetooth wireless system or any of the other wire connections, you will see that connection and or data transfer information in this back little lcd display and you can also create different folders and shoot two different folders. So for if you have different projects and just one memory card, you could shoot to those different folders and you'll be able to select that and do that in the menu system now in the viewfinder itself when you look in the viewfinder, what do you see? Well, you see the frame of what your camera is pointed at and it is a one hundred percent coverage so what you see is what you were going to get. It has a fairly high magnification of point seven six the five d for instance is that point seven one which basically means the viewfinder is a little bit bigger for you next up we have are focusing points we have sixty one focusing points we talked about those forty one of them are cross type after that we have a optional electronic grid pattern yes, you can buy a grid screen but you can also turn on elektronik grid and if you do want to see the shortcut on how to do that it's in the setup menu and you can turn that on nice for getting a level horizon or some people like it just for compositional reasons we have a little slightly outlined spot metering area in the middle there it is indicating the two point five percent area where spot metering is normally done next up what we have next I don't focus status light and so there's a little light in the lower right hand site that turns on when your auto focusing I am not a particular big fan of this and this can be turned off in the auto focus custom menu because there is another little light that will come on that indicates the camera is auto focusing and I just don't like things over what I'm going to look at now down at the bottom of the camera hopefully you will never see it lit up in its entirety like this but here is what is going on down here it's just the basic information the most important information we start with the meeting mode that you have your camera and and if you're really good at operating your camera, you'll be able to make these adjustments without taking your eye away from the u finder you're shooting, moz, so if you can reach up, grab that button, turn the dia while you're still have your eye up to the viewfinder. All the better for you, our auto exposure lock, which is that thumb button on the back of the camera. If you have a flash on and it is ready to fire you will see the lightning bolt in there. We also have something called flash exposure lock where the camera does a pre flash exposure to check to see if you're getting the correct exposure and you would do that by pressing the auto exposure little ass trick button on the back of the camera. The camera fires a flash, checks the exposure and then when you take the actual picture, will do a better job at getting the correct exposure. Now, earlier in this talk, I had mentioned that the maximum flash synchronization on this camera is one to fiftieth of a second and I was totally lying to you. That is actually the top shutter speed that you can use with t t l flash memory but if you do have one of the cannon flashes, you can go into a high speed sync mode. You do have to have the right flash you gotta put the flash on the right mode and you can shoot at upwards up to eight thousands of a second the flash range shortens quite a bit and there's a number of other limitations that deal more with the flash, but you can get into that and that's what the flash h indicates. Next up, you'll have your shutter speed, and sometimes they'll be other information that may show up in that spot as well. Aperture information is next to that, followed by your exposure compensation generally want to be pretty careful that this isn't turned on and left on all the time. It is easy to forget that you have left your camera in a plus or minus exposure compensation. You can go in and tweak the white balance if necessary. Little warning in here, if you have done that, not something I recommend in most situations, we have the remaining or the possible shots that you can get left that are left to shoot in the brackets after that. D plus, we saw this before in the top control panel explain this further in the menu system, and then we have our eyes so speed at the right hand side now next to that is another focus, confirmation and auto focus status, so the dot indicates that you are properly focused, the little arrows below it indicate that your camera is working on achieving focus, and so you can either use the auto focus a f letters you see in the bottom right hand corner of the frame or you can use these little ones down to the bottom depending on how prevalent in the frame you want that information. Now we have an additional grouping of information on this over on the right hand side and we have our exposure scale. And so when we talk about our light meter, this is what we're talking about. And the column right next to it is the basic exposure level that you will be using. We do have a additional one beside that which is your flash exposure, and so you can overexposed and more likely under exposed with the flash, and you can adjust that visually in the viewfinder. With that secondary scale, we have the maximum burst. Now this is how many images that you can shoot right away on this camera. Yeah, according to canon, they can shoot one hundred and eighty j pegs in a row on this camera. And from what I have heard, it is with a fast enough car, you could just shoot nonstop at twelve frames a second or even fourteen frames a second. If you are shooting raw, you are limited to about thirty eight images at one burst before the camera needs to process and download those to the memory card. And so if you are shooting sports, one of the techniques that sports photographers commonly used is they shoot in burst. Now you can shoot in pretty large burst with this camera of maybe ten or twelve shots, but just be careful if you are getting to a point a point in the action when it's getting really exciting, you want to make sure that you have lots of pictures left so that you can fire at that time. If you are shooting raw plus j peg, you're going to be limited to about seventeen shots and in a burst and down there you'll see exactly how you have your camera set to j peg rock or both. And then we have another battery information letting you know how much battery life you have left, so you can tell a lot of information without ever taking your eye from the viewfinder. Now, there's a lot of information that you can get from the back of the camera. We're going to go through the menu system here after our break here, we talked about the information, but just keep tapping that button to cycle through different groups of information, whether you're in the shooting mode or the playback mode, but this screen is a little different than others. This is the quick menu I sometimes call this the quickie mart. It's kind of like the quickie mart down on the corner, it doesn't have everything in the full supermarket, but a lot of the things that you quickly need access to its gonna have. And so if you turn on this information screen, you can get a lot of the stuff you would see in the viewfinder on the back of the camera, which is really handy. If you're working from a tripod, you have your exposure meter or your light meter over on the right hand side. You're remaining shots in your burst devil on the bottom, of course, your battery life and then there's a little reminder to press the q button and over on the right hand side of the screen, there is the cue button for going to the quickie mart where the quick screen in this case and you can dive in and you can change some of the most common features your eyes. So you're aperture in this case now that could be done with other buttons more directly, faster on the camera, but you can do it in the back might be easier to see with where the camera is mounted, so a lot of these are duplicate controls that we have already seen, but sometimes they're either easier to see or easier to access back here, picture mode is for j peg. Mode shooters and what's going on here is you are adjusting the look of your j picks, and so if you want to have him a little bit more saturated, a little bit more contrast e, you can tweak without a little bit and we'll be going through that a little bit more detail in the menu setting on a white balance we've already seen but it's listed here because it's one of those common things you want to go to white balance shifting. If you want to adjust your white balance a little bit let's say you're dealing with tungsten lights that are a little extra orange, you can go in and you could tweak it with this adjustment in the white balance setting auto lightning optimizers something I'm going to explain a little bit further when we get into the menu setting here's our auto focus mode. There's a button on the top of the camera for this, but we can change it back here is, well, same thing with me during second time. We've seen it as well as with the drive this one's kind of handy if you want to go in and customize a lot of the buttons that we have already talked about on. It's going to give you a whole host of options there's a bunch of different buttons that you can go in and customized the exact way they work and so figure out what's important to you and go in and customize here camera to your liking and that kind of gets us through that section and gets us poised for when we come back from our break to start diving into the menu settings. All right, dive into the voice memo question yeah, all right so best shot had just asked can you customize the quick screen to show only specific options? No, I really wish you could because there's some in there that I find totally useless and others I wish I could change the size and customize it maybe someday and future congress will be able to do that. But no, the set they give you is the set that they have okay? And maybe just a couple more questions before we break for lunch here what is the highest cf free? The one d x supports is at six hundred first time I know it can take way have the rate card in here type seven cd inmate cards and this was only ninety I don't know that there is a limit on that it's whatever they can make in the type seven udm a cards which I believe they have up a thousand x and can use that start running into certain limitations in its question of where is the slowdown? Is it in the camera or is it in the card and I don't have one hundred percent knowledge on at what point it doesn't make sense to buy hiring card I don't know of any compact flash cards that will not work in this camera it's a question of it are they worth it? Ok, one more card question from monica olsen can you shoot rock to card too and j peg to card one not as a backup to mimic those cameras with dual sd slots um I don't know if it's that specific I know you can shoot raw to card one in j peg toe card too, but I don't know if you could switch card they go to but I don't know why that would be so yes you can shoot ross specifically to one card and j pig specifically to another tweet okay, great thank you. And then let's see nasser says how much battery life can we expect in this camera? Give me ten seconds ten that went out just because I think I had that down and forgot to mention it and best shots had also asked about adding a battery grip no, this one does not have an external battery grip on it so I know that because it's it's already built in okay it's built in for two batteries the camera? No, it only uses one big battery. Okay, that's it yeah, and also while you're looking, hank also had asked if you have a favorite compact flash brand and speed. He asked what we talked about speeds. Do you have a brand that you love them? I typically stay with two major brands, which is lexar and sandisk. There just been around long this time they're the biggest companies I've had. I would say that I've had the best customer service with lexar. I've had situations where something happened with the card and I sent it to them and they were able to extract the information that was more difficult than the software that I had could get it off. And they sent me back a new card and a dvd with my pictures on it. Corn so good good plugs toe looks hard for that you haven't tried goodman. Um, nobody heard good things from them. Yeah, and the battery life on this, you can expect about eleven hundred still shots on it. It may very with video use.
Class Materials
bonus material with purchase
Ratings and Reviews
user-63d8a5
This is a brilliant course. John explains the camera in a very detailled way. Really great. I wished to have a comparison of noise using different ISO settings and just a second later John offered that. Very good work, very helpful. Thank you for that work, John.
Maggie Buckley
John Greengo, you are a wonderful teacher. I can't say enough on how thorough you are. I truly enjoyed viewing this video and at my own time and pace. Thank you , thank you, thank you. Looking forward to my next class.
a Creativelive Student
If you own a Canon 1DX DSLR you should take this course. John is a master at explaining in easy to understand detail on how to get the most from this camera. I own one and John's course is the icing on the 1DX cake. I appreciate the amount of time and effort that he put into creating this course. I feel we are lucky to have someone so dedicated to create such a detailed presentation on this camera and others like it. Thank you John!
Student Work
Related Classes
Camera Guides