Lesson Info
9. Light Painting: Masking In Photoshop
Lessons
Class Intrduction
05:40 2Milky Way Image: Combining Exposures
04:32 3Milky Way Image: Simple Selections And masking
06:37 4Star Stacking: Combining Layers With Lighten Blending Mode
09:09 5Star Stacking: Layer Masks
05:06 6Car Trails: Merging Multiple Exposures
09:19 7Car Trails: Fixing Uneven Sky
08:38 8Light Painting: And Layering
03:12Lesson Info
Light Painting: Masking In Photoshop
the layer that ended up on top was indeed the layer that I wanted the sky out of. But we're gonna need to mask this image out because I don't want this darker part showing through now I could just use a light on blending mode on all three of these, But that may mess up my sky. So what I'll dio is Let's see, I think quick select tool works just fine for this. I'm gonna raise up the size of my quick, select tool using my right bracket key Click in there, Click in there and my sky is selected So now what? I can dio let's click on this layer Create my Adam ask and voila! There it is. You can see the white parts of the mask are allowing this more bluish sky to come in and it's showing me this layer underneath. But now I want all of these layers all of the light from both of these layers Teoh to come through. So what I'll do is click on this layer and change it to you guessed it lightened blending mode And now we have exactly what I was looking for. That blue in the sky and the warmer colors...
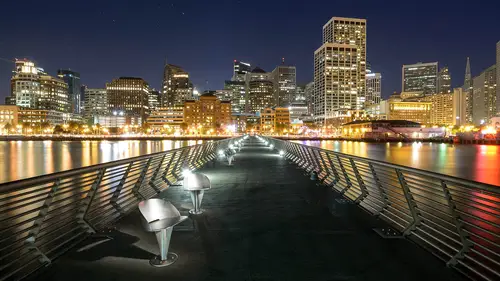
of, um the underneath the bridge. OK, but we've got a few problems here. Number one I want ultimately guide your light here I down to this area and here. So the fact that this is so bright up here compared to here is kind of the reverse of what it is that I want. So what I'm gonna do is I'm going to click on this layer on the top from the middle layer and create a mask. Now, if I start painting some black on this layer, what's gonna happen is it's going to darken down the area that I'm painting black because it's actually seeing through to this layer below it. So by painting black here, grab my paintbrush by painting black here. I'm actually punching a hole into this and I'm seeing down into this area. So that's what's happening. Um, so let's make it, um let's make it a little bit better. And to make my image rather small, grab my paintbrush by tapping be bracket key to make my brush very, very large and then shift left bracket to soften my brush all the way up. Now, instead of painting with 100% black, which would just completely obliterate that whole area there. What I'll do is I'll go up to a lower opacity of maybe say, 50% and just kind of start painting in ever so slightly and see what that looks like. Remember, I'm using a very soft brush so I can just use the edge like that and maybe one more shot. I'm just hitting Command Z to undo what I last did. Just so I can kind of get that feeling. And I think that's pretty good. That darkens it down a little bit. I might go one more time. There we go. Now, in this case, I felt like that last click that I did was a bit too much. So I'm gonna go up to edit Fade Brush tool. And this will only work, of course, if you do it exactly right after you did the last move because if you do anything else like click on a mask or go do something. This edit fade is gone. But if I go all the way down to zero, it's like I didn't paint it all all the way at 100. It's like I painted completely, But now this gives you a nice little slider where you can kind of find that individual area or that perfect area to blend right in together. All right, so I click, OK, and you can see our mask is just a really nice soft grey blending into white, which allows those tones to come through. Now let's see what else we're gonna do here. Um, I think the outside of the edges of this bridge should also be a little darker here and here. I tried to illuminate as best I can up in here with the flashlight, but it's that was pretty far away from my flashlight, so it wasn't able to do it perfectly. So that all, of course, is on this layer in here. So if I want to paint some of this layer away, I'm gonna need to grab the mask on that layer. And wherever I paint with black will dark in that area down because it's now going to be seeing the bridge actually above it. So make that little bears soften that edge and there soften that edge in there that's actually looking a little fake Now that I see it, I think maybe I'll leave it the way it is. Um, perhaps it's this bright area back here that's bothering me, and that break area is on this bottom layer. All right, So if I was to click on this mask on the bottom layer where that break area is, let's see if I can't, uh, dark in that down a little bit. Ah, that's better. That's kind of what I wanted to dio. All right, Now, a few problems left our bridges kind of crooked, and our road is going off at an angle, and that's not uncommon. I tried to align myself as perfectly as I could in the center of the bridge. Um, but I was just a little bit off. So in this case, what I want to do is I want to transform the bridge to even it out and fix the street here, the road in front of you. So it's perfectly level not going at an angle. Um, but I can't really do that to each individual layer. I mean, I could, but it would be problematic. The easiest way is to do something. I just showed you a couple minutes ago, which is select all of these layers and we're gonna merge them together, make a copy, and put that on top. And that will be a complete layer of its own on the top. So select the top one shift, click on the bottom one, and then we're gonna hit command Ault Shift and E command all shifting me. And that puts everything right on this layer right here. Now, again, I could take these other eyeballs often. It doesn't matter, because this is in itself a blend of all three layers. Now, when I transform, I only have to do one layer. So I'm gonna click on that layer and choose at it. Transform if free transform. Now, when I'm in free transform, I can control which transform aspect amusing by right clicking inside the box. And in this case, I want to use skew. Skew means that I can take one corner and move it out of time like that are like that. Um let me escape out of that get back in to transform and to get back in the free transform. I just hit command t um, perspective. You grab one end in both ends move which sometimes you need skew is just one edge at a time. So what I'm gonna do is I'm gonna grab this bottom edge and pull it down, and that should make that road a little bit more straight. And I just grabbed up in that ruler by clicking up in the ruler and dragging down, and that kind of gives me a guide. And I could leave that guide on there if I want, But I just wanted to get an idea if it was relatively straight, and I think it iss so now to commit to that layer, I'm going to hit the check, Mark. All right? I may have actually gone too much, but we'll see Right now, there's a little dark edge at the bottom that needs to be cropped out. And so let's see what it looks like once that's gone. Just pull that up. Just a touch. And I think that that dark edge was kind of messing with our eyes. That looks pretty straight now. It's got to be absolutely perfect. What I recommend to you guys is, um, hitting command are and command are will pull out your rulers. And then you can grab and you congrats a guide and pull it down and place it and grab another one and pull it down and place it. And in this way you can put guides all over your image if you're trying to get it perfectly straight up and down. And in this case, I think we're doing pretty good. But now, if I hit command T, then I could make any change that I needed to and use the guides at the same time. Okay, But I think we did a good job the first time. So I will just escape out of that and I will clear my guides by hitting command semi colon. That's actually hide and show your guides command semi colon. All right, now, while I'm liking this, I feel like the bottom is still a little bit too bright. The road, of course, was illuminated by the cars trails going by, and that's just too bright for my taste. So what I'll do is let's just make a rough selection of that area with that marquee tool. Let's do that again, and when you have a selection active and you create an adjustment layer. You get that selection turned into a mask, and now I can darken down that bottom of that road. And I don't want a hard edge in there, and I kind of hit it in the white, the edge of the selection. But I don't want to take any chances. So what I'm gonna do is I'm going to click on this mask and give it a bit of a feather just in case. And you can always check your mass by all clicking on it. Or you can also hit your backslash key, and that shows you sort of a red overlay. All right, so I think that I think that Blur worked well now notice because I used curves and this happens a lot when you're when you're increasing contrast in this scene or darkening down using occurs, you get a sort of a saturation that wasn't there in the first place, so increasing the contrast will increase color saturation. So I want the darkness of this. But I don't want that increased color saturation cause it's not mashed around the rest of the image of the rest of the images a little bit more muted in color. So what I'm gonna do is I'm gonna change the blending mode of that over to something called luminosity and that commands the curve to not adjust the saturation. But Onley adjust the darkness and lightness and you can see that that saturation has has gone away somewhat so before and then after now, because I still don't like that much saturation in there. I'm gonna steal this mask and reuse it. And that is just by command, clicking on the mask itself that reloads the selection. And then once the selection is active, I will go down and create a hue saturation layer. And I will pull back on that saturation a little bit until it's just a little bit on the yellow side. And I think that feels a little bit better to my eye. Maybe we can have a little bit more yellow in there them But somewhere in that looks good to me. So for this image, I wanted to blend several different light painting exposures together, and I did so by using the lightened lending mode. And then when I was able to do is work on the individual images themselves and create their own masks so that I could lighten and darken and choose some to come out of some areas and play down other areas. And again, this is all part of crafting the image so that you can get this more three dimensional image, which that
Ratings and Reviews
Constantin Simion
Very good!!! Mr. Cooper presents simple Photoshop tools that can make a substantial improvement of the pictures in a way that everyone can understand.