Lessons
Class Intrduction
05:40 2Milky Way Image: Combining Exposures
04:32 3Milky Way Image: Simple Selections And masking
06:37 4Star Stacking: Combining Layers With Lighten Blending Mode
09:09 5Star Stacking: Layer Masks
05:06 6Car Trails: Merging Multiple Exposures
09:19 7Car Trails: Fixing Uneven Sky
08:38 8Light Painting: And Layering
03:12Lesson Info
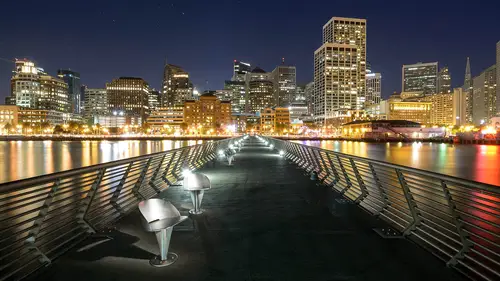
Car Trails: Fixing Uneven Sky
the sky is a little bit uneven. And we've got some something going on up in here. And let me tell you when you're blending multiple layers together and, uh and you have issues are you know, little bits that you need to take care of. Sometimes it's much easier just to put all of the layers together. Now I could find out particularly which layer this is on. Is it on the brightest layer? Oh, it's being part of both. So it's showing on a couple of different layers here. That one. Not on that one. So it's actually on the bottom layer Now, I could just go right to the bottom layer, but what I'm gonna do instead of show you a little trick once again, I'm gonna select all these layers gonna go click on this one shift click on this one that selects all the layers and then I'm gonna hit the keyboard Command, get ready for this command all shift and E. And that would be control Ault shift. And if you're on a PC and what that just did, was it tick? These three layers merged them together and copie...
d them and put them on a layer of itself. So notice I could take off the eyeballs of these three layers now, And it doesn't matter, because this in itself is now a complete image. The blend of these three and the reason that we're gonna do this in this case is because it's gonna make retouching much easier. I don't have to continue to go back in between each one of these layers and say, Well, where's that problem? Where is this problem? Click and click. This is just one complete layer. And, um so now I'm gonna click on here, and I'll just grab my very simple and easy to use, uh, spot healing brush and click over that and that disappeared. And I could fix out anything else I needed to on this guy. Maybe that green light it's a little bit sore on the corner there. And just to touch a read touching looking good. Okay, But now I do not like this heavy duty glow over here on this portion of the image. While it's natural, it just looks a little distracting to me. So what you can dio is you can use a bit of this sky now fixing on even skies. I'm not going, Teoh. Try to fool you. It's not super easy to do in photo shop. Um I mean, it certainly could be done, but it takes a little bit of work. But I'll try to show you an easy way to do this, at least for this way, for this particular area. What Will dio is? I'm going to make a new layer and I'm gonna fill that layer with this color here. So to grab this color, what I'll do is I'll grab my paintbrush whenever you have your paint brush in your hand. If you simply click Ault, you get the eyedropper key. And now when I click, it covers or it creates that color in my foreground color picker right there. Now, once it's in my foreground color picker, I compress all to delete, and it fills that color in the image. Now, of course, that's Ah, that doesn't do us much good, right? Our whole entire image is gone, but what we'll do is we'll create a mask here and instead of just clicking the mask, which gives me a white mask if I hold down the all key while I click the mask, I get a black mask. Just think of Ault or option as the alternative function. I've heard it called the Make Better Key by some of the folks I learned Photoshopped from now, what we're going to need to do, though, is we're gonna need to allow this color to come in across this area, and there's lots of different ways to do that as well. Somehow, though, we're gonna need to get that to be white so I could take my paintbrush and click on my mask because if I was clicked here and I painted with white, um, it would just show up on this image itself, and you could see that if the mask was gone, it would look like that. So I don't want to paint on the actual image. I want to paint on the mask, So click on the mask and I could take my paintbrush in here and use a nice soft edge. And I could simply paint white onto that mask and you could see what's happening here. That's where I painted. All right, so that's gray. So that reminds me to look up my opacity and see that it was at 50% rather than the 100% I wanted it to be. All right. Now, as I painted through here, painting that color on top of an already something of already the same color is gonna have very little effect. Right. So you take that on and off. You could barely see any effect in here, but over on this area, we're getting much more of that blue effect. All right, so that's one way that you could do is just simply painting on that mask. Not gonna fill that masking again with black and show you another thing that I'm going to try this time. What I'm gonna do is use my rectangular marquee tool. And you know what? I take it back, I'm gonna hit command D and undo that or de select that this time. What I'm gonna do is I'm going to grab the Grady in tool, and the greedy and tool will help me paint on this mask and give us a nice, soft, radiant through here. So I wanted to run from black two white, so you can see this is white to black. And that's actually what I want cause if I click up here and drag down, you can see what's happening here on the mask. I'm drawing out the Grady Int. Now, the greedy int tool works pretty cool because you could just keep clicking and trying ingredient multiple times until you get it to where you want. So you don't have to completely do do edit, undo or redo every time. Okay, so let's start here again with a completely black mask and I'm going to zoom in. And once again, I've changed this to the choice of white to black and my foreground color is white to black, and I'm gonna click up here and then click and moved down to about there and see how that looks. Maybe you can go a little bit longer, so click up here and drag down. Yeah, that's a smoother Grady Int. Now let's, uh, look it quickly, the before and after, and you can see how it's just sort of evened out this guy. The only problem is that I think my Capitol building might be getting a little messed up, so I'm gonna go back and command click on this mask, and what that does is it reloads the selection, but in this case, it's just the opposite selection that I want. So I'm gonna go up to select in verse. And now I have that Capitol building selected again. Now, this is very handy, because when I paint now, if I click on this layer and paint, it's only gonna paint within the selection. And I want to ensure that that mask is gonna be black in that area. So quips painted the wrong color, and it is indeed black, and we can look at our mask. And I did paint that in, so I made sure that that part of the mask was really nice and dark, so it's not getting influenced by that sky. Now if you wanted to get this a little bit more, uh, you know, if you want to get more of that blue sky in here and completely get rid of that glow, you most certainly could you just click on that mask and you could use your very soft brush painting with black or I'm sorry, painting with white, and you could start to pull that in To get rid of that glow, you would now just need to go back and get rid of it off of the city. So lots of different ways to go about that. I just wanted to show you guys how how easy it can be to turn a night sky into it, um, or even type of sky by using a color film layer.
Ratings and Reviews
Constantin Simion
Very good!!! Mr. Cooper presents simple Photoshop tools that can make a substantial improvement of the pictures in a way that everyone can understand.