Lessons
Day 1
1Introduction
11:19 2Two Exposures Explained: Ambient & Flash
18:24 3Flash! A Drama in 4 Parts
18:42 4The Triangle: Aperture, ISO, Shutter
18:08 5Overpowering the Ambient Light
37:36 6High Speed Sync
15:03 7High Speed Sync Q&A
25:15Shutter Priority Mode
23:12 9Manual Mode
50:21 10General Q&A
19:21 11Color It
15:53 12Diffuse It, Twist It, Pull It
17:29 13Click It, Zoom It, Remote Control It
24:13 14Shoot: Softbox and Umbrella
41:44 15Shoot: Three Light Setup
21:56 16Shoot: Freezing Motion
17:39Day 2
17Introduction
06:28 18Bouncing the Light
36:18 19Off-Camera Flash Options
29:03 20Light Modifiers
08:15 21Limitations of Your Flash
20:48 22Shoot: On the creativeLIVE Roof
27:55 23Flash Modes: TTL & Manual Mode
16:50 24Light Metering
13:48 25Light Metering Q&A
42:50 26Guide Numbers
18:52 27Built-in Meter
20:28 28General Flash Q&A
24:10Day 3
29Light Shaping
36:58 30Group Lighting
46:18 31Lighting Dark Environments
17:37 32Indoor Holiday Photos
23:10 33Outdoor Events at Night
13:46 34Lighting Dark Events Q&A
13:14 35Portrait Lighting
32:22 36Portrait Lighting Q&A
21:57 37Butterfly/Clamshell Lighting
16:06 38Q&A and Lighting for Men
24:12 39Final Q&A
06:15 40Ninjas!
27:02Lesson Info
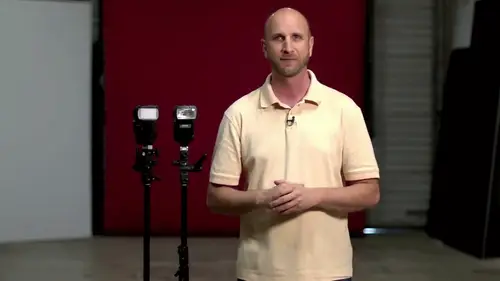
Portrait Lighting
We are gonna have a blast. We just met the ninjas there. Here. You just can't see him, but we have ninjas coming up. But first we're going to talk about portrait lighting, specifically a three light set up so sarah's going to come on out here and then kelsey and john, I'm gonna be helping me as well, and we're going to build this light by light, and we'll show you how it works. Awesome. So we have that I want to give you this, teo teo out, so I don't ok, thank you, that's. What have phones in the city? Okay, so, sir, I'm gonna have you always facing this way, always facing just forward. Now, the first thing I want to do here and when I'm taking my photo put this down a little bit is I'm establishing the relationship between my camera and my model, and in this situation, this is a portrait session. I want to control all of the light. I want to control all of it, and so I am going tio do my best to under expose the ambient light totally so that's where I need to start, I need to get rid ...
of the ambient light. I don't want it to be there, and so I could if I wanted to try to shoot this in aperture priority mode, that's what we did when we are on location shooting outside, we were able to do that, but I know that if I shoot an aperture priority move, my camera is going to be thinking that I'm trying to expose for the ambient light because it doesn't know it's stupid remember, so I'm going to shoot in manual mode so that I can control everything. So the first thing I want to do is try to get my camera dialed in for I have no ambient light, and I know a couple of other things about this that we talked about earlier. I know that when I'm shooting a portrait, I want to shoot around between five point six and eight five point six is going to give me a nice, shallow depth of field it's a great portrait set up if it is going to make sure everything is in focus, and so I know that's, the sort of the sweet spot. My preference is to be about five point six that's really where I want to be normally I would be using a seventy two two hundred millimeter lens so I could have a little bit more compression but because of the distance and so this set here I'm gonna cheat and I'm going to use my twenty four to seventy unless I just can't stand it when I try to do it with this lens and so some of the results aren't going to be what I would normally shoot normally I'm usually a brown one hundred fifty to two hundred millimeter range to really get a nice compression between the background and the subject, but let's, start, I am going to first try to figure out what my ambient light is looking like I put sarah on a stool and the reason we have her on a stool is because I don't want to have to stand up this entire time and also I'm going to be positioning lights around her and if she is turning a little bit, well, that can cause the light toe look different so fight sticker on a stool that sort of anchors her and it's gonna work much better. So first let's, check this out, we know what their parameters we want to be a five point six I'm gonna die on my camera, and right now I'm a five point six and I'm in manual mode I don't want any any light coming in from my ambient light, and so I'm going to dial my shutter as fast as I can get it, which is two hundredth of a second try to eliminate that ambient light and now I'm going to take a test photo no notice there's no there's, no flash, no flash on here because I'm just starting with my ambient light, I want to check that out, so I'm going to get rid of all of miami alight let's see how well I do, okay? So I have a little bit ambient light leaking in so it's just a little tiny bit of ambient light looking in on this background, you can see that there, and I think what we'll do is we'll just go with it because we're still going to control the light pretty well. I really want to have that five point six experience and so that's, why what we're going to stay if this was critical? If I was shooting in the studio, I was doing it's a portrait for something professionally, I wouldn't let that slide I would lower the ambient light, I would control that in some way or I would change my aperture a little bit, but for now we're going to let that slide even though we have a little bit of that because we really want to know howto shape these lights ok, the next thing I need to do is I need to create a nice pleasing look you know I prefer to do this using off camera flash and I really like the look of a soft box soft boxes are great we're going to start with the soft box so kelsey's going to bring this over and I'm going to put this soft box on through the camera left sorry about that put this over your camera left why is it camera left because there's a camera right there and I want a block that's what that's the only reason I normally models and people will have a side of their face that they like better than the other say what's your good side oh it's this one because of whatever so normally that's the side I go to but for now I'm going tio illuminate this in a way that we can actually see it at home so that's that's the on ly reason I'm going camera left now what I'm doing here is we're going to also get a transmitter thank you and we're going to start doing everything in e t l mode we're going to see how well our cameras meeting mode works and then we're going to bounce over and shoot everything in manual mode because that's how I would normally do it but you might not have a meter you might not have that set up, so this is set again to our normal configuration zoomed to fifty millimeters. It is set to slave. This is set to master mode. And what we might have is a problem with these two things seeing each other. I think we'll be ok, but I'm gonna have this over here. My camera angle is street at sarah. I'm going to take this. I'm gonna loose in it so that this couldn't go down just a little bit. Remember that? Forty five, forty five. I talked about earlier. Well, if you could see from this angle, you would see that we're about forty five degrees over. And this is about forty five degrees from here. Maybe a little bit higher now. What I'm going to do is to make sure that this looks right. I'm looking at the shadows that the light casts and so sara look right at me. We've got some other problems here that we need to deal with. So I want you to cheat your head to the left or to your right. Yes. There you go and then chin up just a little bit. There you go. Beautiful. Okay, this is just a straight on shot now there are some issues with this let's start breaking down the issues and what we need to solve here number one the background right background we have an issue with the background because we don't want that picture to show up in under the lamp show up get that shrub! They're going to start fixing this stuff. Normally we'd have a seamless wide or something else we're going to take these pictures down. We can move these so I think michael is fine. He can hang out actually know michael does need to go away. Sorry. Yeah, so let's go ahead and move that in the bush so normally obviously this would be done beforehand but we really want to break this down piece by piece and so you the mindset of building a portrait so clean background it is important that this was a location shoot. I would get that clean background by really throwing open my aperture wide open and allowing everything to fall out of focus which is what we did on the rooftop. Remember, we had the wires in the buildings. All that nastiness ways through the aperture wide open if you can that's great. Okay, now let's, take a look at what her background is is doing for us here now the other thing that I would normally do differently here you could see that we now have a cleaner background this pops up that's much better was going to move these little greens and coming in the other thing that we normally do here this is a portrait normally portrait, sir shot vertically. So normally I'm going to shoot this vertically. I'm not doing that now, and the reason is everybody is watching this on the horizontal screen on computers and televisions, and we really want to make sure we can see this, and so I'm going to keep this horizontal, okay, so we're trying to not only get a good portrait, but we're also trying to make sure everybody can see this at home. All right? So we're doing that now. Remember our direction of light. We have a lot of shadows on the opposite side of sarah's face. So what we need to do is we need to add some phil on the easiest way to do this is with the reflector. We had a white reflection panel over here. This is going to save you some money, so if you don't have to flashes, you can just use something to bounce the light. Now you can either get a stand, you can use a wall. This was a white wall. This would work just great. Or if you have a kelsey on hand that works as well. And so what chelsea is going to do is the way that this is being held is important. And so you can feather the light by doing this so you get more like coming this way you can put more light into the face by going this way we're going to try to keep this at a ninety degree angle and she's going to get that is closest possible without getting into the frame and she'll know if it's in the frame because I'll say move back back back stop that's good and then I'll have her move things around so the direction of where people move try to give them relational directions toward our model away from our model ward the camera away from the camera instead of left and right because kelsey's left is different in my left my left is over they're hers is they're so try to give directions that are more meaningful than just left and right okay so kelsey if you'll just uh you're about they're just move your right hand towards yourself there you go that's good and they were going to take one more shot here we're going to see how much phil we got now this fill it doesn't look like we got very much we got a little bit here but not enough to my taste and we're also over exposed right here see how our ninja is not getting it right so with this again yesterday we said shooting in tl mood sometimes could be like chasing your own tail so if we take our r t tl auto exposure compensation flash exposure compensation we take that down well, then we add in a little shadow or highlight it thinks it's wrong we put it up then we can start getting into this loop of craziness but what we do is we're going to take this down by about two thirds of a stop. Why two thirds of a stop? I'm just guessing just guessing. Okay, so I'm gonna take another shot, move your hand back a little bit. Kelsey back a little more there you go. Good. Great, great. And then also so sarah is putting her head this way, but the light is that way, so I'm gonna keep directing her tio look this way just a little bit instead of this way and so we can help fight doing that so yeah, and then chin up chin up there you go. Good, good, good. All right, now, let's take a look at what we get. We get a little bit more pleasing light now, okay? I directed him the virgin a little bit too far this time, but we're seeing that now we're starting to get nice, even light have too much headroom there need to fix that, but we can see that we're starting to get something we don't have is separation from the background so I'm gonna do that next time you take one more shot, and I wanna fix this headroom. Forgive me a little smile. There you go. Good. Good. Okay. And I forgot to tell kelsey where to put her hand, but you can see that now we've got a pretty consistent look from these photos. Ok, so the next thing I want to do is I want to start sculpting some light, so we need some separation. We need some light on sarah, and then I also like to add a little punch to the background, so we're gonna bring out a second light here, so john's got it. This is going to be our kicker light and this kicker light what? I'm going to dio so I'm gonna make this vertical just like this, but I'm going to turn this, okay, so that we can illuminate a vertical strips remember this morning I showed you how that was all horizontal in the background. So I want to make sure that we are illuminating something in the correct way. And with this little, uh, this little guy here, I don't have a lot of control that's how it is adjusted, so we'll just stick with what we have the other issue we might have is that it is going to see you can't see my trigger, but I think it'll bounce off the floor. We'll have to see if that's going to work so we can move this back here, zoom this up so I just want to sort of hit the back hit the back of sarah, okay, so I don't want any of that fall on the wall, and I'll make sure this is turned on it's always good to turn it on before you do this, then the other thing I'm going to do here is I want to put this on slave be so that one is on slave group a this was is going to be on slave group b, so that way I can do something called changing my ratios, aiken say more of that light less of this light, more of this light unless that second sort of have some a little bit of control out of what's going on because right now, remember, we're just doing everything in full t ell mode, which doesn't give you a lot of control when you start doing multiple flashes so kelsey's going to come back in, one of the things we have to do is make sure that the light doesn't just hit the back of kelsey's card so that's not good, so kelsey that looks about right right there, I want to take a picture and now look what we're getting here when we have this picture we have a nice separation on sarah's hair but it's too much light rights too much light now I find new flash exposure compensation what's gonna happen everything is going to get darker everything is going to get darker and so what I have here on my this s t two I could turn on racial control and what that allows me to do is you'll notice that on one side this is a on the other side it says b what I can do is aiken same or power to a and less power to be and I can change how those ratios are being distributed and then if this one's getting too much light I can take exposure compensation all down so I can sort of change how the power is being distributed and then doing overall adjustment okay this is to me a really wonky way to do this but you can do it all right so let's do this again kelsey hold that up right there good okay so I took that light way down I said mohr power on a much less on b and you can see how I took that down quite a bit ok that's pretty good I like that ok so we've done a key light we've done a separation light. What we want to do next is what about adding some light to this backgrounder here can we do that? Well, of course we can. So what we're gonna have is gonna bring out a third light. This is just like a circus trick was going to keep bringing a lighthouse. So you bring this third light out now this guy here, I'm going to turn it on. I'm also going to put this on, be going to go over here and show you how I'm doing this because at home, I'm sure people are going, how are you doing that in that voice? So all I'm doing is I'm handing zoom and as I'm hitting it multiple times, I'm getting different choices and I'm getting to where my a and b you're flashing and I'm sitting it to be that's what I'm doing that's all there is to it now with nikon, we're not doing this with mike on because of the tethering, but with nikon and also with the candidate has controls built into the actual camera, you could do a b and even see, and then you can do things like saying, hey, I want to set this to manual mode here in manual mode here and you can dial those in exactly from the camera, which is really terrific on this camera. We don't have that, but we could use the pocket wizards we had the cannon version of the pocket was armenian flex we could do that with his own controller so there are a lot of different options of shooting in full manual and controlling right from your camera so my preference is using pocket lizards and when we have him now this what we're going to see is I want to sort of put this back here and chelsea's gonna come back over here and be the she's going to be the film and I think what we're going to find is we have way too much light in fact this is too close because actually in the picture someone having you move that for me so I think it's yeah okay, okay, now here's where a t t l really really starts to get confused yeah now why is this happening exactly? It's thinking that we're trying to illuminate everything when this background light fires it's it's averaging that and it thinks ok, our exposure is correct based on the eighteen percent great and so this is where when you're starting to sculpt light and have a little pockets of light, you're going to run into issues really quickly and then now to try to dial this in with the racial control by the time we get this all dialed in, we're going to be ready to go home okay, so I don't want to do that, so instead, what I want to do is use manual mode and instead I want to do manual mode, so I'm just gonna go to my camera and I'm going to push and hold mode, and that will allow me to switch this into manual mode so it's in manual mode now, and I'm gonna take my ratio control turn it off. I'm going to take these guys were going to do the same thing, so pushing hold mood and we'll go to manual mode and we don't we're just gonna keep it at the setting that it's on right now because we need tio start dialing. Listen, notice we're not using pocket wizards or anything yet we're not doing that yet. We're just firing these let's see how crazy this power is and see now had to sort of start from scratch because right now we have disaster, right? Because we haven't meet heard anything so kelsey good and turn those two lights off when I want to do is start from this first light here and I wanted to start building this this, uh, portrait out and so do we have our light meter, okay, so what we want to do is we want this two meter at five point six so kelsey is going to put her meter at I s o one hundred that's where the camera is set we're going to put our shutter speed of two hundred that's where the camera is set you got it there and she has it on auto reset cordons flash me during mode in other words she pushes it and waits for the flash to fire I'm going to fire this light and what does it read one point not even close right so I need to go in here dial this light and we had it weighed way down was mean to this again now what do we what is it about five point six okay, I got lucky so I just dialed this in your life how did he do that? I just guesting got lucky so I pushed this to quarter power and let's see if we actually get a proper exposure with this at five point six firing it with this guy right here and notice this also notice how yeah, the background cause we turn off all those lights notice how fast it was for us to dial that in so I didn't have to go in and do exposure compensation all that stuff we just said manual mode what is it? We're there so very, very quickly okay, so we have that set I'm gonna make sure that my white balance is set for flash it's on auto white balance which shouldn't be now because we're in manual mode so I said it to flash and now look how the color changes drastically from that greenish color it is to now this okay? So white balance this is this is a perfect time to use the color checker passport tio we're not going to do that just based on time but so later we could really dial in the color okay, so we're building that portrait the same way what do we need next we need our kicker light so let's go ahead and turn that kicker light on and then you know what the power is set on that it's a quarter power it's okay so celebrated and we'll do it tomorrow I mean right here it's too much so when it comes in here we're going to judge this just like we did before we're looking at it noticed we have no details here when highlights turn yellow then you're over exposed highlights when they turn yellowy then you get too much light this is really really true of video so take that down at least to stop. So what were we were a quarter let's take it down to a sixteenth for two stops three is when a little kiss of light this is also where a stool helps way have won an apple box or something okay guilty if you can't do it I'll just okay all right so now we're going to fire this one more time and now take a look at this the light is now falling the way that we want assumes this pops up you're going to see that we really took that power down it's just a little kiss of light and weaken twist that knows we have light on the shoulder which is really nice, but what I want to do is add a little teeny punch to that background. Now the other thing that I would really like to do is give more separation between sarah and the background how do we do that? We move everything right way move everything so we're going to move everything this way okay, so sarah let's have you move up to about right here kelsey get the meter must meet us at five point six tell me when you're ready, what is that? Five point six that's experience okay? And now we're going to move that as well just put it ish around there we'll take another shot to make sure our exposures or sent so look this way perfect, thank you very much. Okay, now you can see that that background is starting to fall out of exposure, right? We're starting to fall out of exposure, which is great, so that's what we want now the next thing I want to do is add a little bit of punch to this background and to do this, I have this guy right here. Do you have any of those road grids? Grids? I love grids. Just give me a ten degree would be fine. Ok, fourteen degrees. The closest to ten is good. All right, let me show what the grid is gonna come to this camera right here saying to see it, to see this guy right here, how that allows you to see through and not see through. So a grip really control how light falls ending to stick that on the front of your flash and we can add a vignette, we can add a little a little splash of light. So this is another robe. Amazing. We're using this one because it's it's got more wet, more that tighter degree. Ok, so let's have both of them out just in case because we might find out we don't like this. And this is in manual mode. I'm just gonna pop a blast of light here and then kelsey gonna have you hear what I'll do is to position this just put this down position. That's what we'll do is we'll have kelsey fire this and I'll look through my lens to see where the light is falling. And then she might have to put it up or down or left or right but that's the way we would do this on a studio strobe, you have a modeling like that's always on with these guys you don't so go ahead and pop it kelsey so it needs to come out of the whole frame about a foot, keep going, keep going, keep going yeah, and it's also what we're going to do here is so we're gonna go this way because of kelsey would keep feeling that way then the round circle that I want is going to turn into a long diagonal which they don't want so it has to be on access and you guys I might have to be kicked out of here ok, so let's try it from here track from here. All right, so you guys you're gonna have to help us out and move back a little bit. All right? So go ahead and pop that light I think that's perfect think that's perfect let's not raise it up just a hair and you can see now that we are actually starting to sculpt some light behind sarah pretty goals here look this way taking another look there needs skill right? Just a little teeny bit good and let's raise it just a hair keep going up there you go good, good all right that is almost awesome now we have a problem here that I was seeing and that is we're getting the shadow of one of our flashes in in the shop you could see that we have some pretty amazing results just doing this, we're starting to carve light out I really like that, so what we might need to do is pull that back, increase the power a little bit and yes, you can pull that back now pulling something like this back the question is will aren't you changing the quality of light by moving this well, this is just hard, nasty light right that's all it is and so by pulling it out it's not really going to get much harder than it already is. The only thing it's going to do is to decrease the power output of this strobe and that power output we can always increase because we're only at a full power something that sixteenth full power so we have plenty of room to grow with this flash so we can get it out of the the way of this it will give us a little bit more light, but judging with what we have here that's not going to hurt us at all, so we're just dialing in each light one by one to make sure we get it exactly where we wanted to be there and take their shot here and now we've eliminated that problem we have this groovy the light in the background and you'll see that that flashes went away it's pretty cool, huh? Now if we wanted mohr a more pronounced little background light we just increase the output of our little grid then I can take a picture so sarah look great this way and do this without even looking job okay, so what we're going to get now is even mohr light on that background and so it's sort of a fun little trick to use and we can do some other things with this we could put a gel on there to change the colors if we had less ambient light we could control that so let's try one other thing here let's instead of shooting a five point six I want to shoot it about ten ok, so let's meet her this wouldn't get to ten we're going to meet her are key light so it is meeting right now at five six right? Ok, now we're going to take this up to ten our two full power and tell me what that is. Ten okay, so sorry my brain is jumping ahead so we're this is at full power and the question though is how does he know like how to go that far it's just that I've done it a lot that's how I'm really bad at math but I sort of that's how you know I don't know, you know, so that's it full power now we need to meet her this light let's see? Well, we're going to mark levin. Sorry. We're going to take a shot. See what? We look like a ten and what we should have it. Ten is just a little less of the ambient light falling and see how that works. Yeah, we're just controlling the ambient light a little bit. Now we can take this light list let's, increase it by, uh, two stops all increase it by two stuff, okay? Or you can always just do this and and raise it back up. So he's going to take this but that at quarter power. Not like that. We'll put it back up where it is sometimes for stuff like this, I like to measure with my nose to know where it is now when I take it down, I'll just do the adjustment. And as long as it goes back to where it was supposed to be, its it the exact same height or maybe it's my chin or maybe it's, you know somewhere else but that's an easy way to figure out where exactly it should be so let's, dial this in really fast, okay, we're gonna take this shot we can see now that we have that highlight it looks great maybe I don't like now this light right here but if I don't like it turn it off turn it off and then I looked right at me sarah excellent now we really have something that I like a little bit maur which is a very very nice background and we could start shaping this stuff okay that's a basic sort of strategy for portrait light which is start with what you want your aperture value to be start there start with your key light your main light you wanted to be soft going to be hard what he wanted to be dial that in and then start building out now the question is what if this was an umbrella what if it wasn't umbrella we're gonna get one and I want to take this light and we're gonna get rid of it for now what if it was an umbrella quick question from turner morris ok just to confirm our all your life set right now uh fifty zoom they are yes, all of them are fifty fifty millimeters in thank you. Can we see what an umbrella does um because umbrellas air used by many, many people myself included and dial this in now this light is when I stole so we're not using the background light for he's going to use this and right now the sensor is facing the umbrella so it might not fire we might have to twist it around turn this on it's going to have to be at least at full power to match what we had with the soft box because it's bouncing and now this is at that forty five degree angle and so let's go ahead and media that are you ready at eleven okay so we actually got a good lunch I'm gonna take this back just a hair so kelsey don't go away yet we stopped them file this in okay so let me get this a little bit closer this way and then let's make sure it's at ten so oh yeah it's up to me and eleven yeah don't move it so I can see it it's that's it ten ok so now it's at ten and now we're going to take this shot with umbrella instead of soft bucks umbrella instead of soft box and we'll do a comparison between the two and the big difference is the background the big difference is the background so with the umbrella what's happening is the light is not controlled it is night soft light coming in this way on sarah but their light is also flying back here to illuminate the background with the soft box you have nice soft light coming right here and it's illuminating syrah but we're controlling all the light that's spilling around on the walls and balancing stuff so the umbrella gives you a nice soft light. Also noticed the umbrella. The opposite side of sarah's face has more light, it's, softer, and the reason for that is that is a larger light source. So we have light going this way and this way. And so we have a softer light source of the umbrella can really help you get nice offline immediately. But it can also start to spill and detract from things you're trying to control.
Ratings and Reviews
Gary Hook
Mark's wealth of knowledge combined with his engaging and 'fun', experimental approach to teaching is a winner. I learned a great deal but what truly reinforces the learning is that he actually shows what he is talking about. He gets a question and quickly sets up the practical demo for the answer. Brilliant. Given that this session took place some time ago ( but by no means diminishishes the tremendous learning value) the lessons and knowledge are based techniques that will stand the test of time; however, if I was advising Mark on his teaching techniques, the main are a of 'focus' would be to be more effective with his demonstrations. He holds the back of the camera up, makes his point quickly and then moves on, just as the video is locking on. Great idea to talk about what button you are pushing, but when your fingers are obscuring the 'learning point' it diminishes the effectiveness of the demo. Overall great course which I will watch parts again and highly recommend it. Thank you PS Give both Kelsey and John and huge hug as they are all-stars making things happen!
Alexander Svishchenkov
Great! I'm so thankful to you, CreativeLive, for providing this great opportunity to learn an important subject of photography - Speedlights - from the professional Mark Wallace. He is such a good teacher and explains everything in real-life situations and on slides. As he fires his flash, I instantly see the resulting photo on my screen, so this is theory combined with practice. I'm in fact watching you from Belarus, and it's midnight, so I'm fighting with sleep, but I can't get myself away from the screen. this is my 1st CL experience. I'm very grateful for running a rewatch of the previous Day the following morning, so I woke up and saw what I'd missed. And it's totally free! Thank you so much for a true first-class education!
Aussie David
Truly a fabulous class. Mark has such a gift for taking a complex subject and making it so understandable and fun at the same time. Mark is easily one of the best instructors out there. Highly highly highly recommend this class.
Student Work
Related Classes
Lighting