Lessons
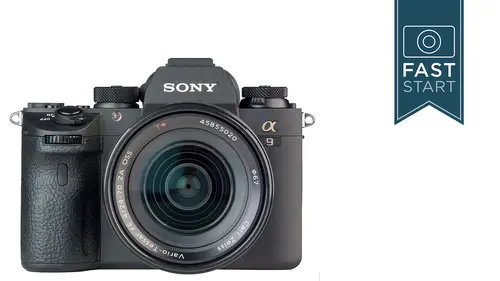
Camera Overview
14:02 2Photo Basics
03:53 3Camera Controls: Dials, Auto and Movie Mode
10:47 4Cameral Controls: P Mode, A Mode, S Mode, M Mode
17:43 5Top Deck: Exposure Comp, Custom Key Settings, White Balance
10:20 6Top Deck: Focus Area & Flash
19:50 7Drive Dial
07:17 8Back Side: Focus Mode & Shutter
17:45Back Side: Electronic ViewFinder
09:06 10Function Button: Top Row
11:47 11Function Button: Bottom Row
15:05 12Back Side: Playback
07:44 13Left & Right Side
07:19 14Bottom, Front & Sony Lenses
16:41 15Menu: Camera Setting 1 Page 1-3
28:09 16Menu: Camera Setting 1 Page 4-6
17:58 17Menu: Camera Setting 1 Page 7-9
08:17 18Menu: Camera Setting 1 Page 10-13
18:38 19Menu: Camera Setting 2 Page 1-2
05:48 20Menu: Camera Setting 2 Page 3-4
06:21 21Menu: Camera Setting 2 Page 5-6
07:35 22Menu: Camera Setting 2 Page 7-9
11:40 23Menu: Network
13:03 24Menu: Playback
04:08 25Menu: Setup
20:19 26Menu: My Menu
04:09 27Camera Operation
07:50Lesson Info
Menu: Setup
Alright, we are now in the Setup menu. And this has a lot of features that will be adjusted once, and then you probably won't come back to them with a few exceptions of a few places that you might come back to. So, first up, is Monitor Brightness. You can control how bright the screen is. I found that under really bright conditions it's very hard to see, and you may need to pump the brightness up, of the screen. But normally, you're gonna leave it right there in the middle. You can do the same with the Viewfinder in the camera. You can change the color. Hopefully you don't need to change this. Hopefully it doesn't drift or change, it stays very neutral in color. I talked about changing the volume settings. And so, here's where you might want to change the volume of your camera down to something that just you can hear, and very few other people. Or, you might want to take it all the way down to zero. I like this option on the camera, the Delete confirmation. Because normally when you pr...
ess delete right now, the camera assumes that you mistakenly pressed delete, and you need to confirm it again before you say, I actually do want to delete it. You actually have to press the button three times in order to delete. And that's just a little too much protection. It makes it too hard to delete. And so, I like the option of saying, if I press the delete button, I intended to delete it, and I will have one more press, and then it deletes it. And, so it's just a little bit easier to delete. Second page, in the Setup menu. We'll start off with the shut down of the camera. How quickly do you want the camera to power down to conserve battery power? One minute seems like a pretty good option for a lot of people, but you may need to adjust it. And that's from the camera completely powering off. And so, the camera also will shut down if the temperature of the camera gets too hot. And this will be very important for people shooting video. And so, there has been some talk on the internet about Sony cameras overheating. And they are known for shooting video, they are very small cameras, they don't have heat syncs like a lot of the bigger cameras do. And so, yes, they're going to get warm. There's a lot of stuff going on in a short period of time. And so they now give you an option for a standard, or a high rate. So, if you don't want your camera to shut down for any reason, you set that on high, and it's gonna wait for a very high temperature before it shuts down. Will that damage your camera? I doubt it, but it's probably a little bit harder on your camera than leaving it on the standard setting. And so if you shoot video, that's who's gonna be most affected by this setting on the camera. Depending on where you live, you'll wanna se it to the appropriate video platform for the countries that you live in. You can have the camera turn on its cleaning mode if you wanna go in and manually clean it. The two step process, one step is to use one of these rocket air blowers. And pretty much anyone who has an interchangeable lens camera, should have one of these rocket blowers for cleaning dust off the sensor. Those of you who are very careful, might be comfortable with step two, which is a sweep cleaning system. There's dry systems, there's wet systems. This is one of the most effective ones I've found out there. It's a sensor and swab system where you'd swipe across the sensor cleaning off any dust that may be on it. The touch operation of the LCD screen on the back of the camera is pretty minimalistic in this camera. You can touch to change focusing points when you have it in live view, but beyond that it's not doing a lot. If you don't like to use it, you can turn it off, or you can leave it turned on if you like it. The Demo Mode, is kind of designed for being used in camera stores. If you wanna have some sort of display on the back of the camera. And so it's designed for showing example movies of what the camera does, and most people will never use this mode. Next up, got a little somethin' for all you video shooters, and movie shooters out there. The TC/UB, Time Code User Bit. And so, this is metadata that's going into the movie file, that's gonna help you organize your clips, and your shots that you've done. And so if you're just shootin' simple little videos, you're not gonna need this. If you're shooting on a complex setup with multiple cameras, multiple angles shooting lots of different scenes, that's where this type of information's gonna come in handy. So there's a whole sub menu for this. The display setting on this, when you're in the movie mode, do you wanna see counter, do you wanna see the time code, or do you wanna see these user bits, which is another way of defining a point in time? General counter is gonna give you that normal counting up. Have I been recording for 10 seconds or one minute? Other people prefer a time code when they are shooting with multiple cameras. Time code preset. You could go in and preset a particular time that you want your camera to be at when it starts the next video. The User Bit preset, you could go in, and you could set a particular number letter code. That's alpha numeric code that you can put in here, and I'm not gonna get into even explaining how you would use this into your video logging and so forth, but it can do it. Those of you who use this a lot know all about it. The format. You can use either a drop frame, or not drop frame because it is shooting 23.98 frames a second every, let's see what is it? It drops two frames removed every minute to keep things synced in the way it's supposed to. And so most people, the drop frame option's gonna make sense there. You can have the time code just automatically running, or you can have it start and stop according to when you are starting and stop the recording itself. And then TC Make on this one, you can have it start a new time code, or you can restart it where it was previously if you're using the time code option. And then you can turn the user bit on and off finally here. So, lotta different little sub settings that a lot of people are not gonna use in there would be my guess. Alright, next item is Remote Control. So if you are getting that Sony remote and you wanna use it, you need to turn on the receiving signal in the camera, and this is where you do it. If you're gonna be hooking your camera up using the HDMI outport, there is a whole sub menu if you're gonna be hooking up to a T.V. for a slideshow, or if you're gonna be hooking up to an external recorder 'cause you wanna record video from the camera, you don't want the camera to do it itself. And so you can control what sort of resolution is being output to that device. You can control whether it's gonna be in 24P or 60P frames per second output on your video. The display. Do you want to see the display on or off? And this displays the shooting information on that screen. And so, if you wanna record the image, you don't wanna record this display information on it, and so, you'd probably turn it off. If you're just using that viewer as a large viewer, and you're not recording with it, then you might wanna have that turned on. Time code output. Do you want the time code output, outputted along with the video signal so that it can be recorded by that external device? Probably a lot of people are gonna wanna have that turned on so that they have access to that information. When you press the record button on the camera, do you want the external recorder to start recording, or do you wanna have separate record buttons for them? Most people probably wanna have that turned on. And so, control from HDMI. Do you wanna be able to control your camera from your HDTV's remote, as far as forward and back through your images? Probably it'd be fine if you ever do hook it up in that manner. Next up, is our 4K Output Select. And so here when you are recording, or you're sending out a 4K signal, how do you want that recorded? Do you want it recorded solely on this external device? Do you want it recorded on the memory card as well as the external device? And at what frames per second do you want it recorded on that external device? And so, for those of you with that device, you'll probably know exactly what you want. If you are using the USB Connection on the camera to download to a computer, you can probably leave it on auto and it's gonna be fine. But you may need to change it if your computer does not recognize your camera. So, if you use a Windows computer, you might wanna look at setting this to MTP setting on it. If you're doing a remote tethering, you'll probably be using the PC remote option on it. And if you're just trying to get images from the memory card into the camera, you'll probably be looking at the mass storage option. But there's a good chance that the auto will figure out what you're trying to do. And with the LUN Setting, it's a logical unit number here. And this is gonna enhance the compatibility of certain USB functions. And so, you can leave it on multi so that it works with multiple devices. If it's not hooking up properly, you're not recognizing the camera from your computer, you may need to change this to the single option. Alright, plowing our way through the setup section. We're on to page four of seven here, USB Power Supply. So, you can charge the battery in the camera from your computer, which is a nice option. If your battery is low, it's a simple way of charging your battery. The downside of charging your battery on your camera, is it's depleting the battery on your computer. And if all you wanna do is download images, you can turn off the USB supply, so that you're not draining the power of your computer anymore than just normal usage. You're not charging up the battery power on the camera. And so, that is gonna be possible with the supplied USB cable that comes with the camera. PC Remote Settings. And so, if you are using a PC as a remote, there's gonna be a little sub menu that you dive into here. Still Image Save Destination. And so, when you are shooting a still image, do you wanna save it on the PC, or do you wanna save it on the PC as well as into the camera as well? It's good for people doing that tethered wired shooting, but using the USB port on the camera. And so when you're shooting RAW+JPEG, where do you want the RAWs and JPEGs to go? Do you want them shot together, or do you just wanna shoot JPEGs, or just wanna shoot RAWs as you're storing them onto the computer? You can set the appropriate language. Whatever is easiest for you here. And then of course, you have the date and time setup, which goes into a little sub menu. You can set Daylight Saving Time, so you don't have to change your clock, you just turn this on and off as you go in and out of Daylight Savings Time throughout the year. Input your date and time right here. And then of course, you can have your date format. And the format that I like to use is year first. And that way, things stay organized very easily, year, month, day. You can set where you are in the world. And so if you do travel, you don't need to change your clocks. You just need to change the area that you're in. It will automatically change the clocks according to what's the local time. And then you can add your name and copyright information here in the copyright info sub menu. And so, if you want, you can put information on. You can turn the whole thing on and off to start with. You can then add in your own name right here, or your contact information. You can add in any sort of copyright information you want right here. And then, you can display what information that you have. It's gonna show you your name and whatever else. You don't get too many characters to work with. And so maybe you'll put your email address or something like that. Good to have that information which is added to the metadata, which goes out on any photograph that comes outta the camera. Alright, page five in the Setup menu. This is one of the items that you're likely to come back to more frequently than anything else in the setup menu. And that is format the card. I mentioned before, you should format your cards anytime you get 'em new, or you're transferring 'em from a different brand of camera into a Sony camera. And so, I like to format the cards on a regular basis. You can choose either slot one, or slot two to do those with. As far as saving data to the card, I've mentioned that Sony has kind of a complex architecture when it comes to the file structure on their memory cards. And so all the still images are gonna be located inside a DCIM folder, with a counting date, and letter system on it. The videos will be either under the MP_ROOT folder, or the Private folder depending on what style of format you are shooting your videos on. And so, as I heard one photographer say, if you have an assistant going in to grab all your still images, tell 'em to get your videos as well, because they're in a different spot. And so, just realize that the movies and stills are under different subheadings when you look on that card's file structure. If you want to play around with the file numbering of the memory cards, you can do that. Normally it's just gonna follow a continuous counting cycle series which is fine. But if you need to reset it, you can do that here. If you wanna change the three letter code, the file name that begins each of the files, you can do that here. You can put in your company code or your letters, whatever you want. And so you can go in and change. And they're slightly different depending on whether you're shooting in sRBG, or Adobe RGB. There's different protocols for the naming of those files. You can select which card you wanna go to, slot one, or slot two. And then the recording mode. And this is where things get a little complicated. Because some of you I know out there, like to shoot backup images, one to card one, and one to card two. And yes, you can do that with stills. You can do it with RAWs. You can do it with JPEGs. You can do it with movies. And there's a lot of different options and they're kinda different than some other cameras. And so, let's take a closer look at the different ways that we can record images in this camera. The standard way, is to save to the designated card. And your still images, your videos will go to that card. It's whatever you select in setup five, select record media. Next option, is simultaneous. Your still images will go to both cards, and your movies will go to whatever is your designated card. And so if you're primarily a still shooter, this would be a fine option. Just realize that there's one card that has all of your videos on it that are not on the other one. Another option is for simultaneous movie shooting, where you're primarily shooting videos with this, or movies. That will go to both cards, and all of your still images will go to whatever is your primary designated card. Be aware, that if you are sending moves to both cards, that the slot one is the UHS2 compatible card, and you can stick faster cards in there for shooting 4K. And you might have some problems shooting 4K to that second card slot, if you shoot for long periods of time. Next up is simultaneous both, where you have your still images, and your video images going to both cards all the time. And the the other way that we can split up images is in RAW or JPEG. And so if you wanna sort your JPEG images, you can choose to go and separate those between the cards. JPEGs will be recorded to the designated card slot, whatever that happens to be in the camera, and the RAWs will be going to the second card slot, whatever that happens to be. And then finally, you can sort the still images, and the moves so that they go to separate cards. And let's see, on this one, the stills will go to the designated slot, the movies will go to the other slot. And so, there are more options here than I think I've ever seen before. Takes a little handle, so you may need to print this page off, and go through it a couple of times to make sure that you got the camera set up right. But, most anything that you wanna do, I think it can do in this setup system. So, you can create and select different folders on the individual cards. And so if you wanna have a folder for your personal images, and a folder for your business images, you can have two separate folders, so that when you're printing or playing back images, you're only looking at images from one group or the other. You can create new folders in here, and that's so that you could have these separate folders for designating different groups of images. You can create special names for those folders. So if you wanna go in and have a standard form, or a date form, you can do that as well. Not a lotta people are doin' it, but, it can be done. Recovering the image database. And so, Sony doesn't play well with other cameras. And so, when you stick in a memory card from a different camera, it may not want to read it. And so, this is where the camera will go in, and try to repair files that were processed on a computer. And so, if you took a memory card outta here, and then you put it on a computer, and you were playin' around with the camera files, and then you put it back into this camera, the camera may not recognize those images anymore. And so, if you do a recover image database, it doesn't delete anything, it just goes back, and it tries to look at what those original images are, and reconnect them, so that you can see 'em in the camera here. Displaying media info is a kind of nice one. It shows you on any particular memory card how many images you have left to shoot, how much time you have left if you were to shoot video. Version number, will let you know the software or the firmware that is running on your camera. Sony has updates from time to time. You go to their website. You'll find that you can download new firmware. You'll need to have their system software updater on your computer. You plug you camera into your computer, and it will download, and update the software on your camera. They haven't had any significant updates as of the recording of this class, but there's no doubt that they'll have some sort of update at some point in the future, fixing, adding, or doing something different with the software. And so that is all done for free. You can go to Sony's website, and gather more information about that. Alright, final setting here, is the one that we talked about at the very beginning of the class. If you just wanna reset the camera, and start all over again, this is where you can go in, and you can do a basic camera setting reset. Or you can do an initialize, where you're gonna have to enter the date and time information again. I do not believe that the initialize will format the card, or delete any photos on it. So, you don't need to worry about that part of it. But everything else as far as the camera functions are gonna be completely reset to the factory default settings.
Class Materials
Bonus Materials with Purchase
Ratings and Reviews
~user-e143a3
I've taken lots of John's classes as my photography journey has unfolded. Like all good teachers, John has a fantastic ability to take concepts which are complex and could be overwhelming, and making them accessible and much simpler. I'm lucky enough to own this amazing camera, I'm sure I'll get even more enjoyment from using it after taking this class - John has done so much of the hard work of learning away, now I feel like I can just start enjoying it!
Jeferz
Great information as always, John's approach is amazing, well paced and very informative. I own so many of his amazing tutorials, I feel like he's part of my family - but a lot more knowledgeable 😏
Alexander Zlatev
Thank you Great Work
Student Work
Related Classes
Camera Guides