Lesson Info
14. Making a Label for a Quilt
Lessons
Every Quilt Has a Story
10:14 2Suitable Textiles for Quilting
05:59 3Cleaning and Preparing Textiles for Quilting
06:51 4Gear You Need to Make a Quilt
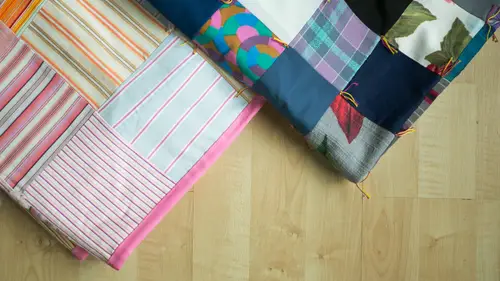
15:29 5Cutting into Clothes to Make Quilts
16:26 6Cutting the Squares
14:40 7Planning Your Quilt Design
06:17 8Sewing Squares into Rows
17:59Lesson Info
Making a Label for a Quilt
So the most important part of your quilt is the label the reason I say this because there's nothing more frustrating than going to a museum and looking at a quilt that's beautiful and you want to know who's close they were and why it was made and there's no label so we're going to make a little label and I'm going to show you how I do it it's pretty simple you guys label your colt yeah I think it's so important and what it whether you labeling when you label it you're labeling when it was made your labeling if it was made by you for someone you're labeling what was what it's made of these air baby clothes so in your course materials there are two templates for labels and one is serious and one is not so serious if you have a sense of humor like we do in my family so one is pretty straightforward name made by date and materials used this one is date made for who has to love it because and you list all of that so these air for you guys to take this is just printed on fabric you can peel ...
the back off and you can use it like any fabric so take one feel free and there's also you can print out more of them from the template that comes with the class said to print out your own uh, fabric labels you can use principal fabric, which is you can buy that any craft store you run it through your printer just make sure if you have a laser printer or a uh inkjet printer that you buy the right type, but when you peel the paper off it's going to look like this and this is completely washable and ready to go, so we're going to turn this into a label and I'll show you how I do it. If you make a lot of quells, you can get your own labels. I have my labels printed on the art of fabric through the company's spoon flower have you ever heard of that? So that's another option as well? To make a label, you have your actual label and then I use like a muslim or a cream fabric that's kind of similar in color you need an acid free penned on dh you can usually find these in the scrap booking area this is and this is ah yeah, this isn't an acid free pen acid over time, as you can imagine it's not going to be very kind to the fabric you need your fabric scissors and you also want something that you can push the corners of it out with an isa bone folder that you can use a like a closed pair of scissors if you're careful, so I'll show you how to do that so we're going to take a scrap of the muslin and just cut it roughly to the size of the label and then cut it down a little bit more to be more exact so on these labels they have a border on there so I would just go out like a quarter of an inch beyond the border on all four sides or half an inch doesn't matter just trim it down just like we did the quote so you've got the two you've got the backing and you've got the label and then I would do this right sides together on just stack them on top of each other and then what you're going to dio stitch thes almost like a pillow like he would stitch the right sides of a pillow together you're going to leave in this case about two inches returning right side out so I'll show you how to do that and just stitch it doesn't matter a quarter inch away or just whatever you do you want a big label or a little label so I'm coming around background around that port side I'll just stop give myself a couple inches probably back steps would be a good idea so what you have are these two pieces own together like this and then I just trimmed the bulky corners off just so that they're going to turn in a little bit better so it looks like that then you're going to turn this right side out like a dollhouse and then I used my bone folder to just ever so slightly just nudge those corners out let's get that press and then when you're pressing where you left the opening, you just kind of turn that under with your fingers, press it down and that's your label, you're gonna hand stitch that on and you're all your hedges, you're going to be secure, so the one thing I didn't talk about was when you write your information on there I would do it before you sew it into this label form and sometimes if I am just writing the information on a piece it's a muslim and I don't have a pre printed label, you can put a piece of lined paper behind it and see the lines in that way my hand rings really bad, so I like to practice before I commit to fabric but you would fill out all of the information before you so it in and then I can show you one of my lets you think this one has a label and then I just so it to one of the bottom corners just hand stitch it on and that's it any questions yes set the ink was an iron, you know, not that I looked at several different kinds you it needs to dry for a couple minutes before you would put an iron on it, but it does not need to set. Yeah, e mailed so many final words for us, for I yeah, I hope you guys try this because it's, it's it's a fun process, it's relaxing and if you make anything, I would love for you to tag it. If you're on instagram, tag me on instagram at blair s and I would love to see what you make, and if you have questions, you can also I've had people take a picture of the question and tag me on instagram and that's a really helpful way, because usually it's something that I can give inside and pretty quickly so and the hashtag wise wise craft hand may yes, a tag it wise craft, handmade and on instagram or twitter. And that way I can see it, and I'd love to see it. If you guys make anything, thank you so much.
Class Materials
Bonus Materials with Purchase
Ratings and Reviews
a Creativelive Student
This class is a very basic class on making your first quilt out of square blocks. And on tieing a quilt. It is good on that level. She didn't go into much detail about how to work with different fabrics, advantages and disadvantages and different applications for say using jeans vs. linens vs. cotton. Or how to combine them so it does work. I did like that she wasn't from the quilting police and really encouraged us to try things. And to get stuff from Thrift stores, yards sales, etc.
Janelle Embree
I have been sewing for about 55 years and have made a few quilts. This class was better than I expected, in that it got me thinking about how I can use fabric scraps, fabric from my stash, and designer swatches I got from Fabmo in Sunnyvale!! The teacher had good ideas that you may not find in more traditional quilting classes. So not so perfectionistic and limiting. GO for it!