Lesson Info
5. Lighting Pattern Demos
Lessons
Class Introduction
04:58 2Keywords and Terminology of Lighting
15:17 3Lighting Patterns
16:29 4The Science of Light
13:49 5Lighting Pattern Demos
27:53 6Study the Catchlights
17:42 7Study the Shadows
08:31 8Soft & Hard Shadows
28:57Lesson Info
Lighting Pattern Demos
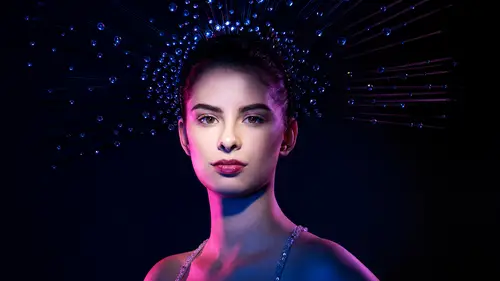
So some of the things that I wanna demonstrate is going to be the positions of the light and just that whole rim light and whatnot. So, can I have the silver reflector, please? Alright, so here... Or silver white. Here is our main light in the photograph. And I'm gonna take a photo, and so everybody take a look. (camera shutter sound) Let's see, you look perfect. And I'm gonna move it off just a tiny bit to the side. And can we lower those lights just a tiny bit in the front? Okay everybody, so, when I shoot this picture, (camera shutter sound) What would you, this next one, what would you call that one? Going back through the things? So I did this a little bit confusing on purpose. Just like a little bit. Anybody? Like, what position would this be? (audience member calls out answer) Okay, so, here's the thing, this is why I'm saying this, if you look at this photo, technically the shadow of her nose has not quite reached the shadow of her cheek, so technically, it's Loop, and the poin...
t is, who cares, it doesn't matter. It's just as long as you can look at a photo and say, oh okay, the shadow of the nose almost meets the shadow of the cheek. That's what I want you to know. Like, it's Loop, but it's almost Rembrandt, so it doesn't matter, you just have to be able to see it, and that's what you're training your eye to look for. Training your eye to look for the length of that shadow. Okay, so here's the next thing. Can you bring that white in real, real, real, real, real close? Perfect. Okay, so, here is where it can get a tiny bit confusing. If we take a look at this shot, the shadows are really filled in, and it becomes hard for somebody to tell really what the position of the light is. So what you'll be doing is training your eye to separate. Say okay, the shadows, like if you look at the highlight, there's a highlight under her cheek there. So I know that there's a main light off to that side. I'm gonna ignore the shadows first, so I can figure out where that main light is placed. And then your next step will be okay, I figured out my main light, now let's go ahead and worry about the fill. Alright, so that would be Loop with a lot of fill light. Can I have silver from the back as a rim? Alright, so the next thing to know is that rim lights can be lots of different things. Rim lights can be from strobes, on location rim lights could be lights bouncing off of a wall. But a rim light can also be a reflector. And so in this case that we're gonna do, is John can actually see it, or I think he can. You did it a second ago. Yeah, right there. Wait, or is it this light? It's hard with lots of overhead lights on. But what you can actually do if you're using your modeling lights, is you can actually see the separation. So this rim light will make it so that side of her face doesn't blend in. So let me take another shot. (camera shutter sound) Alright, I've got, you'll see just a tiny bit of highlight, right here on the side of her face. So you know something's gotta be casting that, and you just have to figure out what. But that would be a rim light, or you could call it a kicker. The other thing that it could be is it could be a strip softbox, we're gonna go through all of the different options of what it could be, so that's perfect. Let's give it a test right there. So here's another example of... (camera shutter sound) Ope, different channel? Channel one? Ah, let's see, channel set, 8A. Oh, yep, that would be why, (laughs) thank you. 1A? 1A is perfect. (camera shutter sound) Okay, so now we've got a nice subtle rim light on the side. But I'm gonna warn you, although this class is intended, like the entire class, point of the class, is in the end, you look at a photo and figure out how it's lit. There are many, many instances where you won't be able to tell. If it happened to be a reflector catching a ton of light, or if it happened to be a strip softbox, or whatever. But no one cares, the idea is that you can reproduce it, like that's the goal. It's, you're not right or wrong if you're like, oh, I used a reflector but it looks identical. It's more so if you use a reflector and go man, it's not doing what I want, let me try another option, let's try a strip softbox. You could have a totally different setup, but if it looks the same, you've achieved your goal. It doesn't have to be identical. Alright, so next thing down the line, so far I've demoed for you our main light here, that's our rim light, or our kicker light. We had a fill card in the side, we had white to fill in the shadows. But let's take a look at adding a background light. Can you take the strip off of that? You can just point any light at the background you want. You can just blast it with a bare bulb, but it's a little bit harder to control. If you use a softbox, you could have a gradient across the background. But I wanted to introduce just something interesting that I use quite often, called a grid. And grids are fantastic, and you'll see this at the end, how you can use grids on the face. But grids are one of these things that tripped me up in lighting all the time when I first started to code light. Because I didn't know what they do. What grids do, is they focus light in. Normally with a bare bulb, and if you guys wanna take a look at what that looks like on the background. I'm gonna have John take that grid on and off so you can see the difference. So right now you can kind of see the spread of light. Now, watch when the grid goes on, okay? And I believe that one's a 20 degree grid, right? I think? Okay, here's what you need to know about grids. Grids vary in size and how much spread of light they allow. So here's the rule that you wanna keep in mind, the smaller the number the grid, the smaller the area it lights. So a very small number like this one, for example, this is a five degree grid. It's going to give me a very tight, narrow beam of light. However, if I switch to something bigger, this one, it goes five, ten, and twenty. Five, ten, and twenty. So take a look here, and then we're just gonna switch it to the five. It is a tiny spot of light. So the reason that I wanted to introduce this to you early on, is that as you look at lighting, I think a lot of us might be familiar with softboxes and umbrellas, but these ones confused me all the time, because they give you little focused areas. I recommend if you've never used grids to give them a try, because they give you so much more control than any other modifier. Now, one other concept of lighting. We talked about hardness and softness of light. Can I put the... Oh, it gets hot. Do you have the 20 still or no? Yes, the 20 is right here. Can I put that back on for a sec? Okay, one other thing to know, in general with lighting, is if you want to focus the light, if it's looking focused, one of the things you can do as well is move it. So watch what happens if he moves this light back further, and further, and further. It actually begins to spread out quite a bit. Now can you move it real close? The closer you bring the light, it starts to concentrate it. So how I often describe light, and I'm sure if anybody's seen me teach lighting class, you've heard this, I describe light like bucket of water. Like a bucket of water, because it behaves very similarly. And John, one day we were testing this, and he let me splash water in his face to demonstrate this. He's the one who suggested it, it was not me. I did. So, that was all him. But how I can describe this is, if I were lighting you, I've got my bucket of water, and let's say I throw it from back here. Throw my bucket of water, what happens is that water spreads out. So you'll get wet, and you'll get wet. But you all get kinda wet, you're not soaking wet, cause it kinda spread out. So for light, right? Light spreads out, and you're all, it's like a medium exposure, right? I take that same thing, and I throw it right at her face, this is the birthday girl, so that's why she's getting the special treatment. (audience laughs) But I do the same thing, it's just going to light, or get her face and her chest wet, but it'll be soaking wet. So, the light will only hit here, but it'll be really bright. Now, with grids, this is most defined, like you see this most, but the same thing happens with any modifier, it's just this is where you'll actually see it the most. So if you're seeing like, man, they've really got that light just hitting one part of the body, or there's just a spotlight on the background, it could be a grid, or it could be a grid or another light source very close to focus the light. So that's another kind of science-y thing about focus. The next thing... Let me take one picture of this, so we can get a background light on file. And so you're gonna turn straight back on to me, perfect, and can you angle it down just a little? Perfect, great. And maybe turn it to, let's try just like five-two, like just turn up the power just a little. Yes, sorry for the gloves. Perfect, thank you. (camera shutter sound) Okay, so this now gives her separation, so that's the difference of what you would get with a background light, so if I flip between the two of these, it's just taking a look between. No separation, she kind of starts to blend in to the side. This is the difference if you have a rim light or a kicker light. And then this one would be for your background light. So you're training your eye to see those things. This can be used to make really graphic effects, and so I like to do that, cause I can carve the subject out from the background, especially if they have an interesting pose. Okay, here's another thing. Would you turn that one off for me? Another thing that you might wanna add for science of light, would be feathering your light. So you don't always just point the light straight at the subject, and this will make a difference what the light looks like. In this example we probably won't see it too much, but let's say for this photograph the way that it's angled here, the light, the shape of it here, it's wrapping around a little bit more. So I'll get a little bit more wrap to the side. But also, where that light's pointed, especially if I have it straight at her, if you have a lighter colored background, or if you're in a small space, or you're close, your background's gonna get some light. I know that my first studio was tiny, and I always struggled cause I think it looks nice in that example when the background and the subject are lit differently. Like it's not just flat, it's not just throwing light at the situation. But in a small space, it's like, I take the shot and they all look like they're on the same plane. So one of the tools you can use is feathering the light. I can still have Loop light on her face, but angle it's so it's not quite hitting the background. So that would be something like moving the light off to the side. And I can actually feather it so it's still, I can still have that Loop pattern, but now it's not even anywhere pointed at that background. So that may be another situation where you're in your studio and you're like okay, they've got a nice, dark background, and Loop light on the face, perfect. And you set it up and you're like, crap, my background is super light, what do I do? It may be something simple as changing the feather. So I'm gonna demo this, I'm gonna just move you back so I can get a little more spill here. Let's move it back this way, alright perfect. Let's see how this goes. Alright. Let's do first, can I... Oh, those are lowered. So what I'm looking at, is when I look at the shape cast by her nose, I've got all of this light in the room that fills it in, this is why I try to darken everything down. But I'm seeing it. I'm getting some, I'm seeing the Loop light, there. So, let's take a look. Perfect. (camera shutter sound) Alright so, this is a non-tricky example of Loop. She'll have just a little shadow of Loop from her nose, it's not perfectly centered, but it's not going towards Rembrandt. But, I've got kind of a light background. So, now, what I can do, is I can try to angle it away, feather it off. I can still have Loop. And I can bring it a little bit more to the side if I need. So I can try to isolate the two. (camera shutter sound) Okay, so let's take a look at these. So if you look at the difference between the two as I flip through these, and I know for you guys it might be a little difficult to see it is completely different between the two. Because of feathering, yes. But the shadow stays pretty much the same. When you feather like that, like how much power of the light do you, I mean did you change the? Good question. So when I had the light not feathered, pointed towards her, what's happening is I'm, when I'm actually pointing it at her, I'm getting a little bit more of the center of the light. And the center of the light is going to be the brightest part. And this is kind of what John was talking about, is in a light source, I mean, the head is only so big. Now it has a little bit of time, the bucket of water, it's got a little bit of time to spread out by the time it hits the end, but it's not going to completely fill the modifier. So you'll have that bright spot in the middle. There's a lot of portrait photographers and a lot of master photographers that I know, and this is not really exactly related to the science of light, that they don't ever point the center of the light at their subject. Because the edges are going to be softer. So you'll see a lot of people using softboxes that are angled to the side for that reason. It just has a little bit smoother edges, whereas you're getting a little bit harder light in the center. So going back to your question, is when I'm pointing it at her face, because I'm getting that hotspot it will be brighter. As I feather it away, there's less light hidden, or less light hitting her. And so you would have to make exposure adjustments. If you wanna use a light meter, it would tell you exactly how much. And it might just be a third to two-thirds of a stop. Kind of depends on the light, and how much you move it, and all of that stuff. Okay, so the next thing that I wanna talk about is controlling your light. So let's say you're all in home, and I'm gonna go through everything. I'm gonna go through looking at all these photos and the catch lights, and the shadows, and whatever, and you're at home and you cannot get an example that I told you exactly how to do it. And you're saying well crap, what's wrong? If you are shooting in a small space with white walls, that is an equivalent of surrounding your subject with white fill cards on all sides. So if you use umbrellas, what umbrellas do is they toss light everywhere. So it's more like if I'm, instead of throwing a bucket of water at you, I'm throwing a pan. I take that pan and the water just, I have no control. And that's a downside of umbrellas, what's great about them, you can get nice quality of light, and they're cheap. That's fantastic. But you just lose that control. So if you're at home, and you are trying one of these setups, and you've got an umbrella or whatever it may be, and you've got white walls on either side, it's just like having white fill cards. So the actual better way to have your space set up to be able to replicate something, is actually to have black walls on all side. However, I find that if you have all black studio, you look like you're taking your subjects to a dungeon. And like, they enter and they're looking around all confused. So instead what you can do, is you can better control the light in your space by using foam core. So this is one piece of foam core, you can get them all different sizes. What I use in my studio is something called V-Flats, and V-Flats are four-by-eight sheets pieces of foam core, black on one side, white on the other. And then you put them together and you tape them in the middle to make a V. So that's if I'm in a situation and I'm shooting this, and what'll happen is right now I've feathered my light, so I turned it to the side, but I've got a white wall right here. I mean that's just, it's exactly like having a white fill card. So this is when it would be appropriate to flip it around and use the black side up against the wall. It's not that you need to bring it very, very close to her, but you're just trying to dampen some of that reflection. So this is one other thing to add into your list of improving your space. To try to replicate something, know that your environment will make a difference. Light colored walls, light colored ceilings all of that. Where you can get V-Flats is if in your town there is some kind of theater supply, they have them. So like, I mean there's just like Theater Shop. Also you can make your own, absolutely make your own from Home Depot. Also, any place that does large-scale matting and framing. It's just pieces of foam core. Anything else I'm missing John, for recommendations on those? Sign shops. Sign shops, that's another good one. Right, cause their using foam core all the time. So I recommend that you add that to your to-do list to have right away if you're trying to replicate things. Okay, so, I just wanted to show an example. Can you give me a white wall? And then we'll flip it. Okay, perfect, so this is your white wall nice and close. And then, if you've got your black V-Flat up, so there's with white walls, and there's when you flip it around. It's a huge difference. And especially when you are using softboxes and feathering. I'm gonna use that one more time, I'm gonna do one more thing. Alright, here's another term that you would want to be familiar with, something called a flag. Flagging light is blocking it off. You're blocking it off from hitting areas. So there may be an instance where your light and your subject, and you're like man, I've got my white wall right here, and I can't, I don't have anything to block it off. And then oh man, it's hitting the background. What you can actually do, is you can actually use a piece of black fabric or a piece of black foam core, and when you hold it up like John's doing, it casts a shadow onto the background. So there might even be things like that in a photograph. Like man, they're getting their background much darker than me, how are they doing it? That could be one instance. So let me take a quick test of that. (camera shutter sound) Alright, and then can you do one without, John? Perfect. (camera shutter sound) Let's see, so there's with. And there's without. Huge difference between the two. So there is a lot you can do to control your light. Alright so the last thing that I wanna do, is I wanna talk just a little bit more about your directions of light, right? A little bit more about that Rembrandt and moving the light around. Okay. So, one of the things that you want to notice is that we've got a boom arm. Your life will be made a lot easier by having a boom arm. The one that I use is the Avenger D600, oh it is, hah, I'm so smart. (audience laughter) I knew a product name. But anyway, so this is the one that I use at home. Just a quick recommendation, the reason that you would want to do this is if it's just on the stand, and you are trying to achieve Paramount lighting, Butterfly lighting, what ends up happening is to do so without a boom arm, the pole ends up directly in your way. You can't actually get it centered. So you wanna have a boom arm, because it lets you get the light directly out-centered without the pole being in your way, which becomes even more important when you do full-length shots. So you'll definitely want a boom arm, and making sure that you've got sand bags on your setups as well. Okay, so what I want to show you is taking a look at our Paramount light real quick, okay? Make sure we're all set up. Okay, Paramount light. I'm gonna move the light far off to the side for our Rembrandt light. I'm looking for that little triangle. I'm gonna move forward a little bit more, I think there. Okay, get Rembrandt light. (camera shutter sound) Okay. Perfect, so I've got a nice triangle underneath her eye. And if I turn her, I'm gonna have you turn just a little bit this way. If she turns this way and there's a triangle... Bring your chin back towards me a little bit. This would be broad-lit Rembrandt light. Wider part of her face, the triangle is away from me. However, if i bring the light all the way back around here, I'm gonna have you turn and face me, great. Okay, good. And then bring your chin back this way. Little bit less, I'll tell you when, right there. This is Rembrandt in short light. (camera shutter sound) And actually turn your chin towards me a little bit more. So what I'm watching is when that shadow meets, right there, and do one tiny move to your right. Just a little bit, right there. Perfect. (camera shutter sound) Okay. So, moving the light background to the side makes the face look a lot more narrow than just having it... Let's see, fully illuminated. Lets' bring those up, if it'll load. There we go. So, the difference between the two, a lot more shadow is in this because there's a lot more shadows toward the side of the face. But if you look at the shot and go oh man, there's is way, it's way too dark, I didn't want a shot that was so heavy, you can come in and bring in a reflector. Photomaker wants to know, Lindsay, if we want to do a very pale post-processing for like a fashion-y look, like you often do, does it matter how much shadow we're creating on subjects with our lights? Good question, I find that usually I can get more of that even pale look, when I have a lower contrast image with less shadows. It doesn't mean that I have to eliminate them, but I find it a little bit easier. So let me just real quick show you how easy it is. And she's got a warmer skin tone, so you'd have to actually do a bit of post-processing. Will you face me straight on? Just like that. And John, can you pop a reflector underneath her chin for a sec? Great. I'll take one quick test. (camera shutter sound) Okay, so for an example like this, this would be for a shot where I'm going for bright, glowing, happy because there's not shadows. Whereas in this, exact opposite. So that's why I say what's the point of this photo? For that person what I do is in the Develop module of Lightroom, I go down to Hue, Saturation, Luminous, I de-saturate reds, yellows, and oranges, and then I brighten up in Luminous. I lighten up reds, yellows, and oranges. And obviously, that's like to a super extreme, but it's just to prove the point. Kind of side-by-side I can go really pale, and it looks more over-exposed on maybe there, something like that. It still works with shadows, but I find it just to be a little bit smoother when you have a low contrast versus a high contrast image. Cool, is there an ideal distance from placing your subject away from the background in the studio? Okay, good question, I recommend that you keep them as far away as you can. Because what you usually wanna do is you wanna lighten different zones, like different planes. And the closer the subject is it makes it very difficult, because this light is gonna be spilling on the background. So if I want my background really dark, all of a sudden when they're very close I have to consider the way I angle my light, to see if the background will go dark. Or, the way I position it or, I've gotta take flag to block off the light. The further back I bring from the background, it separates the two, so one's not influencing the other. Same thing, is if I have this background and I take two zoom reflectors, one on either side, and I try to light that background white. I've gotta give it quite a bit of light to make it pure white. And what ends up happening, is it ends up kind of hazing around, it ends up bouncing, and it ends up giving her rim lights that maybe I didn't want. If I could pull her away, I can light those two separately. The background won't influence her, she won't influence the background. In small spaces all of this is absolutely possible, it's just as with anything. You know, if you got lots of money and a big space, things are easier, right?
Class Materials
Bonus Materials with Purchase
Ratings and Reviews
Kaltham Ali
Wow wow wow- I finished the entire class in a day! I feel like owning and buy right away all her trainings... this is what a real trainer is al about.. I went from zero in light understanding to really looking to lights/shadows etc.. awesome thanks Lindsay .. the best purchase ever
Warren Gedye
Lindsay, you're an absolute genius!! Such a terrific teacher. You are so talented- not only as an out-of-this-world exceptional photographer, but also as a person who clearly is so passionate about her craft and has that very rare ability to teach your art in such a unique and structured manner! I have learned so much from you previous courses too, Lighting Bootcamp 101, I think was one of them. I look forward to more of your tutorials. On a side note- John in the background is such a stand-up guy! I love the rapport you have with him. I've seen him in on a few Creative Live courses now and he's a kind of guy I just want sit down and have a coffee with, and pick his very informative brain! Such a cool fella!
a Creativelive Student
Lindsay is a talented teacher. She is very knowledgable of what she teaches, but also can teach it well (which is not something all talented people are gifted with, whatever the field). She is humble, dynamic and her courses are interesting to study. The one small improvement I would have liked would have been a little more emphasis and theory on the shaping part. However, this not being the most important, it is better that more emphasis was put on seeing (if you can't see it, you can't make it). Finally, I will say that to study and understand this course, or Lindsay's methodology, you are then equipped with an understanding—you could even say partly knowing the language—of light, which gives you a huge set of tools and advantage, allowing you to progress quite substantially with your studio or out-of-studio photography.