Lesson Info
3. Processing Images in Adobe Camera Raw Part 1
Lessons
Day 1
1Adobe Bridge Basics
27:08 2Sorting Images in Adobe Bridge
29:24 3Processing Images in Adobe Camera Raw Part 1
29:42 4Processing Images in Adobe Camera Raw Part 2
34:57 5Image Processing Q&A
08:13 6Contrast and Color
18:15 7Adjustment Brush and Auto Mask
16:19Adobe Camera Raw Optimized Images
11:09 9Lens Profile Corrections
20:36 10HDR Pro Part 1
23:05 11HDR Pro Part 2
20:49 12Panoramas Part 1
28:37 13Panoramas Part 2
22:02 14Intro to Photoshop
13:23 15Interface Overview
11:37 16Essential Adobe Photoshop Adjustments
10:33Day 2
17Flat vs Layers
34:49 18Simple Composites with Photomerge
22:53 19Stack of Prints Panorama
15:42 20Combining Exposures Composite
08:28 21Layer Mask Composite
23:51 22Selections and Masking Part 1
26:18 23Selections and Masking Part 2
16:04 24Adjustment Layers Part 1
18:51 25Adjustment Layer Part 2
23:20 26Creating a Postcard Layout
26:52 27Hand Drawn Photo Layouts
17:39 28Creating a Layout with Hand Drawn Frames
30:55 29Working with Frames and Textures
14:54 30Customizing Frames and Textures
24:33 31Saving for the Web
11:02Day 3
32Correcting for Noise
17:48 33Camera Profiles and Split Toning
19:30 34B&W Toning
25:24 35Post Crop Vignetting
11:05 36Selective Clarity
14:49 37Dust Spot Removal
29:57 38Content Aware Fill Part 1
22:46 39Content Aware Fill Part 2
21:59 40Healing Brushes: Basic, Spot, and Clone
26:02 41Retouching: Removing People
11:40 42Retouching: Building and Clone Source
20:12 43Other Retouching Techniques
22:00 44GIF Animations
14:51 45Creative Masking
15:24 46Displacement Mapping
16:44 47Creative Filters and Smart Objects
27:42 48Finishing Techniques
10:56Lesson Info
Processing Images in Adobe Camera Raw Part 1
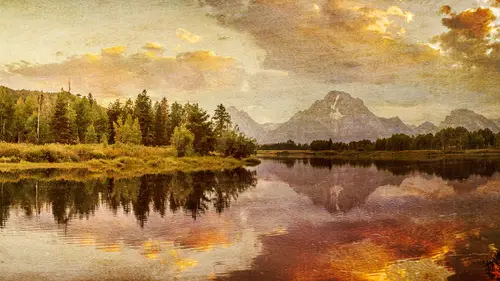
Now let's talk about processing images and I'm not actually going to process these because they're all so similar and all that we might come back to him at some point, but in general I'm gonna work with a different set of images now instead of having a shoot on the beach, I'm sure you're sick of looking at those we're going to iceland uh, so all I've done is here is I have a collection of images that need processing and let's jump in and process them, so I'm going to click on an image and if this is a raw file me, my camera was set to capture and raw file format instead of j peg then all I need to do is double click on the image and it will open it in a special dialog box that's called camera if, on the other hand I have my camera set to shoot j pegs or these or tiff files or another file for men other than raw, then when you double click on it, it would just open the image in photo shop without first sending you to this thing called camera and if that was the case, I could go to the f...
ile menu and there's a choice here called opening camera raw cameras and optional in some ways pre processing step before you actually open the image all the way into photo shop but I find that a huge number of my image is all they need is this one step called camera to get him from shot to finished and that would be my ideal situation if I could just finish everything in wrong so in this case these air raw files and so I'm gonna double click on one and it's going to open it in camera just remember if he had a j peg or a tiff I'll go to the file menu and she's opening camera wrong the one exception when this is great out is if you have a file that has layers in it like you've typed text on it and the texas on a separate layer then this will be great out often times because you don't think it can work with files that contain layers but I'm going to double click on that and when I do this is camera wrong is what we're gonna do a lot of processing but first we have a question when you do a photo shoot do you but most often shoot in the raw form at format or well what what point would you choose j pager tiff okay ezra in general when I'm out shooting and this is for me personally I'm not saying everyone else that's out there should be the same but I shoot ninety nine percent of the time in roth format and we just briefly tell you why the general reasons the jpeg file format is mainly there for convenience of a few things. First off, it gives you a smaller file because it wants to do any processing, any prove mint of the image in the camera itself, and if you look at the menu system for your camera, you're going to find settings for contrast, saturation, sharpness and all those things. Those settings only apply to j peg files because j peg files are processed in your camera, we're hopefully when you pull the card out of your camera, you could hand it to a client because images they're done, and because of that, it doesn't need to save as much information because of all the processes already done. All you need is enough information, so you could print this file and show it to people. Well, if you want to do processing on your image, let's say that you have an image and close this one that looks like this one. If all it does is save enough information to print the image in enough to view it on screen, I would actually like it to save as much information as the camera is capable of capturing, even if that's amore information than my printer is capable of really dealing with, because I need to be able to get us much out of that image as I possibly can. So it makes sense that if there's any extra handful I want it on an image like this one and so the raw file format grabs the raw data off your camera sensor without changing it. It just says let's save everything that camera captured so and the prosecutors scene is done when you open the pictures and that's why when you double click on a raw file, it opens kamerad says, hey this image isn't been processed yet you need to process it and now it's giving you the equivalent to the settings you could find in your camera contrasts saturation, sharpness all that kind of stuff but you can look at the picture and decide that for this picture you needs different settings for the others where's the j peg you already picked the settings there already being applied every time you hit the shutter and you better hope they're pretty good for those images because some things are being baked in you could say permanently applied and it's not saving everything your camera captured so you're all going to get so much of that in information would be able to adjust so some of the advantages of the raw file format is that if the jpeg file format would make anything look solid white let's say in this water the area in the middle of solid white and a j peg file it's done processing it it threw away anything extra and so we're stuck with it being white with a raw file it might look white to begin with but the camera might have capture just a little bit more information in there that it just decided not to render as detailed decided to make it look white and if it's raw file we could get back that detail we can bring detail in here whereas in jpeg could be solid white be nothing we could do about getting it back same is true for the shadows if this area in a jpeg file would be solid black nothing new about there's no detail that was in that file that was stored to extract from there it's a solid black area but with a raw file it might look like it's solid black and if you printed it it might be solid black but if there is any information your camera captured in there it's still in the file and we can get it out and so you're going to be able to get more highlight details amore shadow detail out of a raw file and the final thing about raw file is color changes if the color and your image is way off you can easily color correct a raw file and it maintains its quality. Where is a j peg files since it discards anything that was extra any extra info get just enough to print just enough to show what you got um doing any kind of color correction makes it actually a little more difficulty in the quality of the end result doesn't look is good so for me personally it's an extra step you have to process the images and move sliders around to make him look good but raw files capture more info they're more versatile so that's what issue the time that I switched to j peg is when the card in my camera is full I want to keep shooting well j peg files or smaller I could probably fit a fume or on the card even after it thinks it's full or I'm going to shoot these images and I'm instantly going to give the card to the client they don't know photo shop they're just going to take what's there so I need to give it to them in a file format where it's done and j peg is a standard file for my name I can open a j pick but not everybody can open a raw file you need photo shop or light room or some other specialized tool to open it. And so I'm not going to give those images to a client until I'm done processing them given to mr j pecker some other thing doesn't make any sense, so but I'm not saying you guys should always shoot j paige shoot whatever you're comfortable with whatever you have good reason to but with rock since I get extra highlight detail extra shadow detail by moving sliders and I can more easily color correct where the end result looks better it makes sense to me to shoot it but if you find it gets in your way and stuff you know shoot what makes you get good pictures and I just think roz good, so I'm gonna double click on this that opens it in camera remember if he had a j peg art if it wouldn't open this automatically because that file format will be considered already processed so you just open it in photo shop and so you would have to go to the file menu and bridge opening camera that kind of force your picture into camera when they first came out with kamerad would only work with raw files but then they figured that these adjustments are really good and so why limited to just raw files let's make it work with j pegs and tips that people wanted to but you have to kind of force it in by using the menu all right now when I open good looking images you could move the sliders a little bit make him look a little bit better but it's not too exciting and it's not as easy to learn what all the sliders do because the picture itself looks ok to begin with so what I want to do is actually start with images that have problems so imagine I got like, a new camera or something, I don't know how to use it. It was some mode, I didn't realize it was in and I just went out shooting with it and I need to fix my shots or whatever it is sometimes some action happens in front of you and you have no time to react and adjust your camera, you have to pick it up and capture, so I'm going to end up working with a lot of really bad looking images because that's, where we learned with the sliders do, and once we've learned what they do, then working on good looking slot are good looking images, we can make him look a heck of a lot better, but it's easy to understand what the sliders do because you've seen them at their extremes what they're really capable of. So first let's do a simple thing remember we're in iceland. I went up in a plane in iceland to shoot it from the air it's quite beautiful, both on the ground and from the air, and when I'm doing that, though, sometimes I get the plane wing in there. And so one of the first things I think about with images I find the vast majority of images could be improved by cropping, and so one place where I can crop things is here in camera now in camera at the top of your screen is a horizontal bar full of tools he could use, and then the right side of your screen are a bunch of adjustment sliders you can apply, and just so you know, those adjustments, sliders, they didn't have room to show them all here, so they categorize them under all these little tabs that have these icons. So if I click on one of these, it'll change what's down below to show me different sliders and there's a whole bunch of sliders, but we're going to start off on the upper left of my screen, where we have all the tools, and I'm going to start off here with crop tool now. One concept I should mention in photo shop as a whole and in adobe products in general, is if you ever see a small triangle somewhere, it means there's more than you expect there. So when you look at these tools, do you notice that some of them I have a tiny little triangle incorporated in their icons, and you're going to find the same thing? If you go into photoshopped, you look at the toolbar and photo shop some of the icons, and the tool bar has a tiny little trying on him some down well, that little triangle is usually an indication that there is some sort of a menu there you could click on that thing and it will work just by clicking on it but if you click and hold on it you'll get more so if I go to this tool all there is to do is click on it there's no click and hold it there has nothing extra there's no triangle but you see these two tools have triangles so I could either click on it justo grab it generically or I could click and hold on it and that's where I see more just so you know that is in general anywhere in photoshopped tiny triangle somewhere click and hold on it will be more so when I click and hold on it right now it's set to normal and that means that when I crop this picture it's not gonna limit how aiken crop the image I'm not limited to a square or I'm not limited to a really horizontal thing where is below that these air various aspect ratios where if I want to square I could choose one to one and that means the with the height ratio would bee one to one and I get a square I could choose custom and here's another convention in photo shop just like the tiny little triangle means there's mohr there well if you ever see three periods after something see the three periods that means they're settings involved so up here these choices no settings involved meaning that choices all of what it means this one means it's going to ask you something once you choose it and that's true also in photo shop and usually I think in light route as well, in fact that's true in anything at least on the mac. If there's ever three periods after a menu choice, they're more settings involved, so if I choose custom, he would allow me to type in a particular ratio that I want instead of using a preset, so I'm just going to leave this it's normal setting not going to mess with it. I just wanted to introduce you guys to the concept that tiny triangle means there's more hidden there three periods means their settings involved versus no three periods means no settings. Okay, now in order crop the image, all I'm gonna do is move my mouth on top of the image. I'm going to click and I'm going to drag and I'm going to get a rectangle and if I let go of the mouse, it puts little handles on each corner and on the sides and I confined to knit by grabbing that corner right now I got the lower right corner pulling on it, or if I got really close to being right, I could grab just the bottom edge or the right edge, but I just need to grab it where those handles are to adjust it but in this particular case if I try to crop the image and get rid of the plane's wing and get rid of that dark thing in the corner whatever it was I don't like that I'm cutting off part of this I call it a lake and enough that truly is a lake or not but I don't like that I'm cutting off that in order to get it I would get some of the wing showing up and I don't like the horizon is at an angle so what I really want to do is rotate this crop in order rotate it you have a couple different choices but the main one is moved away from the cropping rectangle that's here just move outside of it if you move outside of it, you'll see your mouse change into something that looks like a curve and that means you can rotate so I'll click outside of it drag and right now I'm looking at the horizon line and I'm trying to get this to somewhat align with that horizon so it feels like the horizon is straight and then I could let go and I can now again grab the sides or the corners in fine tune its size I'm just trying to get rid of this dark thing the upper right and get rid of the wing and then create a good composition now when I try to create a good composition I usually first bring this in to get rid of whatever blatant stuff I needed to discard then ah look all the way around the edge of the photo to see if there's any busy things and if there's anything really busy right near the edge of the frame like for instance might not look that busy but do you see this little detail this little kind of u shaped dark spot well that's something that could draw my either so I'll just pull it over a little it's a right about there well that's still got a little thing on the edge I try to clean it up as much as is practical there so here it's a big mass on the edge big mass on the edge here I don't like this dark blob I'll see if I brought it up could I get rid of that? No, I bump into the lake so I'll just find tune that like this little piece of snow is it thing that could distract me in the edge of the frame can I get rid of it little dark things? You know that kind of thing so I just kind of try to optimize it if you ever find that you can't do something like I can't bring this up any higher I want more sky just pay attention what's happened the corners do you see the corner and the upper right is bumping into the top of the picture, you'd have to pull that to the right in order to feel to make it taller there so you could grab that get it up there. So anyway, do that, then in order to see the end result, I need to get out of the crop tool, so I just switch over. And most of the time I switched to the hand tool, the hand tools, kind of a neutral tool it means let me navigate around my document to scroll through it, and therefore, I know if I click of my image, I'm not going to actually make a change to it where some of the other tools I might mess up my picture, so you just get out of the crop tool, I'm gonna click on the hand. There we go now, if you've ever cropped a picture and you decided didn't want to, the client came in and told you they didn't like it. Just go to the crop icon if you click on it again, it'll bring you back to that view where you could see the rest of the picture. You could adjust the cropping just as if you never finished it, or click and hold on the crop tool, and you're going to find a choice, and they're called clear crop, and that would bring you back to the un cropped original and cameron never throws away the information that's been cropped out. You could open this image thirty years later and get back that stuff is long as you have the original raw file once you open it into photoshopped, meaning I go beyond this dialog box and it's in photo shop, then what's in photo shop no longer has that information that's been cropped out, but if you went back to the original raw file and open it in camera and still be in there now, when I'm done in the lower right corner way of three buttons cancel means I screwed up so bad. I don't want to remember any of what I've done here, so that means just get rid of what I've done done. Is it going to the safe, bud? Hey, I mean, save these changes, but it says done because with a raw file, what happens is all the changes we make in camera are saved is only text that's attached to your picture, just like your shutter speed your aperture setting your camera model on the date we're all attached to your picture. Will these get attached your picture in the same way it just adds text that says crop in the width and height of the crop, the angle it was at and so on, it doesn't actually change. The information in the file it's simply adds instructions to the file that mean the next time I open it, load these settings back in so that they can be applied again. So instead of saying save, which usually means actually physically change what's in that file done means just attach. This is text to the picture and that's really nice, because that means every single thing we ever do in camera is undoable it's not permanent it's just text attached to the picture, then we have one other button down there. It's called open image in open image means I'm done processing it here, and I will save these changes as text on the picture, but I also want to continue working on it in photo shop and so it actually open it all the way into photoshopped camera's not considered to be actually in photo shop. We're in a plug in a little kind of it's kind of like being in bridge you're in a separate thing, so I'm gonna hit the done button and I go back to bridge all right now, let's, start processing some other images so far, all we've done is crop let's work on some bad images look at this thing, it looks like one of those images and you'd just you'd hit you, you'd raided a zero you, you know, like it would be a not even keeping ignore. This would be a throwaway image, but if you'd learn what cameras really capable of, you're going to find that you have the throwaway images you have are your fault from how you captured as far as it being blurry or being a bad composition or something else. If you captured it just some of the info, you probably going to be able to pull something out of it, you'll be amazed. So let's, take a look on the right side. We got a bunch of sliders and let's look at the ones that primarily deal with overall brightness. There are three main sliders we need to know about. The first one is exposure exposure affects the entire picture if you want the entire picture to get brighter or darker exposures where you want to go. So in this case, with the exception of the sky, I want the entire picture to get brighter or darker in the way I think about it is if eighty percent plus of the image needs the change, I think of it is the whole image, so I'll take exposure in with all these sliders. If you move them to the right, you'll usually brighten them if you move in the left darkened. And it gives you a preview of that by looking at the slider and that the sliders brighter on this end of it is darker on that. So I'm just gonna grab this moving towards the right, keep moving out towards the right and see what I can get. Now if this is a j peg file, I'd get nowhere near this much. Why? Because the jpeg file on lee saves enough so the image can look ok, as is on screen and could be printed. And in fact, what happens is it saves a total of about two hundred and fifty brightness levels between whatever is black and whatever is white in the picture. It's got about two hundred fifty shades in there with a raw file usually have thousands of shades between black and white, so when you move it up, there's a lot more in there to show up, it looks smoother, so that's exposure but now I'm not happy with the sky, so we have two other sliders we want to get used to, and those are highlights and shadows with highlights and shadows. Instead of working on the entire picture, we're going to try to isolate on ly the bright areas with highlights are on ly the dark areas with shadows. So in this case, when I look at the picture, what I don't like about it is the bright areas I don't like that I can't see any detail in the sky, and the waterfall might also be solid white, so I'm gonna grab the highlights slider because highlights were considered the bright areas with all these sliders. If you move it to the right, you brighten those areas, move until lefty darken them so I'll grab the highlights slaughter, I'll move it to the left, and I might have to move it quite a distance, but you see, I'm starting get my sky back now, there's only so far you can move these sliders. I've maxed out my highlights slider not that I wanted to cover it right now, but do it anyway. That is, if you ever max out one of these sliders, this's more of ah intermediate instead of a beginning idea. But if you ever max out the highlights or the shadows slider and you wish you could move it further, here's how you can get away with that. So I've already maxed out my highlights, slaughter and here's a trick for getting the equivalent to moving it beyond one hundred go to the exposure slider move in the same direction you were trying to move the one that you maxed out so I maxed out the highlights later I moved it all the way to the left I wish I could move it further to the left so move the exposure slider towards the left until your highlights or the way you want about it there for my sky that's not enough because now everything else is too dark so to compensate for dark ing everything now go two shadows in boosted bring it the opposite direction you moved exposure and you'll be able to fix it that's more of an intermediate ideas so if it didn't connect with your head as faras the way a trick things around I don't worry we'll do this on a lot of images you'll get used to it for now think of exposure is mean brightness for everything highlights is meaning brightness for the bright stuff shadows this meaning brightness for the dark stuff well we happen to do is we maxed out our highlights got it is dark as we possibly could could move it any further so we said fine let's darken the entire picture by moving exposure in doing so the dark stuff got too dark so he went to shadows and said ok let's tweak those it's a trick but let's look at before and after if you want to see before and after you're some icons in the lower right therefore icons if we have time we'll get it all for but for now let's use the one on the right now when it comes to icons, icons aren't always obvious and what they d'oh if it is not obvious with something does especially when it's a nikon hover over it without clicking on it. So what do you mean by that? I just mean move your mouse on top of it and don't click so if I do that this well, give me a tool tip it'll tell me what is it toggle between current settings and defaults, it said for visible panel only you don't know what that means yet, but this just means when I click on it, show me the default settings so there's my defaults I'll click on it once more here's what I've done in that pretty amazing I think it is considering what we started with now what do we got to make a comment though don't take from this that every single picture you took when last ten years that are dark you're going to be able to fix because the one thing about your camera is it's best at capturing bright information in the bright information it's got nice clean data and as it gets into the darker and darker areas two things happened it captures less information so that if in the bright party very mention a particular brightness range it will give you one hundred brightness levels in the same difference in brightness same range but in the dark party your picture it would give you fewer shades captures less and less and less information is it gets into the darker part of your picture but the other thing is is it gets into the darker part of your picture it gets noisy usually you don't notice the noise because it's where the image looks black for the most part and it's on ly when you brighten it up so that part of the picture looks normal that you've made the noise obvious it's not that you created the noise the noise was there it was just so dark you couldn't see it you made it bright soon now you can see it so in the upper left we have two tools we have the hand tool which allows us a scroll around her document just click and drag and you could move around it if we were zoomed up on it and we have the zoom tool and so if I used the zoom tool I can click and if I zoom up in the dark part of the picture it's most likely gonna look a little less than ideal in those dark areas don't know if you can notice it but I noticed noise in here and also I noticed that the color looks like it's blotchy and we'll learn how to fix some of that you can see quite a bit of it in here but we would have to at least make sure to adjust that uh any time we brighten up an area that was overly dark to begin with because you're gonna start seeing noise now another thing you learn in here in this is true and photo shop and and most other adobe products is we have a zoom tool in a hand tool up here and if you double click on them they have extra functions, so I'm gonna double click on the hand tool double clicking on the hand tool brings you to fit in window view that means show me on my picture double clicking on the zoom tool on the other hand brings you to a hundred percent view hundred percent view means show me the exact information I have in this file I mean, zoom up until I can see the individual specs that make up the picture. You know that when you're here even if you got your eyes really, really close to your screen you wouldn't be able to see more and more detail because this screen my computer screen it is only capable of showing so much well when you double click on the zoom to let me zoom up until a speck on my picture is the same size as the smallest speck on my screen, meaning the size where you can show me every little detail and that's where you can expect your image, but double clicking on the hand tool in the zoom tool gives you those two different views very quickly, so you double click on hand tooled means fit and window double click on zoom tool, one hundred percent view and so it's a nice, quick wave switching between the two same is true and photoshopped. You'll have the hand tool in the zoom tool in your toolbox and many other adobe products double click on those things. Yeah, just going, click done. I want to show just one other issue in that is simply when you're done adjusting or cropping a picture, and you look at it in bridge, you can tell which pictures you've adjusted in which you haven't. Do you see these little round circles in the upper right corner? If you see one that looks like this one, that means you cropped the picture. If you see one that looks like this one, you've adjusted it, you will sometimes see more than one icon. You could see both the crop icon and the adjustment icon, that type of thing, and then if you look at other images, you'll find they don't have those icons, which means you have never adjusted them our crop, and so, therefore, if we had an image, a folder full of images, we've raided them with stars, and we filtered down to viewing on lee those images that are three stars or above weaken glance very quickly to see which ones have we worked on, in? Which ones haven't. So that's. Just a last little idea.
Class Materials
bonus material with purchase
Ratings and Reviews
a Creativelive Student
Ben, thanks again for this course. I have taken and purchased quite a few of your courses to date. I keep thinking I will only watch to make sure I am on the right track and you always bring more to the table than the last course. Your teaching methods are the best, sorry to all the other instructors from Creative Live, but you are very easy to understand and you speak in layman's terms so we all can understand. I am following your instructions and working along with your files and it is the best! It is hard to keep up with you even when I watch you on one computer and work with the same files on another computer, to do what you are doing...impossible but I gain so much by trying. You provide so much info on each topic, it is amazing. Thanks to Karen for the PDFs, she does a fantastic job and also, for her templates/layout documents. Thanks again and to anyone who thinks this is too much money for all the videos, the exercise files and the instruction PDF, I am sorry to say but you are mistaken.
John Taylor
Like all of the Creative Live courses, excellent training. Ben does a great job of explaining the entry part of Photoshop. A lot of things cleared up in my head and i like his easy pace into this complex program. Thanks Ben.
Cecily
I had several "lightbulb" moments with this class, after many years of photography and when you think you know it all, you don't :) Ben Willmore is an excellent tutor, with his many years of experience teaching PS, he obviously knows the types of things a lot of us struggle to understand. I learnt a lot about Bridge, and have since implemented these things into my everyday workflow, so much easier to sort out what I want to keep etc.. Thanks so much Ben and Creative Live. Thanks also to Ben's wife for her amazing work creating the Guide etc. Even though being in Australia, I pay more for the courses (the conversion rate, the aussie dollar is low at the moment) it's very worth it to me. I have paid more for courses here, and learnt next to nothing. Thanks again.