Lessons
Day 1
1Adobe Bridge Basics
27:08 2Sorting Images in Adobe Bridge
29:24 3Processing Images in Adobe Camera Raw Part 1
29:42 4Processing Images in Adobe Camera Raw Part 2
34:57 5Image Processing Q&A
08:13 6Contrast and Color
18:15 7Adjustment Brush and Auto Mask
16:19Adobe Camera Raw Optimized Images
11:09 9Lens Profile Corrections
20:36 10HDR Pro Part 1
23:05 11HDR Pro Part 2
20:49 12Panoramas Part 1
28:37 13Panoramas Part 2
22:02 14Intro to Photoshop
13:23 15Interface Overview
11:37 16Essential Adobe Photoshop Adjustments
10:33Day 2
17Flat vs Layers
34:49 18Simple Composites with Photomerge
22:53 19Stack of Prints Panorama
15:42 20Combining Exposures Composite
08:28 21Layer Mask Composite
23:51 22Selections and Masking Part 1
26:18 23Selections and Masking Part 2
16:04 24Adjustment Layers Part 1
18:51 25Adjustment Layer Part 2
23:20 26Creating a Postcard Layout
26:52 27Hand Drawn Photo Layouts
17:39 28Creating a Layout with Hand Drawn Frames
30:55 29Working with Frames and Textures
14:54 30Customizing Frames and Textures
24:33 31Saving for the Web
11:02Day 3
32Correcting for Noise
17:48 33Camera Profiles and Split Toning
19:30 34B&W Toning
25:24 35Post Crop Vignetting
11:05 36Selective Clarity
14:49 37Dust Spot Removal
29:57 38Content Aware Fill Part 1
22:46 39Content Aware Fill Part 2
21:59 40Healing Brushes: Basic, Spot, and Clone
26:02 41Retouching: Removing People
11:40 42Retouching: Building and Clone Source
20:12 43Other Retouching Techniques
22:00 44GIF Animations
14:51 45Creative Masking
15:24 46Displacement Mapping
16:44 47Creative Filters and Smart Objects
27:42 48Finishing Techniques
10:56Lesson Info
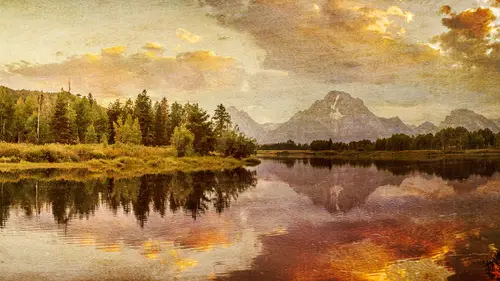
Panoramas Part 1
The thing I want to talk about here beforehand is just remind you of what we're going to do with camera when it comes to pan around us because we talked about adjusting multiple images of the same time in camera and that's what we do with the panorama so here's a panorama and this is actually got an extra picture at the beginning I'm going to ignore but here is the panorama you select it and I'm going to say opening camera remember if he had more than one picture you could do that and they show up on the left side that's thumbnails then I choose the most challenging part of the pan around which might be right here more or the most important part where we have a dark object bright objects that's what I'm feeling before I make any change hit select all therefore any change I make affects all the pictures on the left side otherwise it would only affect the ones that are selected and we only had one selected so select all and this is how I optimized my picture so in this particular case th...
ere's nothing anywhere near black and this if you look at the history ramp, I'll get some black senate and I'd find tune the image anyway this is how I would find tune and image before station in panorama is I would end up ah justin and cameron like what any image but adjusting more than one at a time, and you do that by selecting those images and choosing the image he would like to be viewing at the time that you're making your adjustment and you just make sure select always done beforehand when you're done adjusting, I'm not saying I'm done here, you click done, leonard updates all those pictures, so before we stitch you think about that part, we're going to jump into panorama is briefly, and then we're going to head into adjustments in photo shop because only so much you can do in camera, although a huge number of my images get finished in camera and don't need anything more. So it's it's nice it's already mentioned that you can adjust multiple images in camera and that's, usually the first step before you end up stitching it as a panorama is get the image to look as good as you can before hand, because once you're done stitching it is a panorama. It will no longer be a raw file, and that means he'll no longer have the advantage of being able to get additional highlight details to show up or additional shadow detail to show up where it would otherwise look black or white in your image. And so you want to make sure you do some of that first it's also going to be more difficult to perform color correction and get it good looking and result so it's best if you optimize the image as much as is practical beforehand there's still a bunch we can do to it after afterward it's just nice to do as much as we can when it's in its raw form at now if you're shooting j pegs on the other hand there is not a big advantage to pre adjusting your images beforehand because the processing of your binges was done in the camera in you have already removed a lot of the advantages of starting from the original because you don't have the original you have a processed version already you can just stitch it in adjusted afterwards it's just the raw file see what it would just first get us much out of this he can so here's how we end up stitching a panorama I have a serious of images here I'll click on the first one ah hold shift and get the last one in bridge I go to the tools menu cheese photo shop and that's a choice called photo merge be nice if they named it panorama merge or something else but photo emerges for stitching panoramas ifyou're in light room instead you go to the photo menu you choose edit in and you'd find a choice of merged to panorama or some similar wording that would send you to the same feature we're about to get to now, when I choose that, of course it tells me photo shops busy with something well, let's interrupt, photoshopped clicking, yes, it never is busy with anything uh, here all it's doing is in the middle is it has a list of all the files it's that I just had selected if for some reason I included one too many, I could click on one here and there's a remove button. I've never really needed to do that, because if you start from bridge, you can see the pictures, so if I you know, I don't usually need to see this middle portion, you could just ignore it. Um, you could also add more images, that kind of stuff, but you just don't need to usually mess with it. On the left side, you have various methods for stitching panoramas. You're pretty much telling photo shop. What is it allowed to do when it comes to distorting the image is so that they might fit together in the choice of the top is able to choose from all these options general and it's going to attempt to choose what it thinks is the best, and you, khun, just start with that and the main thing is if you don't like the end result you could start over again enforce it to use one of these choices by choosing something other than auto but most the time otto is going to be fine for most purposes it's mainly if you notice unusual distortion in your pictures like buildings that seem like they're curved after you're done stitching might want to come in here and choose one of the other choices that type of thing and then at the bottom we have three check boxes were just going to use default settings the main thing is we need to just double check that blend images together is turned on if you don't have that turned on then you will not get a seamless panorama instead it'll just be individual pictures that might line up but you'll be able to see the distinct edge where one picture ends and the next one begins because it will not attempt to match the brightness or the color so so in general in here I'm not changing anything at all default settings just click okay now it's gonna take a while for it to stitches together because these air full high resolution images and I had quite a few of them and you'll see it over here in the layers panel we'll start to kind of build up and it'll only update the layers panel when it feels like it but it will do it and it'll slowly stitch it while we're doing that we can switch over to bridge and start pre processing other images you know, getting ready to stitch other panorama zehr doing other things while photo shop is busy and this is when it should actually complain if I told it to stitch another panorama because it is busy doing something else all the other times it hasn't been so let's look at was preview some of the other panoramas we might stitch together while we're waiting for that one to finish so first off you don't always think of a panorama is being horizontal we can also have vertical ones, so in this particular case we have a waterfall and I got the top of the waterfall here in a separate shot I just got a little bit further down because I didn't have a wide enough len it's to be able to get the entire waterfall I think I'm standing on a bridge possibly and so there's no way to back up because the bridge would get in the way, but I could tilt down and get a little bit more so that it's just a cz much of a panorama as the horizontal kind also a few other things is when you're doing a panorama if you want the largest panorama the one that you could reproduce the largest uh turn your camera so it's it's um if you end up shooting the the panorama is vertical shots, then you're getting the most pixels in the smallest dimension of your picture and the height, and you'll have more pixels than if you turn it the other direction where the shorter dimension is the vertical. So if you shoot with your camera and what people call portrait mode, uh, then you're getting the a higher number of pixels on the vertical dimension than you are. If you're turning it makes it so you can reproduce it larger when you shoot your panorama it's also important that you get to things in your camera to be level whatever part of your tripod, if you're using one that rotate it's, whatever the bases of that needs to be level. So if it's something you loosened on your tripod and you, khun, rotate whatever the base of that is needs to be level. If it's a good tripod, it'll have a bubble level right there where you khun look at it and leveling the second thing you need is the top of your camera. We're just your camera in general to be level in a lot of cameras these days will have elektronik level built into it mine has it he's got to find it in the menu system, where I can tell when it's level or not and if you don't have one of those you can get a level that you slide into the hot shoe of your camera where the flash would usually go and you could look at that but if you get both the top of the camera and the base of your tripod where rotates around to make your panorama to be level then you won't be going uphill or downhill as he rotate and you'll be able to be more successful with your panoramas and let's see here photo shops done so I switched back over there and this is our end result so it was able to stitch all those together but in doing so it does not produce a rectangular picture you almost never get something that's a perfect rectangle and it could have cropped it for you which in some ways would have been nice so you wouldn't have more work to do but it's also nice that it doesn't crop it because that would force you to discard certain things you might not want to so let's take a look so here we're in photo shop we haven't talked about photoshopped as a whole will do that in a few minutes here for now all I mentioned is just like in bridge if you want to collapse any little panels that show up in photoshopped you khun double click on their names remember how we could do that with the choice called filter in bridge and things so if I want to get something out of my way, I'll double click on its name to collapse it down, and I mainly just wanted you to see here the layers panel here we have one layer for each picture. I know we haven't talked about layers yet, but all it means is each one of those pictures is a separate piece, and if I turn off the eyeball and each one, I could hide each piece, so if I turn them off, you'll see him starting to disappear because I get rid of those pieces most of the time. There's not a useful reason tohave them a separate pieces like that there is on occasion, but not for the majority of panoramas. So the first step I usually do after done I'm done stitching a panorama is I'll go up to the layer menu, then there's, a church choice called merge visible, emerge visible means to combine together all the layers that have the eyeballs turned on so that they become one piece instead of being those separate layers. Now, that's different than flatten image flatten image would merge those layers into one piece, but then it would do additional steps, like taking the empty parts of my photograph, the part that in here looks like a checkerboard. In filling it with white and there are a few other things, but in general I don't want it to fill those areas right now, so I'm not choosing flatten emerge visible. Now if you look at my layers panel, we have one layer we simplified this image, which causes the file size to go down and it makes it so we just have left less to deal with. Now when it comes to our panorama is we have a couple things when you deal with the first is cropping, and so to crop of panorama, we have a crop tool in photo shop on the left side is our tool panel, and right there is the crop tool in a newer versions of photo shop. When you choose the crop tool, it will put a cropping rectangle on your picture automatically and it's just up to you to grab the edge of it, pull it in where you want it on each side and in this case, pull it in at least far enough to get rid of the little checkerboard. The area that showing up that indicates an area that's empty and you compress returner enter to say you're done in this case, I missed a little part of the left edge I don't know if you can see it, I'll zoom up on the screen, you see little checkerboard on the edge I missed I can just switch back to the crop tools which out back you get a new cropping rectangle and here's the problem if you try to crop out a tiny amount on the edge what you'll find is it snaps to the edge you get it within about four five pixels of the edge and just snaps there to prevent snapping there's a trick and that is after you click your mouse button not before but after you have the mouse already pressed down holding the control key on your keyboard for the length of time you have the control key held down it will not snap to anything the length of time you have the control key down it will not snap to anything like the edge of your document because oftentimes use the crop tool and you notice that snapping to the edge of documents or other things and you can't finally adjusted so first you click your mouse button on one of the handles that you would use to adjust the cropping and then while you still have the mouse button held down press control on mac or windows the only thing is keep control held down until you let go your mouse a lot of people I find try to let go of control at the same time is the mouse or something and if they happen alecko of control before the mouse gets released it goes back to snapping before you finished moving it so you like over the mouse then like, oh, control so there's her panorama now let's, go back to bridge and let's talk about a few other things we might want to consider first we could stitch are vertical pan around here, I'll select these two images tools, photoshopped photo emerge default settings just like we did before, and you'll see now because I had to tell my camera upper down when I did this panorama just like with a building, it might have to tilt it in our out to compensate for what's going on, so you'll notice a little more distortion in the shape we still have the two layers because we had two images, I'll go to the layer menu just like before and choose merge visible to combine those and I grabbed the crop tool it is pull it in to get rid of the areas that are not really defined here. Later on, we'll learn how to actually fill in those areas that look like a checkerboard if we needed teo because on occasion what'll happen iss you'll have a panorama where you get this slightly unusual shape when you're done like it bulges in one spot or something and there'll be just the littlest bit where if you left it looking like a checkerboard there, your crop would be perfect, but there'd be a little checkerboards over here somewhere and you'll learn how to fill it in with artificial information that just looks appropriate, and we'll cover that later. It's just we haven't really gotten into photo shop yet as far as the interface goes and how to think about it as a whole. So it's going to be on what we should do yet, but there's our vertical panorama, then let's talk about a longer panorama. Here is a panorama of seattle skyline let's look at the individual shots first off notice that I shot them vertical vertical means I'm going to get more information in my panorama because there are simply more pixels in the long dimension of your picture, as there is in the short, and if you put that vertical it, it makes it c of the most information in the height. So here's the panorama, the individual shots, usually with panoramas, I try to get at least one third of an overlap between shots sometimes go as much as a half, you can have issues with panoramas, I'm going to run into one of them with this and that issue see that fairy, that fairies moving, and so if I pan around here, it could be in a different position in the different shots and either show up twice goods in two of my shots or the wake behind it. Can be broken up because the wake is different you know by the time I move my camera it changed its shape and I think I'm going to end up with that somewhere over and hear this part of the wake or something so there might be some additional retouching needed here maybe it was that ferry anyway that's my panorama you see all those shots now for me is stitched that is going to take a lot of time because that's just a lot of data each one of those images is I believe if this is the camera I'm thinking of twenty two million pixels times twenty four images that's a lot of data to process on a laptop yeah, so here's a tip you can use when you're just want to test it because remember when we're in the photo merge dialog box how on the left side there was more than one choice we happen to use auto but it might not always be the best choice wouldn't it be nice to be able to test this without this much data to see if it's gonna work out so here's what we can do? I'm going to select all these images I can do that by typing command a select all where I believe it's under the edit menu that's where you find select all I'm going to choose tools photo shop and there's a choice in here called image processor english processor is a great tool for quickly preparing images for clients all it does is it will scale your images to the size you tell it to in save them in the file format you tell it two it's doing that to a copy of your pictures that means it leaves your original sitting right where they were and it says hey I'm going to save out some small j pegs of these nine hundred pictures I have selected or something so you don't have to manually open them and scale women and save them and so whatever I'm done with a project and I want to give the client their images I don't give my raw files they don't usually get those I don't want him to see how shitty the pictures were before I adjusted them I want them to see the great looking images they looked like afterwards so I choose the image processor and I scale them tow the appropriate size and get him sent out so let's take a look image processor remember its tools photoshopped image processor you don't have this in light room because in light room you instead have what's called export presets and that's where you could do the equivalent so this comes up at the very top you can ignore the part this is open first image both been first image to apply settings that would be if these were raw files that had never been processed ever you could open the very first one, you could process it on camera and when you clicked, ok, it would apply the exact same processing all the other images. I don't usually generically process my images like that, so these have already been adjusted so I could just ignore that top part. I don't have to do anything below that. It just wants to know where should it put the end result? If you say saving same location, don't worry it's not going to save over the originals. It will create a new folder within that location to put these in. Or you can choose select folder and that's what I have chosen and this is set to go on my desktop and that's, where I usually have a go. You've just hit the select folder button. This is a standard open dialog box like you get in any program like microsoft word or anything and you could navigate whatever full do you want. And if you quit the open button, it would specify that is the folder you're saving too. All right below that you have the choice. Three different file formats to save in, and you can even saved all three at once with that, why would you want to save more than one at a time? Well, what if I want to email a client really small versions of the pictures? I mean, tiny versions because they're very fast download they can look at him on their iphone and then I could save out some tiff files that are full size and I can upload those two drop box if you're familiar drop box er in so I can email the client that j pegs and say, hey, if you need in these high rez they're over on dropbox go, graham and you know they have two sets then the laura's I emailed the high rez who put somewhere else, but there isn't the choice in here of saving more than one version of a j peg, so you'd have to run this twice if you wanted high rez j pegs and small ones. All right, so anyway, say this j peg is what I'm going to use and here's his resized to fit and weaken type in how many pixels wide and how many pixels tall we want. I really wish they'd make this be able to be changeable two inches, you know, but they don't allow you to. So anyway, I'm going to put in nine hundred that's fine that's a relatively small size because the original images might be five thousand pixels on the width and this is going to get them down considerably then the, uh quality setting is the jpeg quality setting lower that is, the smaller the file sizes with lower the quality is nine in this case that's fine, I'm not overly concerned with us because we're on ly previewing something I'm not going to use the end result, I'm just going to see if it looks good the check box below that doesn't matter from what we're doing, but if you're going to give any images to clients in there, not overly versed in photo shop in digital imaging as a whole, turn that check box on it will make sure that the colors that you're seeing look, they see something similar to that I know you'd usually want that anyway, even if they are versed, but there are some pieces of software they can use that are what you could call dumb software that make assumptions about your images that if those assumptions aren't true, would make your images look wrong and that makes their assumption right, which is like the it's, not the most ideal check box, but it is thie make this universally so that even really dumb software won't screw it up. If they're overly professional people, it wouldn't matter you could leave it off ah, then let's see here I'm just going to click run. So what have I done in general? I open this up I told to go to my desktop I typed in nine hundred pixels the actual number is not critical the main things it's relatively low uh and I'm hitting run now what it's going to do is it's going to open each one of those images it's going to scale it down and then it's going to save it on my hard drive and if I had a whole bunch of panoramas to stitch I would do this when I'm going to lunch or I would do this so I'm just going to go get a coffee or something and it's just gonna open each one, scale it down and now it will be able to do when we're done is we're going to stitch those low resolution versions because the stitching will happen darn near instantaneously because there's not very much information to process and therefore if something doesn't look right and I need to try it again and use one of the different options that are in the photo merge dialog box I'm not going to have to sit there and wait forty five minutes for it to finish stitching that many pictures that are high rez to see what the end result would look like on ly when I've confirmed that I know the right settings to use will I go back to the original ones and apply it to the high risk as I go off to lunch or something else because it's gonna take a while because with that many pictures that would take a while to stich, that all depends on your computer speed. So anyway, we'll wait for this to happen, and then we'll stitch that up so you can see it being done to lore as any general questions about just general part of panoramas, let's see, I think we've got one from e, fergie and one other person want to know this? Is it better to correct the lens before you stitch the panorama? Uh, yeah, it's, it's best just like with hdr? Well, with many things it's best in this particular case to get much out of the images you can before you stitch it because the moment it stick it in it's no longer raphael so you can no longer get your extra highlight detail or shadow detail, or we're very clean color correction, which are the main advantages of raw, and when it comes to lens correction, that means like if you're any straight lines or being bent, uh, it would be best to have that corrected first, so that means in the lens corrections tab, the the options that were in there be great to have a turn on, so yes, that would be a very good thing to do one more and then we'll go right over here. Uh uh three people want to know what's the difference between merge visible and merger layers merge visible on ly combines together those layers that have the eyeball icons turned on um merge layers doesn't care if the eyeball icons are on or off it's just going to merge those layers so it will merge the layers you have selected regardless of their visible or not it would combine them together eso it's uh imagine imagine you had thirty layers and you want it all but three to be merged you could turn off the eyeball icons of the three you don't want to be merged she was merged visible which would combine together all the ones with the eyeballs on and in turn your eyeballs back on on the three layers that you had hidden previously you would have what you desire, which is to merge everything except for three that made any sense. It's perfect. I'm wondering as faras taking thea the panorama as is their particular order that you need to go in like top to bottom to top or right to left in order to make sure that everything stitches tio together we go in a particular order but it's best to shoot from left to right the main reason for that is so that when you view your images here in bridge you recognize it as a panorama? Because if I viewed this set of images here in bridge and I look at it zooming out a little bit here, can you get the sense that this is a panorama just by glancing at it? Because you can kind of see the continuous nature of the the image now had I shot at the other direction, which here I should be able to do? I'm just going to change my sorting order and let's see actually gonna do it up here. There's a little icon up here, this here, I can say my sorting order let's sort by file name, and then this little icon means, should I reverse the order? If I click that s o I'm going to do that, which should change the order. Okay, now look at this and because it's such a long panorama, it's still somewhat recognizable, but now when I look at the individual images, this one doesn't necessarily look like it relates to this one or this one, and I don't really get the feeling of exactly how those would come together because they're in the wrong order. This one should be to the left of that one. This one should be the left of that one, you know kind of thing, so on lee, so that they visually look somewhat like a panorama when you view them in bridge would be best if you shoot it from left to right, but you could get away with doing it the other direction and not messing up because what often happen if you don't do it that way is you go, why the heck did I take this picture and you'll just say that's, a terrible picture and you'll delete it, and then you won't have that piece of your pan around because you didn't realize it was part of the greater. So if you have issues with that, what I would do is before he should've panorama take a picture of your hand pointing in the direction you're about to scan. If you're going to scan left, point your finger that way, take a picture and put it right in the frame, and when you're done with the panorama, take a picture your fist. You ever see a picture of your hand or your fist, you know, beginning of it panorama end of panorama in therefore, that is, if you have issues with it, you can kind of get around it if you just do a little bit in the field, but technically there's, no reason you have to go one way or the other.
Class Materials
bonus material with purchase
Ratings and Reviews
a Creativelive Student
Ben, thanks again for this course. I have taken and purchased quite a few of your courses to date. I keep thinking I will only watch to make sure I am on the right track and you always bring more to the table than the last course. Your teaching methods are the best, sorry to all the other instructors from Creative Live, but you are very easy to understand and you speak in layman's terms so we all can understand. I am following your instructions and working along with your files and it is the best! It is hard to keep up with you even when I watch you on one computer and work with the same files on another computer, to do what you are doing...impossible but I gain so much by trying. You provide so much info on each topic, it is amazing. Thanks to Karen for the PDFs, she does a fantastic job and also, for her templates/layout documents. Thanks again and to anyone who thinks this is too much money for all the videos, the exercise files and the instruction PDF, I am sorry to say but you are mistaken.
John Taylor
Like all of the Creative Live courses, excellent training. Ben does a great job of explaining the entry part of Photoshop. A lot of things cleared up in my head and i like his easy pace into this complex program. Thanks Ben.
Cecily
I had several "lightbulb" moments with this class, after many years of photography and when you think you know it all, you don't :) Ben Willmore is an excellent tutor, with his many years of experience teaching PS, he obviously knows the types of things a lot of us struggle to understand. I learnt a lot about Bridge, and have since implemented these things into my everyday workflow, so much easier to sort out what I want to keep etc.. Thanks so much Ben and Creative Live. Thanks also to Ben's wife for her amazing work creating the Guide etc. Even though being in Australia, I pay more for the courses (the conversion rate, the aussie dollar is low at the moment) it's very worth it to me. I have paid more for courses here, and learnt next to nothing. Thanks again.