Lesson Info
2. Photo Basics
Lessons
Class Introduction
15:02 2Photo Basics
10:09 3Exposure Control
16:46 4Camera Controls: Top Deck
10:33 5Camera Controls: Back Side Control
28:54 6Camera Controls: Back Side Control Continued
42:49 7Left Side & Right Side, Bottom and Front
15:13 8Lenses
14:22Lesson Info
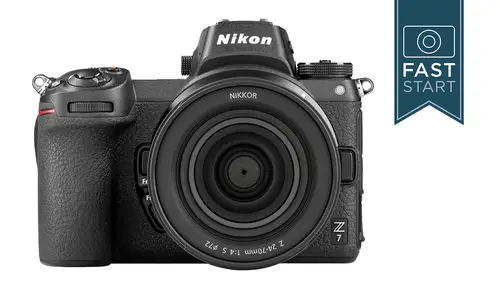
Photo Basics
Okay, this next section is Photo Basics. It's for anyone who's kind of new to interchangeable lens cameras, who just, you know, doesn't mind brushing up on some of those basics a little bit. This is a mirrorless camera, but we have interchangeable lenses like we've had on cameras for quite some time. In the lenses is an aperture that can vary the size of the opening, which is good for exposure reasons. You can let in more light or less light with the different F-stops that you choose. Each one of these F-stop settings is either gonna double or cut in half the amount of light that you let in. Beyond controlling the amount of light, it also controls your depth of field, or how much is going to be in focus in the field in front of you. So, 1.4 is gonna give you very shallow depth of field. Those red lines over on the right-hand side of the screen are showing you an indication of the front edge and the back edge of what is in focus. As we stop the aperture down, we get more and more depth ...
of field, until we get down to f/22, which is gonna be the maximum depth of field, at least on this lens. Some lenses will stop down beyond 22. It's gonna vary from lens to lens. Once light comes in through the lens, it needs to get to the sensor, but before it can get there it needs to get past the shutter. The shutter has two parts: a first and a second curtain. Now, with a mirrorless camera, in order for you to see and frame up your subject, these shutters need to be open so that light can get back to the sensor so you can see what's going on either on the LCD screen on the back of the camera, or through the electronic viewfinder with your eye, camera held up right up to your eye. What happens with the shutter is kind of interesting because with the mirrorless camera we start with it open, and then it needs to close so that the sensor can charge and be ready to capture an image. And then it opens, this is your exposure, and then the second shutter comes down. The sensor turns off, captures the image, and then the shutter opens again so that you can see and compose for the next shot. The shutter is important for controlling light, it's the primary thing, and then secondary, it also helps control how sharp or blurry moving subjects are going to be in the frame. So you would choose appropriate shutter speeds to what you're trying to do for a particular photograph. Those are the key elements in this mirrorless camera. Now, one of the most important things in any camera is the image sensor, and specifically the size of the image sensor is very important. This camera uses what is considered to be a large sensor. There are larger than this, but it's still, in the general sense of things, a pretty large one. It's based off of 35 millimeter film in size, and there are many other cameras out there that have smaller size sensor. This one is known as full frame 'cause it's the same size as 35, and as I say, there are many other cameras that do have smaller size sensors. In general, the larger the sensor, the better quality images that you will get from that camera. So, if you would like more information on cameras and photography, as I mentioned, I do have a couple of classes that you might wanna check out if you haven't seen them. The shorter one called The Photography Starter Kit for Beginners, it's about three, four hours or so, and gets you through all the most important basics very quickly and clearly. Then if you wanna dive in more deeply into all of the subjects and have lots of additional topics to go over, my full Fundamentals of Photography is a very in-depth class that will take you and explore all different aspects of photography. So, you might wanna check both of those out here at CreativeLive. Okay folks, it is time to get into the deep part about this class into the camera settings. We're gonna be going through a tour of the camera. We're gonna talk about all the buttons and dials, and everything you can see, and turn, and press on the camera itself. So let's talk about some of the basic controls that we're gonna be using for a little bit of everything. Obviously, turning the camera on is gonna help out going through this class. When you turn the camera off, the camera goes through an automatic sensor cleaning, and what it does here it tries to knock all the dust off the sensor. Any dust on the sensor will manifest itself as black spots. You'll notice it most like on a bright sky. It'll just be a black dot. At first it looks like a bird, but then you go in and you realize, "Oh, that's a round bird." That's probably a speck of dust, and I'll talk about cleaning the camera a little bit later on. That is something the camera will do on its own. The shutter release for taking photos, also for waking the camera up. The cameras, all cameras tend to like to go to sleep to conserve battery power, and just pressing halfway down on that shutter release will wake the camera up. The main control dials on the back, which is the main control dial, and on the front are called the sub command dial. I will probably forget these names throughout the class, and I'll just call it the back dial and the front dial. We're gonna be using those for changing shutter speeds, apertures, going through the menu system, and doing a whole host of different things on the camera. We do have a major control for switching between photo and video. We will talk more about this as we get into the class, and so if you wanna take still photos or you wanna shoot movies, very different modes 'cause the camera kinda remembers what you're doing in these two very distinctly different types of scenarios. The multi selector on the back of the camera is another name that I will probably forget, and it's the up, down, left, right control, usually used for navigating the menu system and selecting items in there. You can also use it for moving the focusing point around. The OK button is the confirmation button, so when you select a new feature that you wanna enable, you're probably gonna go up, down, left, and right, navigate to it, and then say, "OK," that, "Yes," this is the one that you wanna do. We do have a second controller, the sub-selector. It's primary duty is moving the focusing point, but you can also use it for doing other things in the camera as well, in some cases, so be aware of that. Finally, we have a touch screen, so this is something that you can use to focus, you can take photos, you can navigate the menu system, you can scroll through images and playback. It's a pretty responsive system that works quite well in most every single mode on the camera. If you don't like it because maybe your nose hits the screen when you're holding the camera, you can disable it so that it's not being used. Now, a quick word about some of the Nikon buttons, specifically the ISO and the exposure compensation button. On these buttons, the way they work is that you need to hold them down while you are turning the main command dial, the dial on the back of the camera. This is kind of a safety protocol so that you don't accidentally press the button and do something that you didn't intend to do, and so it's a two-finger affair in order to do this. If you do not like that two-finger affair, there is a way to get in and change it. If you go into the menu system, the custom setting menu, group f for controls, f6 to be exact, there is a feature called release button to use dial. In this case, what you do is you press down on the button, and then you release the button, and then you have pretty much as much time as you want to turn the dial and make that change. That way you only need one finger at a time. This little box that you see on screen here is something that you will see repeatedly throughout this class, and it's called a short cut. It's for those of you who are watching the class and you are wanting to go in and make that change right now. I'm gonna give you that short cut step so that you can go in and change your camera as we go through the class. If you just kinda wanna follow along and you don't wanna jump ahead, don't worry. We're gonna come back and we're gonna cover that particular feature when we get into the menu system, specifically the custom menu and the control section, we will talk again about this particular feature. The shutter release, obviously used for taking the photos, actually controls a number of other features as well. By pressing it halfway down, it wakes the camera up, if it's been sleeping. Also, if you are in the menu or you're in some other place in the camera and you're thinking, "I just wanna back outta this thing "and I wanna take a photo." Press halfway down on the shutter release and it automatically kicks you back to the start, you might say, and gets you out of whatever menu you might be in. It's also gonna start the metering system, and then when you press all the way down, obviously you're taking a photo. So, just be very familiar with that halfway position on the shutter release. One of the things that has become quite popular is something known as back-button autofocus. This is where you are pressing a button on the back of the camera to focus, and when you press the shutter release, the only thing it does is take a picture, probably turns on the metering system, but doesn't have focusing associated with the shutter release. Now, putting this camera into back-button autofocus is really, really simple. You simply go into custom setting menu a, a7 to be precise, and you turn off the AF activation that is associated with the shutter release. So when you press down on the shutter release, it will no longer activate the autofocus system. You'll have to use the AF on button on the back of the camera, and this can be a great way for just giving yourself a little bit more control over the camera so that you can specifically focus in one case and just take pictures in the other case, and not have the two combine. It's really nice when you wanna focus on a subject but you wanna move the camera around, and you don't wanna have to refocus every time you end up taking a photo. It's a feature that I use and I really like on my cameras, and so I encourage you to give it a try if you wanna have a little bit more control on the camera.
Class Materials
Bonus Materials with Purchase
Ratings and Reviews
Edward Luczak
I love all of John Greengo's classes. Now he is a Canon man but he gives the Nikons a fair review and his lessons on them are excellent. I have the Z6 and I picked up a several pointers I had not run across yet, so this course has paid for itself already. The only negative I have, and hopefully this is because the course was streaming, but the camera focus was off when the video was zoomed into the Z camera. John may need to give the creative live camera operators a lesson on focusing. Great informative course at an excellent price.
JUAN SOL
Thank you very much, John! I've been using Z 6 for 18 months, so far, and now I've got Z 6 II as well and your training about these cameras is just an excellent job. Of course I've been following you in other trainings as well, like "Photography Fundamentals" (or something like that) and I've got some of your books too, all excellent, but with this Z 6/7 training have been useful to learn some new things and to remember others already forgotten. Thanks a lot!.
Lynn Fisher
Loved the class. Just bought the Z6ii (waiting for it to ship) , so this is a great introduction. Would greatly appreciate it if John could add one more chapter to this class - Tell us about the Z6ii and Z7ii updates. It seems Nikon has addressed a lot of the concerns (particularly 2 card slots), so it might be very helpful for folks trying to decide on which camera to buy. Thanks!!!
Student Work
Related Classes
Nikon Tutorials