Lessons
Overview of Supplies
02:28 2Adding Decoupage & Gesso to Base
15:17 3Paper Clay: Molding the Arrow
06:08 4Using Gelatos
07:16 5Removing Color with Gelatos
07:51 6Adding Clear Gesso for Doodling
11:00 7Intro to Doodling
06:48 8Adding Doodling
12:45Lesson Info
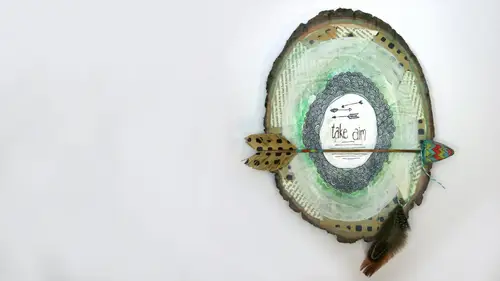
Painting the Arrow
So you guys in your kids should have the magical tv already dried taro ready to go in bubble wrap because they shipped it so it wouldn't break wrap them all individually in bubble wrap I don't know I just what I kid stuff I'm like oh my gosh it's going you know, allow different shipping companies khun b I've seen the videos on youtube I know what happens to my box chucked over a fence or something I just I want to make sure that they're all ok so we're going tio grab those on and then you can either use the white jess oh, or you can use the clear just so it's really up to you we just basically wanted prime things because what happens with the paper clay when it dries is it's a very porous and whatever you put on here is just going it's like when we did the wood it's just going to suck that write ups we need to prime the surface a little bit so you don't need a lot but you'll just seemed like a little bit of um either the clear or the white just so and you're gonna put a layer on and th...
en just try it quickly so that you've got a nice prime to surface toe work on and we did arrows today but you khun you know you can shape that clay into anything you want and add it to your to your piece so if you're home and you want to do a heart or you wantto these are great with this stuff works great with cookie cutters, you can roll it out with a rolling pin, cut it with a cookie cutter and dry it so or if you're like me and you have kids who have plato, you may have lots of the plato tools around they work good on here too, so put that on there and then dry it quick we're kind of going to go through a similar process than we did with when we added the color before we're just going to use the july does add some color and designed to the arrow just try it if you wanted to use paint, you could use paint you just using acrylic paint or something for this part of it that's totally fine we've got the gelato so let's use them I think were good this pallet ranger sent thes and they're technically for their alcohol links, but I use them for this too, because it just works really well, so I just kind of much some color down in there and then I like I said before it makes it really nice portable you can have all the different colors and then you can even leave some open and because they do mix so well I've made I've taken like a gold and a silver and mixed them together to get kind of in between color or I added a little pink so it gets almost that pink champagne he look to it and the little sparkles who is you could have a lot of fun mixing these colors around purple on their claim that I well that dries you can add some more water all right? So now I'm just going to add some color to this on that one I just kind of did like a chevron pattern, but I'm just going toe maybe do some stripes or something on here and just add some color to this if you just wanted to be a solid color and you can take the gelato and just color straight on there if you want I just wanted to add some pattern in some different colors other little thing that I do occasionally is I'll literally take my water pen straight to the top of the gelato and just pull the color like you would if you were using watercolors all those pull it straight from here and then put it on but actually do that at home that works well too because I'm going tio try the pink a little bit before I add the next color just so it doesn't smear quite as easily it still makes me a little bit if I mix them but and I've got more colors appeared so I could bring the bag back there if you guys want more to choose strong in terms of color. So at this point, it's really just about decorating it, making it purty. I won so intent and my last card and I am gonna paint the edges two of this, but I was going to get a solid color just because it's so three dimensional. I like having that kind of finished look to it. I'm gonna get my edges. So now you're getting a much brighter color without having to find nearly as much it. Is there a reason why you're holding it down? Just so the that water doesn't drip is that way. Just harmful let's put it on it. So I just want an answer. You know, technique for july? No, this was holding it because that was the easiest way for me to paint that's, actually. There you go, that's a good question we didn't drips earlier, so it would make sense that would come up now was going to finish that up. I'm going to drive this, and then I wantto add another layer of clear just so over the top once it's dry, but because of all the color that we've added. We just kind of want to add it in one fell swoop so that we don't blend too much together that we don't want blended together. We'll get this really nice and dry down all the foot see little bits, and sometimes I love the fifty little booth clear jesse was going to do when we put on here for this part is sealed the color, and and then we're going to put a little bit if you want tio, you don't have to I like to stuff too, sometimes like a little distressed. So my just a tiny bit of brown schelotto to the top of it and it's kind of a distressed look and by doing the layer of the jess so in between, that protects the bottom layer so you don't get the smearing in the mixing of the colors, okay, so now my paint should be made a lot of should be drying up to do this it's gonna go over it, getting a little bit of smearing because I didn't do it all in one fell swoop, that's okay, we'll do the edges to just to seal them in and then try again at this point, it's, like, put a little line dry a little bit, put a little on dry a little bit it's, kind of where we're at. And again, if you're home and you don't have a heat and you can use a hair dryer it's just going to take a little bit longer for it to dry. So now that I've got the player of jess align here, I'm going to take the brown I'm just a tiny bit I'll hand it back to you guys to have it if you want it or you could do a black you khun d'oh are just a darker shade of something if you want I'm using brown because that's just what I like to use but anything you want to add shading or if you're not a shading kind of person, you don't have to do this at all, but I wanted you to see it just so you know what I'm doing, so I'm gonna put it on my water brush on I'm just going tio go around the edge and then anything about paper claims you get little pits and valleys and then stuff like this was kind of stick in there and you'll get to see some of that texture a little bit. I was braver, this is almost times I'm not brave, I would just take the brown right to this and just color right on and wipe it off, but if I did that for some reason something would go wrong today and it wouldn't all come off so not doing that. So I want to take my baby white and just kind of rub it, and it really kind of meets the colors down and gives it this kind of really distressed look, that just completely changes the way that it looked before and again, you can leave on as much as you want or take off as much as you want, but it's cool because that brown then gets into those little pits and groups within the clay itself and just kind of gives it a little bit of character. Not doesn't seem so flat, and I do that all the way around again just so it's, kind of a nice finished look to the whole thing. Okay, so one more time I'm gonna kind of dab this off in case any of the other, a lot of colors transferred. I'm just going to do a very quick swipe of the clear gelato on the top and the sides and give it a little dry way. Are the arrows coming along way like it? I'm ok, because if you don't, you could start over it's, okay? If you get done and you're like this just really isn't turning out the way I want it's okay to start over and I want this last layer to be really drive because I'm gonna take my pen and I'm going to doodle on the arrow so what I put that last layer of clear just align its to seal in the brown but it's also so that I can go in here and add some hand drawn lines as well and again it gives it that to hang on to and you could actually if you wanted to you could um distress the edge is the same way of the actual piece if you don't like your color being so brave and you wind at a little brown to the edge with the color you've got the jeff so on there so just remember you got that it's going to grab on to that a little bit but he really wants you you can do that too let's avoid the area that you already put pen you don't want to hit that ok so I've got this decision oh it's good thing I didn't start writing because there's one spot that's tacky and I would have clearly ruin my pen that's why we check these things this is the thing that I could never say enough when I teach classes is when you're before you put pen to anything dry dry dry, dry, dry, dry, dry because I don't know how many times will something like this try enough that I'll be like no tonight it's fixed that like popping tacky sound you're like no. Well, my penn will work. I know your plan won't work because it's wet it might not you might not think it's what? It's? Not like you know, but it's if it's tacky and those kinds of things it's not gonna work so it's better to be overly annoying, the cautious with it then ruin pens unless you work for pen company and you just get an unlimited supply. But I don't, so I'm just going to take my pain and I was going to kind of outline the little paint lines that I drew and then I was going to kind of go around the edge and black out the whole thing make it my arrow again. This is just chicken scratch doodling this is not precision by any stretch of the imagination. Nothing about this is precise. They're just kind of defines those little stripes and just gives it a little bit of life and that I'm actually gonna take my pen and just had a few little dots in and just kind of make it its own little, many art piece in a way maybe a couple scallops here in there this is a good, fun well exercised a play okay, so I do it all over my little arrow as much as I possibly can so I'm gonna get this stuff out of the way I'll bring you back your palette so you've got it and then we will move on tio rest of it thank you very much. I see all kinds of arrows over here one I know and I'm like blue ones that was cool just it's such I like how you ok so she left that not in there and she doodling around the night yeah it's really cute I called my husband loved ball oh that's I mean that's like she took that a natural part of the wood and like hey that part of the art piece which is really, really cool and I like how everybody's doodles they're different tio like that's really now see she's taken lettering classes you can understand it's like really good like like she's like the fancy this all going on and I like it block letters I know I saw that teo I'm like it's just the right way I just love it could you do you get such a great different result from h each person has takes it and does something different so it's fun to see and like some of the arrows air really light some of them are really dark it's just fun to watch what everybody does
Class Materials
Bonus Materials with Purchase
Bonus Materials with RSVP
Ratings and Reviews
Student Work
Related Classes
Mixed Media Art