Lessons
Overview of Supplies
02:28 2Adding Decoupage & Gesso to Base
15:17 3Paper Clay: Molding the Arrow
06:08 4Using Gelatos
07:16 5Removing Color with Gelatos
07:51 6Adding Clear Gesso for Doodling
11:00 7Intro to Doodling
06:48 8Adding Doodling
12:45Lesson Info
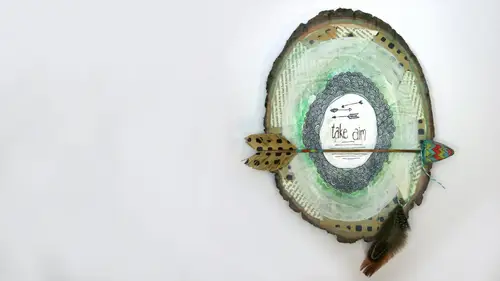
Finalizing the Arrow
You guys in your kits you have some, um baker's twine and then you also have a little packet of feathers and I just tie my feathers a couple feathers onto a piece of the baker swain and then tied that around um by the tip of the base of the arrow so I'm going to do that right now and get those started I kind of just do like a little loops and trying to catch it it's nice because there's a little fan in here like a little breeze happening but I know I'm using feathers so soon as I get it where I want it a little breeze will catch it didn't you? I usually start in the middle and then if I'm gonna do two or three work down towards one end this is another one those things like I was saying, you know all by buttons from vintage stores and stuff because somebody will have donated old jars of buttons this is my kids are gonna have the weirdest things to donate when I'm going like my mom had weird jars of feathers and seashells and all sorts of things but that's how I roll if you don't have fe...
athers you could cut little ones out of paper to that's totally fine make little paper ones three I think title sign and then I'm just going to cut off the excess of that end when I'm done and then I'm just going to take my arrow and just kind of tie it on there it doesn't matter right now how it leaves when we glue it on you can use the glue to kind of spread stuff out if you want to make sure that the feathers are facing a certain direction or laying a specific way you can do that then right now it's just attaching get that tight on there and again this is one of those things if you're not digging the feathers are feeling it you don't have to put him on I just think they're a fine textural element to the to the project so I like having them to see if they're really long so what I'll probably do when I glue it down is like cheat a little bit with the glue and get on how I want them and can you can kind of play around with it then but for right now kind of like this for the last part of building our arrow it was the last part for building the arrow is I used some of the wrapping paper if you want to use the wrapping paper you can if you would rather use the vintage papers, you can do that too it's really up to you um to create our little little feather d bits of the end of the arrow so I'm just going to cut my paper down get it to a workable bit here and then I fold it in half and mace crease on it because what we're going to do is cut it to create the fringe so I leave it like this and then I'm going to cut it down just a little bit more and this doesn't have to be precise I just go really slow because if I don't I know what happens I'll be cutting my little fringe and then all of a sudden halfway through I'll cut through the whole thing and lose half of what I just did so the first part I do is just cut off so that I start with an angle like that steve kind of when you open it up you've kind of got this look to it but then all men and it was followed that angle of that line and snip down about a quarter of an inch from the fold and that'll start to make the fringe for your peace so this is time while I sit down and really focusing on what I'm doing because every time I do this and I'm talking or not actually we're really looking at it I'm asking if you've got the fancy fringe scissors if you've got those you can use those for this I just hand cut all right I'm just gonna keep coming down this is one of those times when I feel like I should be doing people are turning in going, we're watching someone cut paper earlier we watched them drying paint a literally watching paint dry, and now I'm watching someone cut paper who exciting? So then well, do is grab a second piece and try to kind of get it almost of the same size, it doesn't have to be exactly that way, it's fairly symmetrical this is one the only times I will use that word like you mean it symmetrical? Um, so the other side is about the same about the same size, so I like to get really I'm really weird all increase this one hundred times because I just like a good case, all right? So you can cut it right about there and where you check it that looks pretty good and and its use the other one has my temple, it basically toe get it started and then slip it down and so we'll do the same thing again and just trim it, but you can use any paper that you want for this, they said you can use the vintage paper, you've got really cute scrapbooking paper crafting paper you can use that I just like the way the dots added a little different look to the peace when it was done, so now I'm to the end and once I get to that corner I'm now going to just cut the whole thing off like that I'm into the same over here was gonna take that piece right off of there, and you've now got your friends for the end of your arrow, and this is where patients, you actually have to have a little bit of patients because you're gonna put the glue on and hold it in place, and if you let go too soon, it's all going to fall off, and then you'll start over again and I just, you know, I find that frustrating, so it's just easier to be patient with it the first time and do it. So I'm just going to run a little bit of glue, a little bead right along there, but I'm also going to put a little bit of a bead along the wood, so it's kind of like glue, glue contact, which sometimes that's the best way to get confusion, especially when you're working with little bitty bits like this and we're going to sit here and hold that, and we're going to watch blue dry for a minute advised all sorts of stuff dry today was going to hold that in place for right now, and I'll do the same thing on the bottom of it. I can already tell the french is too long someone determined down now that it's on the arrow but again it's like I'd rather have it be a little bit too big and be able to cut it back then have it too small and have to start over. How are you guys feeling about your arrows? Okay. All right. Okay, so it's lots of little flexi work. Well, potsie work. Nancy says she already made to project today in record time. She's, like I love that I could do everything along with this class, which is great that's what? We want our online audience today? Well, good. I used to have to teach in an event every year and no matter what your class was, you had forty five minutes and it would be like, ok, well, we can do this and forty five minutes and I'm like, ok, triple that and nobody ever finished and we would send them home with like all these half finished projects and I always hated that it drove me crazy, but they wanted to get a lot in in a short amount of time and I totally understood from a business perspective why they wanted to do that, but I'm one of those people that, like I want to go home with something that's if it's not done is at least eighty five ninety percent of the way done not all still half in a box and I have to try to figure it out on my own later some clad nancy's having fun at home okay I think that one's good enough that I can let go of it and we can watch paint dry or glue dry on the other side someone repeat the same thing that's a little bead glue down the spine of the fold whoa but on the wood and it looks white but it will dry clear it's ah it's a clear drying glow here we go arrows are coming together and after this dries I'll show you guys one more time slower that folding snip and all of that I'll sit here and hold just for a second though so in case I did that too fast I can do it again well let it just sit there on the edge for a second so just one more time when you go to make your fringe we're going to take your paper and you gonna fold it in half give yourself a nice crease and then you're going to cut an angle like this I'm gonna turn this down a little bit so you can see it better it's going to cut an angle and then all you do is follow that angle along and cut tio about quarter to an eighth of an inch from where you folded it and you're just going to follow that all the way along, take it to the end. Like I said, if you've got the fringe scissors, those were great, but this works just a swell. I'm just going to stop it right there and cut it off on. Then you've got your little fringe to put on the end, so when you are done, you have until they took that piece, was rift right there. But you kind of got this look to it, but then you can kind of once this is dry, well, kind of it's, really technical. We're going to small shape a little bit and just give it a little bit of texture to pop it up.
Class Materials
Bonus Materials with Purchase
Bonus Materials with RSVP
Ratings and Reviews
Student Work
Related Classes
Mixed Media Art