Lesson Info
2. Carving Text Stamps from Printed Fonts
Lessons
Lesson Info
Carving Text Stamps from Printed Fonts
Get my, um I'm gonna get my six b graphite pencil back out I'm going to get my template out I'm going to get my bone folder or burnishing tool out and my cutting matt and my rubber so I think the first one that I'll start with I'm going to carve two stamps today I start one and then a car another one where I'm going to show you basically what I have here see? Cut this out a lot of times people ask me you know, I do a lot of custom work so a lot of people send me their logo and it's not always, you know so easy black and white, you know might have color and radiance and shadows and things like that and they asked me, well, how do you know what's gonna print and what's not going to print basically see? Ok, what I have here is a positive image, it's basically, what I want to print is what you see there, the design the are the flowers that's a positive image. The flip side of that is carving the negative image where you put the design on some sort of background like a circle or square and ...
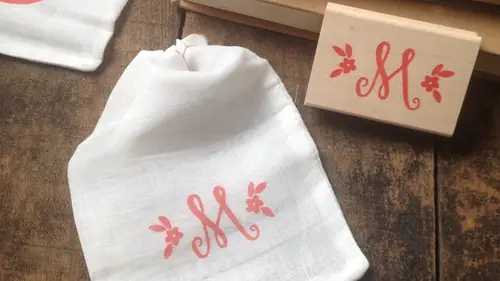
you carved the design a way so that when I go to print this um the background would be printing so that's negative this is positive so I'm just going to kind of touch on positive a little bit and then I'll show you the negative so I've cut out a piece of rubber or my template and I'm going tio flip that over cut out my piece to match my template and again like weed talked about in the last class I am just going to trace my design speaking once you've created a stamp, how long will it last for? Uh yeah that's a good question it will probably last a really long time the best way to make it last is to just take care of it because it is a soft material you know it can if it comes into contact with your scissors or you know, falls on the floor the dog gets it it's not gonna last I've had I actually a lot of people contact me I need to get a new stamp my dog ate it it is rubber so you know a lot of talks like that you material so keep it away from the dog. Um I like to store mine and like little jewelry gift boxes so that you know it's completely protected and also you want to keep it away from, like, direct sunlight and now if you've ever had like, an old pencil sitting out for a long time and then you go to erase something and it's like doesn't erase because the rubber hardened same thing can happen with your stamp. On what about the actual impacts? Hominy how long will they last won? How many times can you reuse them? Yeah, again, that kind of depends on how much you're using them if you're, you know, if I was carving this whole stamp and the whole time I, you know, lived was off that's obviously going to dry up quicker also depends on the climate that you're in. If you're in a really dry climate, those old, dry out fast, these the ones that I use, I like this brand that they'll last a really long time, and the other pool thing about them is, you know, how easy these are to get from a brick and mortar story. Actually, some local art stores do have these, but you can get re anchors on this is specific to this brand, so this is not here's my black ink pad, they're, um so I'll show you really quickly to just how this works, and if you do find that it's drying out and you've got your rate inker, you can just sorry, uh, just kind of squeeze some of it out, and then I like to with the tip, just kind of smush it all around. And kraft tiger was undoing custom when dealing with letters do you have to create the design backwards and said, do you have to create the design backwards when you're dealing with letters? So what you want to dio with text is you wantto printed out um or if you're drawing if your hand lettering it you want it you want your template to be as it is going to show up as you print it um I think you know, I got a little bit of ink on me let's see okay, I just wanted to finish if you really think it just kind of let it you know, you can kind of smush it in and I think they say that kind of like leave it there for an hour until it all kind of like, you know, gets in there, but you could probably use it right away so that I could keep them lasting a long time, but you know, in pads aren't that expensive if you need to get a get a fresh one, get a fresh one, get a fresh color um ok, back to your question about the text. Yes, oh, you wanted you want your template to be right side up if you were drawing directly onto the rubber, which I don't really recommend because like I said, if you're drawing onto the rubber and your pencils sharp, you're going to you know, probably invent the rubber a little bit and then it would it would show up when you go to print so what I've got is my template and I've traced in and now I just flick it a little bit to get any little bits of graphite off flip it onto the rubber don't move it furnished the design on ok, now it is in reverse closely, you know or how perfectly I guess where you tracing the letter because there's some there's some points and like really kind of intricate curves in that yeah that's kind of up to you sometimes I like to be kind of loose with it because I don't want it to look exactly like, you know, a font um I wanted to maybe look a little bit more hand lettered and you know, raw but that that's kind of a personal preference also you know, I just, um once I've kind I know that that flowers solid so it's kind of like I just kind of like sketched it in solid in my head I know that I don't need to, you know, cut out those little bits and pieces and stuff like that, but you know, for your first couple of times if you're you know, you're just kind of a little bit nervous and you want to make sure I'll go smoothly and you don't have any hiccups than you know trace it as perfectly as you want. Um, so get carving tools back out and I'm going to start carving my stamp. Now I'm not thinking of this as the letter r I am just thinking of this as a really pretty swirly design and notice that these curves are really, really easy. See how fast my tool is moving through as my left hand just guides my blade? I mean, my my blade is really almost not even moving like it's really that easy don't over think it, you know, um, just move along and you know that you know, this is that that three step process that we were talking about in the previous class, I'm starting with my number one I always want to start with my number one it's the way that I can create the first outline, and then I'll move on to my number two blade and then my number five and again to reiterate, you know, if you end up finding that you really like the number three blade or the number four blade, by all means use those. Um I just I really just like the one, two and five I feel like those air totally sufficient for me, so that's what I use, but you never want to start with the number five, um and you you really don't want to carve a hole stamped with the number one or the number two I've seen people do that because they're like I don't really want to change my blade and you know, the number one was working out for me so fine so I'm just gonna carve the whole stamp I guess technically you could I don't want to tell you can't do something that you know it's fun for you but if you carve the entire stamp with the number one what could happen is you're gonna have a lot of, um cuts all over your stamp you know this all this pink area if I did that all with the number one take you forever but also when you go to print it you're just gonna have probably like little it's of rubber ge flaking off and coming off onto whatever you're printing and so you just don't really want that it's going to make your stamp kind of, um not a sturdy ok, you'll notice what I've just done here is I've have carved the outline and I've left these spaces in between um in typography that those air called the counters the inside of us of the letter like for example, the oh the inside of the would be called a counter and I'm leaving that because if by chance as I'm going along with this number two and I nick into the side of the r if I had already carved that centerpiece of the r than I'd have like a hole in my letter s o the reason I leave it is say by chance I cut into the are a little bit I would just want to be able to modify my my design and still have enough rubber there to kind of salvage that that counter um I have the lines of this font are pretty thick, so I I don't have to worry about that too much, but for thin letters and small text that that could definitely be an issue, so just do it step by step I also get asked a lot. Um, you know what? Can you carve any font what's, the smallest you can carve? Um, that kind of depends on you know, how much patients you have and how much you know how much time you want to sit there and carve that the smaller the text, the harder it is to carve because, you know, as you can see, a carving, the lines of that are was just kind of easy. But if I had, you know, hole passage of text here, I would be sitting here for a long, long time that's why, you know, I do a lot of custom work and people are saying asked me well how much doesn't stamp cost I'd love to get a stand punishes the cost well how big is it how much text is in your design that's why I really you know really varies um I'm going to be making your stamp for half an hour I'm going to be making your stamp for two week so it really just depends but I have seen some really beautiful stamps you know, people are just so creative online right now too with d I y weddings and decor and people are car are commissioning people the carved like wedding invitation stamps I mean how can you leave like ah whole wedding invitation like hand car but how beautiful right be gorgeous and the fun thing too about um text stamps is um like I just I carved a stamp my friends are getting married and I carved a stamp of their wedding website and so it's so and so dot com and I said so after you're finished doing your save the dates and you stamp so in so dot com give it back to me I'll should shave the dot com off and then it'll be you know your name and you can use you can reuse it so I guess with like an invitation you could do the same thing or you could cut the date off and save the date lots of possibilities I see my time I think for the sake of kind of moving on, because you guys probably kind of are getting what I'm doing here, I'm going to kind of stop there and move on to the next type of stamp. But basically, um, and I've gotta finish stamp show. So I'll show you that. Two that'll be kind of my cooking demo like, and this is what it looks like. I'll move along, but I wanted to show if I were to finish this stamp right in front of you, you know, I would carve everything away. And then I would go in and get those those inner, those counters, just like I did with this. M I waited to the very end to carve the little loops in the m and the little dots in the circle.
Class Materials
bonus material with purchase
Ratings and Reviews
a Creativelive Student
Meagan gives you some basics on how to make a negative and a positive stamp. She makes it look so easy. I can't wait to try it. I watched the free version. Thanks. I didn't hear or see what to use to connect the stamp to the wood. Did anyone hear this?