Untieing the Cloth (Nui)
Lesson 7 from: Intermediate Shibori Indigo DyeingKaari Meng, French General
Untieing the Cloth (Nui)
Lesson 7 from: Intermediate Shibori Indigo DyeingKaari Meng, French General
Lessons
Introduction
02:46 2Creating the Dye Vats
03:40 3Nui Overview & Fabric Preparation
03:48 4Stitching the Fabric
12:25 5Testing the Vats
02:40 6Dipping and Rinsing Cloth (Nui)
07:47 7Untieing the Cloth (Nui)
06:25 8Batik/Wax Resist Overview & Fabrication
08:32Lesson Info
Untieing the Cloth (Nui)
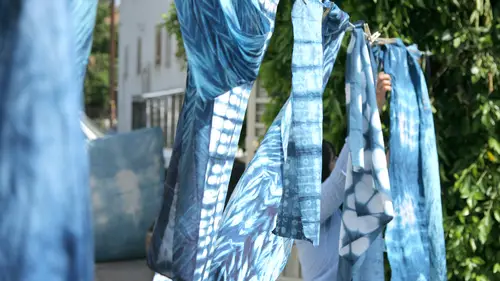
So now that our fabric is dried, we are going to go ahead and take out all of the stitching of our new e she bore e so remember this was our cotton scarf and we stitched it with needle and thread and then we pulled all of our stitches to create the resist, so this piece is still a little damp, but I think that's sometimes a good thing because then we can make sure that we oxidize all the ruffles that are on the inside. Um I always have a couple different pairs of scissors that I have on hand to cut out any of my she bore iwork, so for something like this, which is pretty fine, I'm going to use my stella light and I'm going to go in and kind of find where that not is, and I'm going to cut the thread right around the knot, which will then allow me to release the whole strand so you can see that we've got some nice resist there and remember, this is the single stitch so you won't get a cz much resist on the single stitch as you will on the folded stitch and I'll be able to show you the di...
fference in just a minute, so let's pull this sound and again, this is something that you want to take your time with because you don't want to puncture the fabric you wanna be real careful not to by accident cut into the fabric you're just simply cutting into the thread and another quick way to do this is you if you cut off the knot at one end that will allow you to pull the thread all the way through so you can see we're starting to create the scarf and you can see where we've stitched to put our resistance and remember when we stitched this I said pull as tight as you can to create the resist and the the tightness actually creates the resist that your scene now so you can kind of see the wave pattern a zay hold it up you'll see the wave pattern it's starting to come through so I'm going to keep doing this one one piece at a time and cutting out the knots the's air the most prized pieces in she boeri the new e pieces because the japanese put so much time and effort into their stitching a piece could take them you know up tio three years to stitch and then it gets died in less than a day but the work involved can really be very, very very time consuming and the more detail that you put into your stitching the more of a pattern or design that you'll end up with okay so after you have cut out your last thread but you want to do is you want to lay out your scarf and go back over it and see if there's any threads that are still woven into your fiber so these all look pretty good that looks great that looks great okay, so here's one and as you can see, I just didn't pull it all the way out seal just want to go through those and lift them has one too and lift it so that they come all the way out so here's another one and sometimes if you just pulled from the knot okay, sometimes I've bought into go pieces from japan and these threads are still in the pieces and I always think it's funny that you know the work was so well done and then nobody went back over it to pick out the extra threads but it kind of shows me just I love kind of handmade quality of it, so if you want to leave your threads in, I'm sure it'll appeal to some people. So this is the classic newey wave pattern and it's all been stitched with needle and thread onto a cotton scarf and it's created this beautiful, very traditional like wave pattern. So now that we have the new e peace completely cut out and ironed, you can really see the pattern the classic wave pattern and that's all done by the single stitch so what we're gonna do is I'm going to show you the difference between a single stitch and a folded stitch. So this was just a running stitch that we did with needle and thread. We followed our our mark on our fabric. This is where we actually pinched the fabric, and we folded it, and we did a running stitch on the fold, so you can see you get a little bit more resist. Then you would with a single stitch. I think they both look beautiful. You can also kind of see all the hand work done in here, and everything comes out looking very handmade and that's. Part of the beauty of she bore ian indigo is that, you know, it was all made by hand.
Class Materials
Bonus with Purchase
Ratings and Reviews
Bonita Davis
The class was very enjoyable. Good for beginners or intermediate indigo dyers. I can hardly wait to try. Please do some more classes. Well worth the money. Highly recommend to anyone who loves Indigo.
fbuser e565259b
I love this class. What a wonderful and easy techniques, Only problem is streaming. this class stopped at least 20 times.
Student Work
Related Classes
Fabric Crafts