Lessons
Introduction
02:46 2Creating the Dye Vats
03:40 3Nui Overview & Fabric Preparation
03:48 4Stitching the Fabric
12:25 5Testing the Vats
02:40 6Dipping and Rinsing Cloth (Nui)
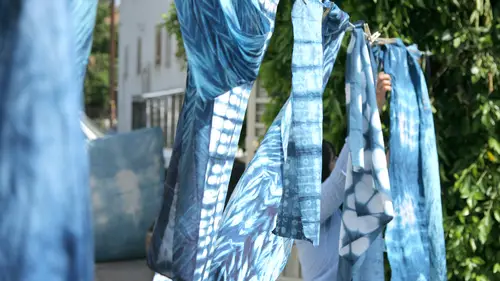
07:47 7Untieing the Cloth (Nui)
06:25 8Batik/Wax Resist Overview & Fabrication
08:32Lesson Info
Stitching the Fabric
So now that we've got our pattern drawn on our cotton scarf, it's time to start stitching, so for the next step we will need a a pair of small scissors we will need a long, thin needle. I like using my friend gina kimball's strong needles, they've got a nice long length and they're nice and thin and it helps me, teo, keep up my pattern on my stitching, then we will need a nice, heavy threat, and I use coats and clark's craft and button thread, and you really need to have a thread that you can pull almost a zhar da's you can pull on it and it won't break this is what's going to help us create the resist, so to begin, you want to measure off the width of your stitching and each of these lines we will be doing individually so you leave a good four inches on either side so that we have plenty of room to tie off and they will cut this and this will be the length that we will need since we've got at the end of this still probably be about twenty one to twenty seven of these waves that were g...
oing to be stitching sometimes just to get myself started, I will go ahead and cut off a few of these lengths so that I don't have to measure it out, which time it's also nice if you want to load up a few needles and that keeps your work moving pretty quickly so for stitching your new we resist it's really nice to have good light so I love using my stella light because it's got three different settings and I can use it in the morning the afternoon and the evening and it always gives me great natural daylight uh, let's see the thread and so to thread a needle you want to take your craft and button thread and you want to hold it in your non dominant hand and you want to hold your needle in your opposite hand I've cut my thread on an angle I want to take my needle and I'm going to place it over my threat and by simply showing just a little peek just a tiny little peak of the thread and then placing this right on top of the thread you shouldn't have a problem threading it should go right through so again that's cutting your thread on an angle holding the thread and your non dominant hand and then taking your needle, placing the eye right over the thread then I at the end eyes not when I call it quilters, not it's a double knot and I want to make sure that I leave at least a four inch tale on this end and this will give me room to tie my stitching off once we're finished okay so now we're ready to start the newest stitching and you can start on either side but I would say just be consistent with the side you're going to start on so that when we go to poll we pull in the same direction so to start your stitching we're going to do a simple running stitch and you simply follow the line that you've already drawn with your needle and thread and this is something that you're kind of pick up a rhythm after you do it a while but it will take you a little while just to get your rhythm moving and your needle kind of used to the repetitive action that you're taking so I love these long needles because what you can do after a while what you've got your spacing down is you can really load up quite a few stitches and then pull through the size of the stitching that you're making will really affect the size of your resist so if I were to do really long stitches along this this design I would get less of a resist but if I d'oh kind of a closer closer stitch a smaller stitch I'll get a little bit more of a resist so this is your simple running stitch technique the new e she bore a technique also has a folded stitch technique which would give you even more resist so now, once I've finished the end, I've got a nice tale on this end, and I've got a nice tale on the opposite end, and we're going to let this sit, we don't have to touch it until all of our stitching is completed, and then we'll actually pull it, pull it and tighten the resist, so I'd like to show you the folded stitch technique, which would produce something similar to this where you have a double running stitch, so I'm going to thread my needle again and tie a double quilters not, and leave a tale of atleast four inches, so for the folded technique, what you do is you actually pinch right along the design and then go ahead and do your running stitch over the folded design, and you can see how this creates a folding the fabric and will give us twice the amount of resist similar to the scarf and to do this, you really have to take your time and kind of get into the practice of the needle and thread stitching it doesn't go fast. Um, I I find that my new e stitching sometimes takes me a few days, and this is what they talk about when people talk about all the work that's in shit boeri is this type of stitching, which really is is kind of ah very meditative process, and I think that once you once you learn the technique and learn the stitch it's really something you can take anywhere with you and work on and then have your facts, fabrics ready when you build your into go that so once you've completed stitching all of your marks on your fabric, it should end up looking something like this, and the next step then is we are going to pull our strings tight toe actually create the resist, so hopefully you've left your tails uh, you're for inge tail on either end and one has a knot on it, and then this is where we started, so what you'll do is you'll take this side and you'll pull it all the way through this tight as you can get it. This is when it gets really important to have really good tension on your string so that you're creating some sort of polled resist so it's nice to have a friend help you do this last step, but I'm going to show you if I can, how to do it on your own. What we're gonna do is we're going to tie this into a knot and be aware of you want to really clamp down right on the fabric, and then you'll use one of your fingers toe hold the pressure, and while you're doing that you're going to tie another not a double knot on top of the first have just switched fingers so that I have some attention to pull it and then pull it nice and tight so let me do that again and see khun see it so I'm always aware of you know making sure that I'm tying right down on the fabric and I'm not leaving any gaps because if there are any gaps we're not goingto we're not going to be able to get a nice sharp white resist s I'm gonna pull the second thread and I'm pulling it through and then I'll find the tail on the other end really tighten up the tension there and then we're going to double knot this so go ahead and tie your first one your first one down nice and tight place your finger over that first not and then we're going to go ahead and double knot it so this is when the really strong thread comes in handy because if you're using any sort of sewing thread or machine thread chances are you'll end up breaking in at this point so the craft and button thread it's just got a nice strong um pulled to it and you really can put a lot of pressure on it so I'm up to my third strand now and I pull it tight s o if you get the fabric sticking out just kind of took it all back in and then pull it tight and find the other tale and then really want a tie right down right down where the two meet so once we've tied up all of our threads it'll end up looking something like this and you'll have all these loose threads kind of coming off what I like to dio is just go right in and cut some of these off I don't cut them too short but I kind of take them down to the original four inches that way they're not mixing all over with everything else in your dive at or in your in your water so we can just go ahead and trim trim off all these threads that that will make it a little bit easier once you are in the dive at so this piece is ready to go and we can go ahead and put it in the water to let thie fibers open up so we'll just add that into our water bucket if you wanted to dio a stitched resist technique that wasn't a simple wave or a line drawing you could also d'oh a pattern and for this example I chose to do the butterfly pattern and all I did was I drew a line on either side of the fabric and then I drew the small butterfly wings a really important tip to remember when you're doing shapes is that every shape has to be done individually so I stitched this wing and then I tied off. I stitch this wing, and then I tied off. So every single one of these wings was individually stitched, and then the center line in the middle was individually stitched. Once I had done all of the stitching, I went ahead, and I pulled the work, and I pulled it tight and tied it off. So the newly technique allows you to d'oh all sorts of complicated designs and patterns. And it really gives you a chance to kind of develop your art of the stitch. Resist.
Class Materials
Bonus with Purchase
Ratings and Reviews
Bonita Davis
The class was very enjoyable. Good for beginners or intermediate indigo dyers. I can hardly wait to try. Please do some more classes. Well worth the money. Highly recommend to anyone who loves Indigo.
fbuser e565259b
I love this class. What a wonderful and easy techniques, Only problem is streaming. this class stopped at least 20 times.
Student Work
Related Classes
Fabric Crafts