Workflow in After Effects
Lesson 4 from: Creating Cinemagraphs with Photoshop and After EffectsChris Converse
Workflow in After Effects
Lesson 4 from: Creating Cinemagraphs with Photoshop and After EffectsChris Converse
Lessons
Lesson Info
Workflow in After Effects
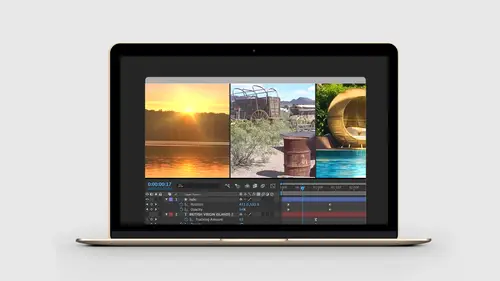
Now, I wanna go in and take a look at some of the workflows that we have in AfterEffects. So, if we could switch over to our slides, I just wanna do a quick little recap. If you've never used AfterEffects before, I just wanna show you how some of the interface relates from Photoshop to AfterEffects. So, we talked about this a lot in our other class, Intro to AfterEffects For Designers, and Photoshop and AfterEffects For Graphic Design, but I thought this was worth bringing up here, as well. Again, if you've never used AfterEffects before, it uses a lot of the same structures and workflows that we have inside of Photoshop. One of the biggest keys, I think here, is to understand where things in Photoshop would relate to things in AfterEffects, because, again, the workflows are very similar. The layers panel in Photoshop is the same thing as the timeline panel in AfterEffects. The main canvas, where we do our work in Photoshop, is the composition panel in AfterEffects. Linked files, like ...
we had the linked files linking Photoshop and videos in, are all found in the project panel in AfterEffects, and then smart objects in Photoshop is the same idea as a pre-composition in AfterEffects. And actually, pre-comps and comps are exactly the same thing in AfterEffects. So, again, there's just this idea of you can wrap animations into this pre-comp and then reuse them multiple times. So, that same sort of workflow we just did in Photoshop, we're gonna do something very similar inside of AfterEffects. And, in addition, we're gonna take a look at more things we can do inside of AfterEffects. Alright, so back in our project files, I'm gonna be going into folder three, and we're gonna be working with the island resort. So, I have an AfterEffects file here, already started, so I'm just gonna come in here and just open this up. So when you launch AfterEffects, one of the default work spaces will put the project panel on the left hand side of the screen. The canvas will be in the center of the interface, and the timeline panel will be down at the bottom. So, I'll come in here and just go into the default work state. So, basically, the design I have in place here, is we have a logo that we've imported from Illustrator, we have a type layer, and we just have a rule showing up here that is a vector shape. So, over in the AfterEffects interface, this is the project panel here, this is where we can see all of the assets we have linked in. This looks a lot like the links panel from Illustrator and InDesign. Timeline panel's down here at the bottom. This shows us all of our individual layers, how these items are stacked. Here's our main composition window, and we're gonna be working with our effects panel and the effect controls. Once we apply an effect, we can modify the controls in the effect controls area. And so, again, one of the best ways to start jumping into AfterEffects is to just start working in it. So what I'm gonna do is, let's switch back to our project files, and in the assets folder, I have a pool, that mpeg four, so we can just take a quick look at this. So this is just a video set with an iPhone and a tripod near a pool. Took a video for about 15 or 16 seconds. Very simple, anyone can do this, nothing fancy about the video. We're gonna enhance this a lot in AfterEffects and create a nice looping point. We're gonna have the same challenge that we had with the Arbutus Lake video, in that if we make a jump cut with these animated water here, we're actually gonna see that. There's so many highlights and movement in the water that our eyes will detect a quick jump, so we're gonna do that sort of cross fading that we did earlier in AfterEffects, or earlier in Photoshop. Alright, so, to begin with, come back to our project files, let's grab pool, that mpeg four, and I'm simply gonna come in here and just drag and drop this into the project folder. Once in the project folder, I'm gonna drag and drop this again, and drag this over into the main composition area. So, once this is in the main composition area, let's go back to our project folder, and the other thing I included in here is a static frame from the video. Now, one of the things that we can't do in AfterEffects is create a frame that is a separate linked file, like we could with Photoshop. I could take that smart object, and I could rasterize it, and get an extra layer with data on it for that picture. I can't do that in AfterEffects, so what I did here, is I went into Photoshop, and I took a still frame from the video and put that in as a separate file as well. This gives me the ability to bring this in to AfterEffects. So that is one extra step that we have in AfterEffects to get our static image. So I'll drag in the pool graphic. The setting I'm gonna pick when I drag Photoshop in here is just gonna be "footage." It's just a single jpeg file, just in a PSD format, so I'm gonna bring it in, merge layers, that all sounds great, and I'll just click OK. And now I'm gonna click and drag and drop that on top of here as well. So we won't see any change, and what I'm gonna do, is I'm gonna put the pool PSD behind the video. So the stacking order in my timeline panel is gonna be the video on the top, this is the static image, this is the opposite of what I did in Photoshop, and then I have all of my other artwork here. And so I'll grab all these and just move these down to the bottom, and the reason I'm doing this is we're going to use an effect. We're gonna use a light ray effect later on to add some glint onto the water, and the reason I want to have the pool above this is because we're gonna mask out part of the pool, but that effect will actually go beyond the mask, and so it's a really cool idea, but instead of masking the static photograph, we're gonna mask the video, instead. Okay, so in the timeline panel, I can click and drag this. I'm gonna extend my work area a little bit, just for a few minutes. So, if I click and drag, we can see all of this moving around, and so we're gonna do something similar that we did with Photoshop, and that is, I wanna mask out areas that are moving and make areas that I don't want moving static. So, in AfterEffects, if I select a layer and then come up to the tool bar and click on any of my vector tools, these will allow me to create a mask right on that individual layer. So, on the tool bar, I'm gonna come up and select the ellipse tool. I have the pool mpeg four layer selected, here. Let's zoom up a little bit so we can see what we're doing. And with that layer selected, I'm simply gonna click and drag and hold my shift key. So, what that's doing, as soon as I start to click and drag, we'll see that I have a mask layer now, showing up under the pool, that mpeg four. I'm applying a mask to this individual image, and to see that, if I click and drag, I can now see through that mask area. I can now see the animation happening inside of this area. So with the mask selected, I'll hit Command or Control + T, to transform the mask. I'll zoom out here a little bit, and what I wanna do, is I want to mask this to just the opening of the inside, here, 'cause if I play the video, the only place we see movement is inside of this chair. So, if I move this around, we're only seeing this inside of here, so I don't wanna see anything outside of the inside of that chair. I just wanna see the water reflection happening. So, by clicking and dragging that, that's gonna show me that area inside. So, with this sort of zoomed up, I can come in here and grab the mask point. I'm just gonna conform these a little bit. Top looks great, right? I'm gonna move over here a little bit, hit the space bar, click and drag upward. Let's grab the bottom and just move this into place. I can control the bezier curves. The behavior is just like Illustrator, and once I have this where I want it, just to make this look a little bit more realistic, let's open up the properties for the mask. I'm gonna scroll down to "mask feather," and I'm gonna put about five pixels of feather on that mask. That's gonna give me a nice gradient between the area that we can see, which is the actual video layer, because the mask outside is showing the photograph underneath, and the static area that's showing up out here. So I'm gonna hit my comma key here, the less than key, to zoom out. The period key, or the greater than key, actually zooms in, those are shortcuts. So I'll click and drag, we can see that happening inside of there. So, with the mpeg four still selected, let's zoom up. We can also see in the umbrella. We can see some of the video moving up here, as well. So if I click and drag this, we're not seeing it, I can temporarily move this back. Mpeg four selected, let's come up to the pen tool, and I was trying to show you this, since we're masking out the video, we don't see it, but there's actually a highlight that's happening underneath the umbrella here. So, with my pen tool, I'm gonna click once, go to about right here, I'm gonna click and drag, I'm gonna follow the contour of that umbrella. Come down on the post, I can come in here a little bit. I don't have to be too perfect, because the highlight only shows up in the top. Get near the beginning of the point, click this to close it, and now we can see the highlight showing up behind, so now if I move this, we can see the water reflection underneath the umbrella. If I scroll down in the timeline panel, here's the second mask. If I hit the f key with the mask selected, that will bring up the mask feather properties. Let's come in here and add about five pixels to that, as well. Again, just to sort of soften that up a little bit. So now, if we zoom out, drag the timeline, we can see we have a reflection inside of the chair, inside of the underneath of the umbrella, and so the last one we need to do is add the water, so we'll come up to the vector tool. Let's choose the rectangle. Let's click and drag. I'll drag this to about right here, right about halfway through the tiles. Let's grab these points and move them to the right. Grab these other points, I'll move these to the left, and we'll add a little bit of feather to these, as well. Grab mask three. Masks get a little tricky to play with. You can select the mask or you can select the points. If you select the item on the stage first, you can then click and drag, so you can see the umbrella selected. I can then click and drag to sort of marquis select just one of the individual points. It takes a little bit of getting used to, the way the vectors change when you select mask items in AfterEffects. And so, lastly, mask three, I'll hit the f key, bring up the feathering, and we're gonna set the feather on this. I'm gonna set this to about 12 pixels, so we get a nice blend between the water and all the reflections that happen off the water against the tiles so that we don't see that moving. Okay, so now we're at the point, we have all of our masks in place, and we're seeing the static photograph behind all of the areas that move, so none of the trees are moving anymore, none of the sort of highlights, the branches aren't moving, we just have the water that's moving, and the water's effect on the inside of the chair and the umbrella. So now, we need to create that looping point, and we're gonna do something similar to what we did earlier in Photoshop. So, in AfterEffects, the interface works a little bit differently. So, what I'm gonna do is scrub the timeline a little bit. I'm gonna bring this out to maybe about two seconds. The first thing I'll do is set the work area. This idea is the same across Photoshop and AfterEffects. I'll grab the work area, click and drag, and drag the beginning of the work area to the timeline point here. I want this to be at least six or seven seconds, so let's come over here. We're at two seconds, so we'll go to about eight. That's gonna give us six seconds. Let's come over here and set the work area to the end, as well. And the shortcut keys for that are b for begin and n for end. So if I had my ... Play it here, and I hit the b key, that would actually change the work area to that spot. Okay, so now what I wanna do is, for the video, on the first layer, we're gonna do the same thing we did before. I'm gonna hit Command + D in AfterEffects to duplicate this, and I wanna count in the same number of frames so that I can create that cross-blend, and I'm gonna do about 15 frames here. So I'm gonna zoom up on the timeline so we can get to much more granular control, and we're gonna come out, let's see, I'll zoom out just a little bit. I wanna be able to see about 10 frames, which is right here, so at this 10 frame mark, this is where I want the first video to begin, so I'm gonna ignore the first ten frames. So what I'm gonna do is hit the control key and the number eight. That's gonna give me a little marker here. You can also get to that under the layer menu. You can choose "add marker." Let's go to the other layer, Control + Eight. I'm gonna do the same thing. So this is a nice feature of AfterEffects, 'cause I know exactly where I need that piece to be. So now let's zoom out, get the play head to the beginning point here, two seconds. Let's grab the first layer. I'm gonna drag this over until the marker is at that point here, and then the second one, we will drag this out to the end of the work area. Get the play head right here. Get this marker showing up. Now, I'm gonna hit the t key. That's gonna bring up the opacity properties, so I try to remember that with the opaci-tee being the end of the name, whatever works. And let's come in here and activate the stopwatch. So, turn on the stopwatch, and again, just like Photoshop, this tells AfterEffects I wanna pay attention to any opacity changes for this particular layer. And, so what we're gonna do, when we're at this point here, I want this to be 100%. That's what it said, too, so that's great. Now, I will back up the play head to the beginning. Again, this is the second instance of the same video. Let's come in here and let's bring the opacity down to zero. So, now I get a nice cross blend from the second video. Back to the first video, cutting off the first 10 frames, which goes all the way back to here, starts here, cutting off the first 10 frames again, so we have the same frame at the end and the beginning. So we get that nice blending, and then the frames match up when the video actually will loop. Alright, let's zoom out on the timeline space here, just so I can see more of what's going on. So here's the entire animation, here. Now, I wanna add a couple of effects. I wanna do hue saturation, and I wanna add that glinting effect, but I have two instances of the pool layer, here, so in order to get both of these in the same item, or in the same sort of smart object, we're gonna use something in AfterEffects called a pre-comp, and again, pre-comps in AfterEffects are the same thing as smart objects in Photoshop. So, I'm gonna come into the timeline panel, select the first video instance, hold the shift key, select the second one, then we can come up to the layer panel and come down and choose "Pre-compose," and you can also hit Command + Shift + C or Control + Shift + C in Windows. Once I do that, this dialogue box will come up and ask me what I would like to do with all the properties of this animation. Most times, you will want to move all of the attributes into the new composition. This just means if there's any effects or anything that we've applied, those effects go inside of that pre-composition. They don't get sort of attached to the outside, and that's gonna be really important when we start creating some of our simulations in AfterEffects. So let's call this "pool loop," then click OK. And now, in our project panel, we have our pool loop, and that is the instance we have in our timeline panel, as well. So now, this is both of those videos wrapped up in that one composition. Now, let's go to our effects and presets. You can find effects and presets under the window menu. Come down and choose "effects and presets," and we're also gonna bring up the effect controls. I like to put my effect controls next to the presets in my work space. And so let's come in here and let's start with hue saturation. The pool clip is selected on the stage. Let's double click on hue saturation, that's going to apply that to the pre-comp. Then, we'll come down to master saturation and I'm just gonna boost this up a little bit. So if you watch my other AfterEffects courses, you know I really like saturated photography, so since I have control of the mouse, I can make it really saturated if I want. So, let's just bump this up here. I'll just do maybe about 30 or 35, just to sort of bump that up a little bit. Effects are nondestructive, so I can turn these on and off, and we can see the difference, and then, just to add some interest here, let's come back to the effects and presets. Let's search for the word "rays," and I'm going to apply CC light rays to this. So I'll click and drag and move this over, as well. So what light rays do is they basically take pixels in the main stage, and they basically sort of broadcast those pixels out toward the camera, and they really make it look as though those pixels are emitting light out into the stage. So it's easy, light rays. Let's come in here, this is my center point, and so if I move this around, what's interesting here, is if I'm moving it around this area here, we're not seeing any effect because we have masked this video layer, so I'm only going to see this effect if I get inside of the chair, if I get inside of the underneath of the umbrella, not out here, and if I get down into the pool. But, like I mentioned before, what's really cool about this is, this effect will actually break the boundaries. So, as I move this around, you can see some of the effects going outside of the mask, which is a really nice sort of effect. The mask is blocking all of the video, but the effects from this ray actually come outside of that masked area. So, let's move this down here, where we have the water moving. If I move the play head here, you can see the interplay between that effect and the video. So, let's select this, let's come over to the shape. Let's change this to square. By setting a square shape, this will give us the option to change the direction, so I can move this around. Let's come up to the intensity, we can make this really strong. We can increase the radius. The wider the radius, the more pixels that are sampled around the center point. So I don't want the radius to be too big, but again, you can come in here and play with it, get any sort of light rays effect that you want, so that looks kind of interesting, somewhere around 50, and then, again, we can come in here and just sort of play with the angles and rotate these around. Now, even though we're not animating the effect, the animation is being created by the fact that the video underneath the effect is changing the pixels underneath, and then the light rays with all of these properties get changed just simply by the fact that the video's changing underneath. So we get this sort of nice effect here. So with that in place, let's hit save, then we can go render this out. So my favorite way to render this for the web is to use the media encoder. It has all kinds of built-in mpeg four controls for us, and so we're gonna do that by making sure that we have our composition selected here, so we're in Island Resort, go to the file menu, come down to export, and choose, "Add To Adobe Media Queue," media encoder queue. So, this will actually launch another application that you get with Creative Cloud, which is the Media Encoder, and the Media Encoder has tons and tons of presets to render video for all kinds of different formats, and not only just different video formats, but even setting some optimizations for different platforms, like YouTube or MEL. So once the media encoder launches, it's now going back and talking to the original AfterEffects file. It might take a second or two, and then we'll see our file show up here in the list. So the h two six four, this is the codec that people mostly use for mpeg four, or rather, I should say that the other way. The mpeg four format uses the h two six four encoding process to create these files. This is how we ... This is the technique that they use to compress the video frame by frame and only modify the pixels that change. This is different from cinemagraphs, where cinemagraphs, you get those ... You get the changed pixels, but you don't get any sort of codec or compression frame by frame, which is why they're so large. So that's why the mpeg four is doing so well on the web and becoming a standard. So, inside of here, I wanna come in and just simply uncheck the audio. I'll just hit OK. Under "custom," I can come in here and change additional properties, maybe sizes, but what I wanna do is come over to the output file. We'll click on this, choose the desktop, island resort, mpeg four, and then simply come over here to the upper right and click "play." So now again, the nice thing is, the media encoder's going back to AfterEffects, finding all of the composition settings that we have inside of AfterEffects and rendering this out for us. So this is really nice, and this will work with a similar workflow with Audition and Premier, the other two main video and audio editing tools in the Creative Cloud. So once that's done, let's close the media encoder. Alright, AfterEffects, let's go back to our desktop, activate looping, go into full frame mode, and now we have our ending cinemagraph. So we got the glint happening. It could get a little tough to read the type down here, but since it is constantly moving, it's easy to sort of figure out some of the letters, so it just gives you a little bit of interest. Again, even though it might obscure the letters at some point, it's enough so that people can still get that interest of the water and the light reflection, but still be able to read the content, and there, got the reflection under the umbrella and the chair. Very cool, so very similar workflow that we had in Photoshop, this idea that we start with a static photo, we mask out the parts that should move, keep the parts that don't move in the static photo part, wrapped up a pre-comp, added some effects to that, and just render this out into a video that we could play out on our social media pages.
Class Materials
Bonus Materials with Purchase
Ratings and Reviews
Jeff S
Fascinating course for anyone who wants to know how to make a cinemagraph. I thought Chris went a little fast for me but I could replay those parts over and over until I got it. This is not a general knowledge course but more of a niche course for obtaining specific know-how on making a cinemagraph. Overall very good!
Randy Spears
For anyone having to create a poster or a book cover or anything creative with Photoshop, this is a great course. I refer back to it again and again when I start some of my projects.
Teresa Piccioni
Chris is really a great teacher: the after effects tricks explained in this class are very interesting indeed!