Lessons
Why We Compress
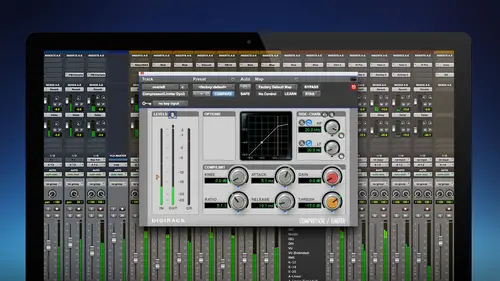
24:08 2Compressor Controls
29:15 3Vocal Compression
30:35 4Glue Your Mix Together
36:58 5That Upfront Vocal Sound
33:12 6Fatter Drums : Fast Attack Settings
19:54 7More Energy in Acoustic Instruments
14:36 8Louder Mixes: Master Buss Limiter
20:08Lesson Info
Parallel Compression
thanks for hanging out with us, everybody expert gentlemen hanging with us today about having a lot of fun. You know, we've covered a lot of foundational things with compression. And what I want to show you in this segment is, uh, one major thing that I do with compression that I really feel gives me batter drums. I can have punch your vocals. It's a concept that is so simple. But once you get it and see it and use it, you can find thousands of uses for this concept in uses that I'm not even gonna cover today. Um, and then I want to show you a couple of different things about different types of compressors, and then we'll talk a little bit about that. We had some questions about the loudness wars. We'll talk about that a little bit, too, because you got to mention that with compression. So one thing that I found for years was I would be mixing. My drums will go back to drums because they're the hardest to get right. And I'm trying to use good compression technique. I'm trying to be cut...
e. Them well, and they sound good. But then in the mix. They don't sound huge, writes like I just want them. This sounds so huge or to really cut through the mix really, really well. And if I always felt like there was something missing, something lacking. And once I discovered this concept, I realized, why didn't pretty telling him about this? This is the most helpful tool in the world, and it's what you know. You can call parallel processing. You can call this New York style compression the same thing instead of thinking about all we've been doing so far is taking is taking compressors and putting him on a track audio passes through the compressor. It affects the whole track for better or for worse, you know, And as your newer you're gonna make bad decisions, and as you get better, you're gonna compress it. Well, parallel processing is a genius concept where we say, let's not process the actual tracks themselves or we could do it a little bit. But let's make a copy of the audio, and there's two different ways to do that. And let's process that copy parallel to the other and weaken over process that to give a really unique sound and blend to together for a very unique sound. And the best way to show it is in drums. If you've seen this before, you know where I'm going with this. If you haven't, this is gonna change your world on. Bennett doesn't not just apply to drums. This is applies to a lot of different things. So I've got parallel compression happening in the mix already, and I want to show you how to do it. So, um, let's mute all the other tracks right now. Let's meet these guys. Make sure my limiters not on Let's get to the drums happening. I must show you before and after and then we'll rebuild it. So I've already got two tracks of drums here. One you can see. It's called drums and I'm feeding on my drum tracks into this, and one you can see called P drums, which I'm calling parallel drums. So when you hear those drums right here really hearing these two tracks together, I'll show you what's on him in a minute. But let me just bypass the parallel track and you can hear what happens to the drums. Did you kind of hear energy thickness weight comes in when I've got him in drums. They don't sound bad. When you take away the parallel channel, they just don't have that. I want to walk you through how you build this parallel channel on why this makes a difference. Because in the mix, it's more parent. Let's take Let's bring everything back in the mix and watch what happens when you take away the parallel channel. All right, kind of lose the drums a little bit of kicking the snared you can. He can hear them a little bit, but they get lost. Here's what's going on. This is what's so cool with this process. Will you got to do is go ahead in, um, mute this channel. Let's start with just the raw drums. And just so you know what's happening, this track here is being fed by just my drums. I just have my kicks, snares Tom's all your drum tracks, whatever you have, whether it's two channels of drums or 20 channels of drums, you set their output, you know, into a group track, which I've got right here so I can control all the drums of one fader. I've got a little bit of processing on the Drum Channel, but but it's really gentle. The compression of I've shown you before, if you saw those segments is really gentle, real gentle compression. What I want to do is create some really heavy compression, but I don't want to squash my drums completely. So let's create another channel, so I'll go ahead and hi to make that inactive. Let's create a new track. You could make a stereo track or mono track, depending on what you're gonna put through it. If you're gonna put things that are pan left and rightly, maybe Tom's through it. You wanna make sure it's a stereo track. If you're just gonna put your kick and snare through it, you could do a mono. But I'll do stereo, and you want to make it an auxiliary track or a bus track or a group track, depending on what your D aaw calls it. But it's It's the track that you can route audio through, doesn't have any audio on it, right to create that next to my drum track. I'm gonna make it yellow because I'm unlike that and I'm gonna call it Piedra. Let's call it parallel today. Right now. If you solo it, nothing happens because there's there's nothing going through it. It has literally no input. It's going to my stereo output, so let's actually run it through. Um, I mixed bus track here. Still, there's no audio through. It's what we need to dio is use sins. Um, you can see the ones that they had set up for the original Peachum track sins or, you know, your your doll, my column. Just buses. But technically, using Ascend to send audio on a bus to attract it's just like it sounds like you get on a school bus and you drive over to a destination I want. If this going top to bottom in your dog is audio passing through the channel, it goes through these plug ins. You go through whatever your sins are, and then it eventually goes through your fader. Ascend is away toe. Send out a copy real quick to wherever you want it to go. So I'm going to, um, get rid of these for a second. I'm going to send this is my kick drum track kick and snare. These first time the send, um, my kick drum to track called Parallel. Okay, I'm gonna bring up the volume of it 20 db. Which means it's gonna be the full volume of the of the kick drum. And if you have a sense you're gonna want to check this button. It's called pre. It stands for pre fader. All that means is you want this send to happen before the fader. Meaning you don't want the fader down here to affect the send it all. So if I turn the volume of this actual kick drum track, I don't want it to turn the volume of the send down at all. I want to be independent. If I meet the kick drum track, I don't want it to meet the send. I want this thing to be happening. Spit out a copy no matter what I do down the actual kick drum track. So pre fader is very important and I like to leave it a zero as a starting point. But you're unable to play with this later and you do the same thing on any other track you want to feed. Typically, I like to do kick and snare. I'm gonna copy to send over you could do the exact same thing on the snare drum. Now, I've got the kick in the snare being sent over here. Two parallel. So if we just so low a parallel track way have audio coming through right now. I've got everything else muted. I don't You don't even have the kick in the sneer audible here. But these sins or pre fader. So they're happening regardless of what we do, which is great. And so we're gonna solo this channel. All we've done at this point, it's sent a copy of the kick in this near to this track. Okay, It's always done. Now that we have a copy of the kick in the snare on this track, here's where we can do really, really fun stuff. What I like to do is take compression, this stuff we've been doing all day with musicality and doing it gently. We're gonna abuse all that. We're going to really slam the these drums and we're gonna ruin them. OK, so here we go. Let's grab a compressor. I'll put it on this jail here, get your typical compressor here, and let's see if we can do a really high ratio and low thresholds. A lot of the drums are gonna get compressed and you're gonna see the gain reduction happening. I'm just gonna try to really squeeze this audio. Sounds horrible, right? It's quashing all the life out of them, but we're getting a lot of smack. Kind of kind of punchy, not good tone, but it's more just how you hear it. A to this point, have a really slow attack, really fast release, weaken, do extreme opposite and see what happened. I can hear it. So I like the transience to come through because that's smack. So like the acoustic guitar example. If you saw that segment, we're letting the trains come through. We're releasing really quickly and just getting a lot of smack. And what I can do is bring up output a little bit nasty sounding drum track. But all I'm trying to do is create a lot of smack and a lot of the feel of compression on a separate track so I can keep the nice drum sounding musical and full. And then what we want to do is blend that nastiness with the good sounding drums, and we'll get a really, really cool effect as we play with it. So I'm gonna pull the volume the parallel channel down. And that's the beauty of it is. You have its own separate fader, so you will be able to blend to taste as much as little as you want. So let's go back and we'll play all the regular drums. Now, just hearing, um, the regular drums here, let me actually change this track too. This approach was classic change one setting here, um, options. Where is it? Pre fader metering. So what I want to do to change the metering. So when the volumes down, you're not going to see the meter jumping. So you think that you're hearing that track and then I'm gonna start riding the fader of the parallel channel up and just listen to how the drums change. You hear what we did here? Now let now the bypass it completely so on off, we'll take off the parallel channel. I was kind of extreme. I gotta crank pretty high so you can hear the effect. But you get the idea you could hear wait and smack. It's kind of aggressive and again in solo mode, but you're not hearing the rest of the band. It might be almost even too much, but it's really cool again in the mix because that's where you lose everything. So I'll, uh, I'll take it away and then I'll bring it back in your kind of hear what the parallel channel is adding. Yeah, you hear that? That's where it counts. That's where you got layers of guitars, layers of vocals, all sorts of tracks happening. You know, your drum sound good and solo. But who cares what it sounds like in solo? Cause no one's ever going to hear this song of Just Trump's. There's no version of this song, unless that's what I release is just a drum only version. No one's gonna hear that. So what I want to do is keep my Drum Channel musical and keep the dynamic range not crushed the symbols, because if you start to add that kind of compression, you're gonna lose your a lot of dynamics. The symbols are going to get real weird because it's I could just compress a kick in a sneer by itself, with no symbols smack in the way I want and then blend that in with the nice musical sounding drums, and what you get is wait where you're kicking. Your snare can cut through a really heavy mix, and this can happen even on a real gentle song. You get a song that's not dense and just bring in a little bit of parallel compression, and it just gives you that little bit of edge to get your kick and snare and even Tom's cause I can route the Tom. See this as well, to pop through the mix engine concept. That's all parallel processing is. This can be applied to anything. Some other examples of this concept we're talking about compressions. That's why I want to show it to you. But you could do this with vocal compression. This is really common. You can have your vocal sounding great, and then you could run a copy of your lead vocal toe, a vocal parallel channel, compressed everything out of that channel and blend that in with the UN compressed vocal or than more natural vocal and get a really cool, breathy, compressed sounding track but still maintain the musicality of it. A real vocal track, and you can blame him to taste and that could even change throughout the song. You could have mawr of that parallel channel in the chorus less and the versus, you know, because it's a separate fader, which means you can automate it, but you can automate any track. You can do this with distortion. You could have parallel processing. Having a vocal distortion track copy of the vocal goes through an AMP. Simulator. Plug in gives you that that harmonics, that grit by itself would be too much, but blended with a natural vocal might give it some energy, some harmonics that makes the vocal pop out in a unique way. You could start to think about this in a 1,000, different ways. I do this with bass guitar, put distortion on a copy of the bass guitar, fuzz up one, copy the base and blended because here's the problem with the bass guitar. Sounds great on nice speakers. What about the speaker in your laptop speakers in your car? Sometimes if they don't have a lot of bass response, you can lose a lot of that nice low end, and all you hear is mid range. But if you have a distorted copy of the base it's gonna add some harmonics in that mid range that your ear will hear me not feel the base. We can still hear the baseline because now it's got some more mid range content it. So parallel processing unlocks a whole host of stuff for you to then go crazy with. But my favorite is Is compression on drums, namely, kicking, sneer. Any questions on what we just did here? And I have something else. You have any questions? Well, I'm on it. Yeah, we have a few that came in online here. Let's see, we have the suburbs, says Graham. Wouldn't you use the parallel nasty track on rock vocals? We have. Absolutely. You could totally do that. Like how you called it the parallel, nasty terminology. Proper terminology in the chat about was a term that was taught to me in school. No, I didn't call it that, but absolutely, I mean, it's you would be surprised how many rock vocals have a multiple copies of them processed through different types of plug ins and then blended in with the regular vocal. So if you ever hear attract, that sounds like how does that sound distorted or compressed and yet not distorted and compressed. It sounds smacking, but it sounds musical. It's because it's it's both your hearing the musical one, and you're hearing the process one together. That's the trick. If you get this concept, you can. You can have a lot more control of your mixes when you feel like the need for it. When you feel yourself saying, I wish I could compress that more without compressing it more that it might be, this might be a good solution for you. Here's another question. Do you often use parallel compression on other elements than just drums? If so, which ones and why? Yeah, I'll use, um, on vocal. Sometimes I would use it. You know what? That's probably it. Drums and vocals. The only time will use parallel compression. I'll use parallel processing for different things, but probably compression would be mostly drums and sometimes vocals. All right, and we'll do one more in here from K 11. We had five other people also vote on this. Graham, how do I make sure I avoid any phasing issues when I'm using parallel techniques? If the D A. W I work in doesn't have delay compensation engine the way pro tools. Okay, so, first of all, pro tools used to never have delayed compensation in the native formats. For the longest time, this was a hard piece of software to work with unless you had a pro tools HD systems. So I understand your pain here. Here's what the question is saying is, as much as this looks like and acts like a console, it's a piece of computer software. And so that's the limitation is it's computing math. And so it takes time to if I have the drums on one track here and they sound fine and then I copy the drums and I start to add other plug ins on this track. But there's no plug ins on this track. It literally offsets the drums on this track by a few milliseconds or a few samples, even because the processing literally slows it down in time. So the theory, your parallel channel is out of time, even a slight amount with your regular track, and then it starts to create what you're calling. He's going phasing issues. Where you here. It sounds like this chorus effect in pro tools nowadays, since Version nine and on in most major dolls seem to have now fix that with automatic delay compensation. So does the math for you, it sees, and we can see it here. It's through the view, um, X window shows to lay compensation Are all these plug ins are the native native plug in? So these are the ones that come with pro tools. You'll see there's no delay, and there's no compensation needed. That's another great thing about using stock plug ins. They generally are very CPU light or very efficient. They're made to go with your software so they don't introduce any at all. Layton See, it's showing me no latent sees happening from any of these plug ins. Um, if I were to grab on my other channel, I had another parallel channel here that has see if this has any. The bus comp doesn't have any. Let's add a limiter. See if that will do it. He's over really good plug ins. Well, to Okay, I just added this limiter. It's delaying this track by 64 samples or 64 milliseconds. I'm sorry, what it's reading to someone. Correct me this plug in to use the limiting its the math is slowing this track down behind in time. So what's gonna happen is every other track in the background is going to get compensated. So in this case, the, um, this parallel channel is getting compensated. So, um oh, yeah, every every group, you can see what's happening here this track and oranges delayed by 64 samples or 60 in. So then it's all these other groups are compensating by 64 samples to then make them just a slow is thing that's been delayed so that what we hear is them all in time. So that was a little bit technical. But most dogs can do that. So it's all happening the back when you never have to worry about it. If your doll doesn't, they should be able to give you a readout like pro tools used to do this. You could see how much of the delaying you say 64. You could insert a delay, plug in and on every other track and delay them by the same amount, and that would line them up. It's pretty arduous and pretty dumb, but that's what we used to have to do or try to stick with his many stock plug ins as you can, and they won't introduce any if it'll much latent. See you take that away and then always at the plug ins or find even some of this way of compressors air not slowing this audio down. Great question. All right, good. Think we're all set right now? I was actually wondering about deep of philosophy on Ah, I've seen other people do this to where they take. They create a group track where they send all the mid range instruments to it or all the low end instruments to and then they compress antique you that it's kind of creating your own multi band compressor. Sort of. Yeah, right you're Then you can compress just a certain frequency range of instruments. Kind of similar thing, not 100%. Um, man, unless I have a need to do something less or something that I just can't control about doing something like that, I don't I don't do any of that kind of stuff. I'm pretty simple. You can see my groups. I've grouped by instrument mostly, so I can do some global processing on the drums. And if I wanted to maybe put some saturation on all my vocals. I could do that or eat you on my vocals. Brighter. I could do that or just automate the volume of the instruments or the band or the guitars or the base or the drums. But my mixing sessions don't seem to get that complex. That doesn't mean you shouldn't do that, but I try to keep it as simple as possible unless I need to. One thing you could do on my original parallel channel, Let's say Delete the one that we just made here in class and I bring these back in is what already had set up in the mix. I don't know what my settings were used. A different compressor. Use one of my favorites that used the same compressor, the SSL bus comp that we've had in our master fader. I'm using this on my drum bus. There's a preset I like called pumping, and it sounds really, really cool. And you can see you look at the setting Super slow attack superfast release 10 to 1 ratio. So very similar settings what we had on the stock compressor. But here's something I've done also also e queued this parallel processing. So I know we're doing a Q and a session tomorrow, but take a listen to just the parallel channel. So again we take out the compressed or any of the plug ins. Bring this up in volume, get rid of this little fill. There's no processing happening here. This is just a copy of the kick in the snare. I've got the compressor Mac in it, but that compressor at least and what it was doing, it seemed like it was I was. I was hearing the snack, but that this sound was really low mid muffle, e sounding, and so you can even take it a step further and say, I've got it really smack and great. But I also wanted to sculpt the sound of that parallel channel before I blended in. So I put any Q before it where I've sculpted out some of the mid range of did a little of the high pass filter and brought brighten it up a little bit. So it sounds like this cleaned up the sound that the compressor was making. And then I can blend that with the drums, so something to consider too. You could do parallel compression, but you could e que that compression you could saturate that complete. You do whatever you want to that parallel channel and still blend it in with the unaffected drumsticks signal. And you don't even have to have any compression. You could even start your mix of drums with your unaffected drum signal. Have no compression on this track. No e que on this track and just bring in parallel compression first. And that might give you enough compression on the drums as well, thinking back to that top down approach. You mean I need any individual compression? Something about any other questions on parallel compression there. I think we covered everything from the chat. You got one here, Forgot whites called in New York. Compression a red at once? A. Well, that's a good question. Yeah, that's the history Buffs computer that I think it was really popularized in a lot of studios in New York. The time a lot of the rock records were, I don't know who invented it, who stumbled across it again. So much of what we do as normal today with someone experimenting 30 40 years ago, and saying, I wonder what would happen if I love the spirit of that because that's someone being creative, that someone trying to solve a problem or just messing around the studio. If you have those questions, well, what happens if you do this? Why don't you try it? You might discover the next great thing that we all now teach in audio schools worldwide of like, This is what you're supposed to do it because somebody stumbled across it by accident. But that's my guess. Someone can find out. The history buffs could go search on the Internet, so parallel compression will. Will will change your world with drums. And I would highly recommend experimenting without on your next mix, give you more weight, more on your kick and snare. One thing I wanted to cover and beyond the basics in this segment is, and some of the questions hinted at this, you know, we were using today the stock approaches compressor. You can use your stock compressor on everything in the mix, and it's gonna do great things for you. Why, then, are there different types of compressors and why thin? Do your favorite mixers when you read interviews, airless interviews from them say, Oh, I love in 76 or I love in L A to A or I love you. Fairchild What is it about these compressors in? I would say it's because what they've discovered is you can think of a compressor as an e que meeting a compressor can and some compressed. We talked a little bit about add a tone. They shape the tone of your audio, and they sound a little different. And so all we've discussed in the session today have been compressing for for a specific purpose. And that's the most of what you should be thinking about. Compression is controlling the volume, controlling the gain, changing the the attack or the release of the audio. But you can also change the tone base of a compressor.
Class Materials
Bonus Materials with Purchase
Ratings and Reviews
a Creativelive Student
After I took this course my mixes began to really sound better, and after learning more tricks and trying out new things and practice they are amazing, and I am very comfortable and happy with the results. Graham is a great teacher, great musician and singer too, we are so fortunate for his contribution to the music community.
a Creativelive Student
THIS IS PERFECT FOR SOMEONE LIKE ME .I STARTED LATE IN TAKING MY SINGING CAREER SERIOUS,SITTING BACK WAITING FOR OTHERS;I AM MORE OF A SINGER/SONGWRITER THAN A PRODUCER OF RIDDIMS;BUT I HAD TO LEARN,BECAUSE I WAS SERIOUS OTHERS WAS NOT,THERE PEOPLE WHO CAN HELP ME WITH ALL THIS STUFF BUT THEY ARE ALWAYS BUSY,THEY HAVE PREFERNCE(POPULAR/NOT POPULAR ARTIST....MUSIC POLITICS,AFTER AWHILE ALL THE WAITING AROUND ,TIME WASTING E.T.C,SO GRAHAM COCHRANE AND THE RECORD REVOLUTION, AND NOW CREATIVELIVE ARE HELPING ME GRAETLY AND I AM ADVANCING AT A GREAT SPEED THANKSSSSSSSSSSSS
Thomas Henkel
So glad, that I joined this master class. Very informative, with good and helpful explanation. I'm keen on Graham's EQ class and my first start at the DAW, with the things I just learned. Thank you!
Student Work
Related Classes
Sound Mixing