Lessons
Lesson Info
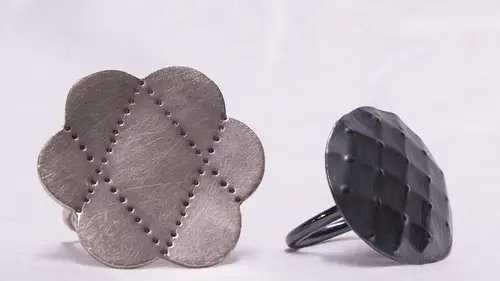
Filing & Deburring the Metal
You got the piece you saw it the salt leaves a little bit of burr and it's never like a perfectly smooth no matter how much you saw, you're always going to end up filing it a little bit too so I'll get a file on files come in different cuts I've got to hear it zero cut and a to cut that talks about the how course the file is the cut is the you know, engaged for the for the medal and the thickness this comes in different cuts and so I'm gonna start I didn't do such a bad job it's a pretty even sawing I don't have any big places I have to file whole lot, so I'm going to use the to cut and you always want support you don't want to be a wr filing like up here you want to support your hand on the bench pin or on your desk or the piece itself supported and then start filing I'm using the flat side of a half round file and working with the push the file works with the push and the extension and so just filing a little bit two five cuts in more than one direction no push the poll won't really ...
do anything much so one direction for the the cut the way that the teeth are you still got a paper on at this point is that cloak of file? It'll do you need to be worried about no I don't worry about it I'm just filing a tiniest spit and keeping the paper on because that's my pattern and I'm going to be following when I'm stamping so I'm just cleaning this up a little bit till and it's good you know look at the back side you can see if it's smooth and nice to the I that there's no like we're flat spots or something like that you're fine filing till you're satisfied with the shape and then I'll use a little needle file one of these little ones tio take off the bird there's always a little bit of bird right on the edge and so I'm taking a needle file and it can be it could be the flat or the courage part of the half round and I'm going out like a bevel so I'm not on that flat edge again yet or anymore like I just did with this bigger file I'm just taking the birds at the thickness of the metal right on the edge and you confer feel that you can use here feeling sensation toe to see and it's not the what is the bird? Yes material comes off it's a little it's yes the shark is the sharp edge that you're feeling from after you saw there's a burr after you file there's a bird's a little bit extra material that's just his sharp on that on the edge, where the dimension of the thickness of the metal meets the plane. Yeah, I'm just rolling the file along the edge to get off the burr and feel it without looking at it. And if you feel like there's still burst somewhere, then you file a little bit more. And then you've got your piece here, ready to go.
Class Materials
bonus material with purchase
Ratings and Reviews
gbarbphoto
I don't even make jewelry and I enjoyed this class so much. There is something relaxing about watching Raissa make jewelry. She explains everything very clearly!