Lesson Info
2. Use Luminosity Masking
Lessons
Lesson Info
Use Luminosity Masking
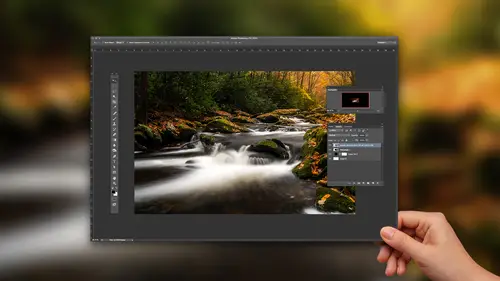
If you want more access to parts of the photo, there's a technique called luminosity masking. And I'm gonna introduce luminosity masking by saying that, so, there's a, I have a friend of mine who owns a boat, okay? And he likes to do everything to his boat. I own, my wife, and I, and our kids, we have a jet ski. When something goes wrong with my jet ski, the first thing I do is take it to the shop, and he always yells at me 'cause he's like, dude, why don't you just open it up? And I'm like, uh-uh, I'm not goin' near that thing! I am not a tinker, I don't tinker, I don't like to tinker. I wanna take it to somebody who knows what to do, okay? He's a tinker, he does everything to his boat. So, luminosity masks, don't mistake the fact that these settings and these controls that we can do are all really, really good that you have access to, so don't think, just 'cause I'm showing you luminosity masks that it necessarily means that this is the way for you to go. It's an advanced topic. It i...
s for the person that likes to tinker. It's for the person that likes to get their hands dirty and get into the image and spend a little bit of extra time. You're generally not gonna find a wedding photographer working through 1000 pictures a weekend doing luminosity masking, okay? It's very much become an outdoor landscape, fine art type of a thing, where we're generally working on one photo at a time for a long period of time. So, I wanna preface my luminosity masking by kinda telling you who it's really geared for. Don't think 'cause I'm showing it to you it means I gotta go out today and start luminosity masking. All right, so let's go take a look here at, let's go look at a photo that's got a decent amount of highlights, and shadows, and stuff. I've got a few of 'em. You know what, let's go with this one. So, let's go hit reset. Hop back up here to the basic panel. So, luminosity masking, think luminosity. What it does is it gives you access to the luminance, the brightness parts of the photo. And if you think of the opposite, it also, once you have the brighter parts of the photo masked away, by inversing that, now you also have a way to access the darker parts of the photo. So think about our landscape photos. We're always battling bright and dark, bright and dark. So, what I have in Lightroom and Photoshop are highlights and shadows. In a nutshell, that's luminosity masking, right? It's just doing it behind the scenes. Make no mistake that there's code behind Lightroom that's already drawn a mask of my photo, and when I move those highlights, it's only, you know, it's figuring out what it should pick. That's what's happening behind the scene there. So, you actually already have it. Now I wanna open up this photo here. We're gonna kinda get geeky, techy speak. Remember, this is an advanced class, so we gotta get a little geekier. Highlights and shadows. So, what's this slider do? This slider works on the highlights. This is an image from white, all these different shades, to black. So, this slider, you could see what highlights it's really doing, right? Working on the brighter parts of the photo. And shadows, it's gonna work on this outer edge, the darker parts of the photo, but it leaves all this stuff alone. So, we already have a luminosity masking tool built right in here. Let's take it a step further. I'm going to take this one into Photoshop. And we're gonna make a luminosity mask. So, the way that you can make a luminosity mask is go to your channels palette, and the RGB channel, if you hold down your command or your control key and click on it, that selects the luminance in the photo. Now, it looks like it's only selected a circle in the middle. What we're gonna do here is we're gonna copy this. I don't even need to copy it. I'm gonna go over to my layers panel, 'cause remember, I have the luminance selected right now, and I'm gonna create a curves adjustment layer, 'cause curves is a good overall brightness/darkness contrast type of an adjustment. I'm gonna create a curves adjustment layer, and take a look at what it's done. I know it looks like it's the same image, but the luminance value, if you remember that circle we saw in the middle, it doesn't mean the other stuff wasn't selected, because look, it pasted that in as part of the mask. But our selection edges don't ever show us that, because our selection edges only show us things that are 50% bright or more. So, from that middle gray to white, that's what our selection edges will show us. Just 'cause it's not showing us doesn't mean that that's not part of the selection. So remember, we went to create a luminosity mask, so we selected the brightest parts of the photo, I created a curves adjustment layer that's got that mask applied to it. As of yet, I haven't done anything to the photo, so let's go to the curve. If I drag the curve up, all right, so you don't have to yell out loud, but just think to yourself, I've selected the brightest parts of the photo, everything else is hidden or masked away, and I'm gonna drag the curve up, which is gonna make things brighter. So what's gonna get brighter when I drag this curve up? The luminance, the brighter parts of the photo, okay? If I drag it down, those parts of the photo get darker. See what's going on? Look on the outer edges, that stuff is pretty much staying the same. Okay, so I'm really just affecting the luminance part of this. So what we wanna do is maybe, you know, if we're thinking landscape photo, we wanna pull it back a little bit, so I can pull back on the luminance. Now, I can take this layer and press command or control J. Duplicates it, all right? So, the last layer, our mask was the brighter parts of the photo. So when we go and we go to click on that layer mask over here, if I go image, adjustments, and I go to invert, it'll flip it. See it? So now what I have access to are the darker parts of the photo. And rather than making those dark, think of these as our shadows, I can make them brighter. See how we start to affect all this stuff? This stuff's staying the same, but we're affecting the darker parts. Okay, so that's our geeky example. Let's take it to a photo. So, I will open up a photo here. I had another one right there. Here we go. So, I'm gonna take a photo and, you know, for all intents and purposes, you know, if we're using Lightroom and we wanna do luminosity masking, you know, you might do a little bit of cropping, maybe a little bit of white balance or whatever. But we're not really doing highlights and shadows. Remember, you're saying I know those tools are there, I got a better way. And I'm not saying it's a better way, but if you're that tinker kinda person, you wanna do it this way. So, we don't need to go through the highlights and the shadows, because they're there. Right, look, 'cause it will bring back all that detail here, but we're not going that route, so let's just take this right over into Photoshop. Okay, what did we do last time? We went to, whoa, go back, darn it. I hate it when I move a panel 'cause it's always so hard to get it back right where you want it. So, our RGB channel, this one over here. By the way, a little tip for you is if you right click in an open area, you can make your thumbnails larger. So, for those of you with poor eyesight like I have, I always right click and make the thumbnails large. So, let's go ahead and command or control click on our RGB channel, all right? So, that's put a selection around the luminance values of the photo. Now I'm gonna go to my layer panel, and I'll add that curves adjustment layer, right? Now, let's go look at the mask, because before, the last example's a little bit different, 'cause it was just a pure copy of the photo. So, if you hold down your option or alt key and click, you can see your mask. So, this is really a selection. This was a selection of the luminance values of the photo, but it just looks like a black and white copy of the photo. Remember the way masks work? White is what's getting affected, black is what's kinda being hidden, or masked away, or protected. So, the white areas are what this is affecting, so it's really a selection, although it looks like a black and white version of the photo. So, what I can do here is my luminance is on here, so I'll start to take that curve and go upward. What's it doing? It's making the sky bright. If I take it downward, it's making it darker. Get it? So I selected the luminance, and now I'm going to make it darker. Another thing you can do is option or alt click on your channel. It's a channel, but it still responds to adjustments. So let's say I do command or control L for levels, and I really make this channel contrasty, right? By making these areas whiter, I'm making them get more of the effect. By making these areas darker, I'm making them get less of the effect, because the white areas are what get affected from this. All right, so, now I can pull that back. That's before, that's after. So, I have access to the luminance, I have access to the brighter parts of the photo. Same thing we did before, command or control J duplicates the layer, and I go to that layer mask, just invert it. Now this bottom one is for the bright areas, this top one becomes part of the darker stuff. And I can even say, you know, bright areas. I can label 'em. Dark areas. And now I can go to my curve. See how it's leaving the sky alone? Okay. So it really is, I can even add a little contrast. That's what's nice about it. I will say, with shadows and highlights, they're on or they're off or they're some level of in between, right? With luminosity masks, you get to put whatever adjustment you want into those shadows and highlights. You're basically giving yourself access to those areas, and then I can take my curve, and not only, so, when I just add the curve in the middle, it's kinda just blasting everything. It's saying make everything brighter, right? To me, these get a little bit dull, so you can take the bottom part of the curve, which is the really dark stuff, and pull back. But it still overall made everything brighter. And you can see it if I turn off, on. It's got total control over all that stuff. So, that's before, that's after. Okay, but is it the same thing as shadows and highlights? I can tell you that there's a ton of luminosity masking gurus out there, there's people that make their living on luminosity masking. They will tell you absolutely, positively, no. For my practical purposes, is it pretty darn close? Yeah, it's pretty darn close. You've gotta be the person that likes to tinker. So, you know, how many people in here have heard somebody give you advice from one instructor, and another instructor give you opposite advice? Every single time you open up YouTube, or watch a video, or something like that. It's just, it's the way it is. Everybody learns a certain way to do things. You know, the hardest question for me to answer about why I do something one way is why. And the why is because it works for me. It's the way I learned, it's the way that made sense, and it works for me. So, somebody that's really, really good at luminosity masking, of course they have to defend it, because that's what they know, so just understand it. What it more becomes a part about is, what you get from your photo, the results that you get is really all that matters. I don't care how you get there. I want you to be happy getting there. Some people like to craft. I know people that spend hours on a photo, but they like it, and that's okay, and I know people that only like to spend five or 10 minutes. I go back and forth. You know, some days I just wanna open up and bam, bam, bam, I'm done, you know? And then other days, I'll sit there for an hour and work on a photo. It depends on mood, time, whatever else happens to be there. But, moral to that story is there's multiple ways to get there. I don't care how you do it, just get there. So, my job is to kind of show you a couple of different ones. All right, but luminosity, I mean, that's it, you know? If you'd heard about it before you came in here today, you think it's like, oh my god, this is the holy grail of editing and I'll never, ever figure it out. But at its basis, that is it. If you're into it, Google it, 'cause there's a lot of cool stuff out there. There's a lot of neat people out here teaching this stuff. They sell these Photoshop panels that do everything for you, and they go much deeper than I just did. You know, they'll create luminosity masks for the 10-20% blacks and the 20-30% blacks, and layer 'em on top of each other, and it's pretty neat to watch, so it's definitely, if you're into that, it's definitely worth looking a little bit more into it. All right, so let's say this is the route that we went. We could go file, save. All right, save it, close it, close that one too, head back over here to Lightroom, and there is our edited layered file. I didn't really go over this in the beginner's class. I'm gonna do a couple things here. I'm gonna do a couple of quick edits, maybe a little bit more in the black and whites, just for some contrast. Option or alt click, just like I did before. I'm not gonna really do too much more. I'll use the quick brush on the mountain. Are you making fun of my dirty sensor? Yeah, I need to clean that. All right, so I'm using my haze killer brush on the mountain. If you just tuned in, I show you every setting that's inside of it, so you can take a screen capture and you can grab all the settings that are in the preset. If you're the lazy type, I've got the whole bundle for sale at mattkphoto for, like, 30 bucks. So, it's got my brushes, and graduated filters, and print presets and stuff. So yeah, I'm too lazy, I'm not gonna paint that long. You get the idea. All right, so we go ahead and paint in there. Somebody mentioned in the live class here of my dirty sensor, and I showed this in the beginners' class, but I feel like I have to show it. I feel like it's a public service announcement that I have to show again. If you got to the spot removal tool, and this is in Lightroom or Camera Raw and Photoshop, you will see that there's a visualize spots option here. Turn that on, and it'll show you all of the wonders of your dirty camera sensor. And you can just fix 'em right there. It's got like a contrast, so you can really start to see. But yes, I know, this was a few years ago, so I since have a much cleaner camera sensor. A couple of spots down there. Next up, so that's before, that's after, so that takes care of that photo there, but hopefully it gives you kind of some insight into our luminosity masking. Oh, so I feel obligated to show you this as well, and that is, I'm gonna grab this guy and open this up in ON1 Effects. So, part of the fun of working for an app software development company like that is, like, I'm a photographer and I get access to the developers and I get to say, guys, we need this, and they listen. What's really, really cool about it is I can, you know, kinda get some features in there, which is a lot of fun. Luminosity masking is one. I don't know that I got it in there, 'cause everybody was requesting it. But check it out, so I'm gonna add a filter, and let's say I'm gonna add a, I'm gonna add a, what's a good filter to add for this? Let's go with dynamic contrast. I wanna add a really contrasty filter, and I'm gonna crank up all the contrast. So, that's before, that's after. Just added a whole lot of contrast. If you go up to the mask menu, it'll automatically make a luminosity mask for you. So now, here, let me undo. Kinda saw the change just a little bit, but it automatically, now it's just masking the brighter parts of the photo, which is pretty cool. So, it's leaving the darker parts of the photo alone. But the cool part about it is I could add any filter that I want to any of that in here, right? I can do a warming, I can do a glow, I can do anything, and I can attack the bright parts, and I can attack the dark parts. So, I had to show that, just 'cause it's nice that it's just, click, and you get a luminosity mask. You don't gotta make a selection, come back, copy, paste, and all that stuff.
Class Materials
Bonus Materials with Purchase
Ratings and Reviews
Pamela Richardson
I would absolutely recommend this class. I really liked Matt's detailed explanations of each step that he was demonstrating, and his review of alternates for each step. I have been photographing landscapes for over 40 years, including the last 10 years in digital. I really appreciated Matt's clear demonstrations of how images can be improved, and am eager to apply his examples to my own work.